During our recent extended trip to Providence, Rhode Island, we didn’t really have time to explore too much of the local craft spirits scene. There are two iconic Rhode Island beverages that we tried, however, that we felt were perfect candidates to work well as a cocktail. We hope you enjoy the fruits of our “research!” Disclaimer: there are some affiliate links below, use them and we make a small amount of money from Amazon.
Lemon Ice Spike
Del’s Lemonade is a popular beverage that you can find all over town when the weather is nice. Shops, food carts, and even ice cream trucks serve this frosty delight. During our trip to the zoo, there were lemon ice carts all over the park even though the temperatures were still a little chilly. The original is a semi-solid slushy and our version plays on that fact, making it the perfect drink for summer. By the way, it didn’t get its name the way you might think. Our hotel was overrun by volleyball players in town for a tournament which inspired the “spike.” You could probably use your favorite lemonade mix if you can’t get your hands on Del’s mix, but they do sell it online.
2 ounces dells lemon ice mix
2 cups of ice
1/2 to 1 cup of water, depending on how thick you want the finished product
3 shots of Tito’s Vodka (our favorite)
Put all ingredients into a blender (we love the Ninja for this). Blend for 30 seconds. Divide between two sugar rimmed glasses and enjoy.
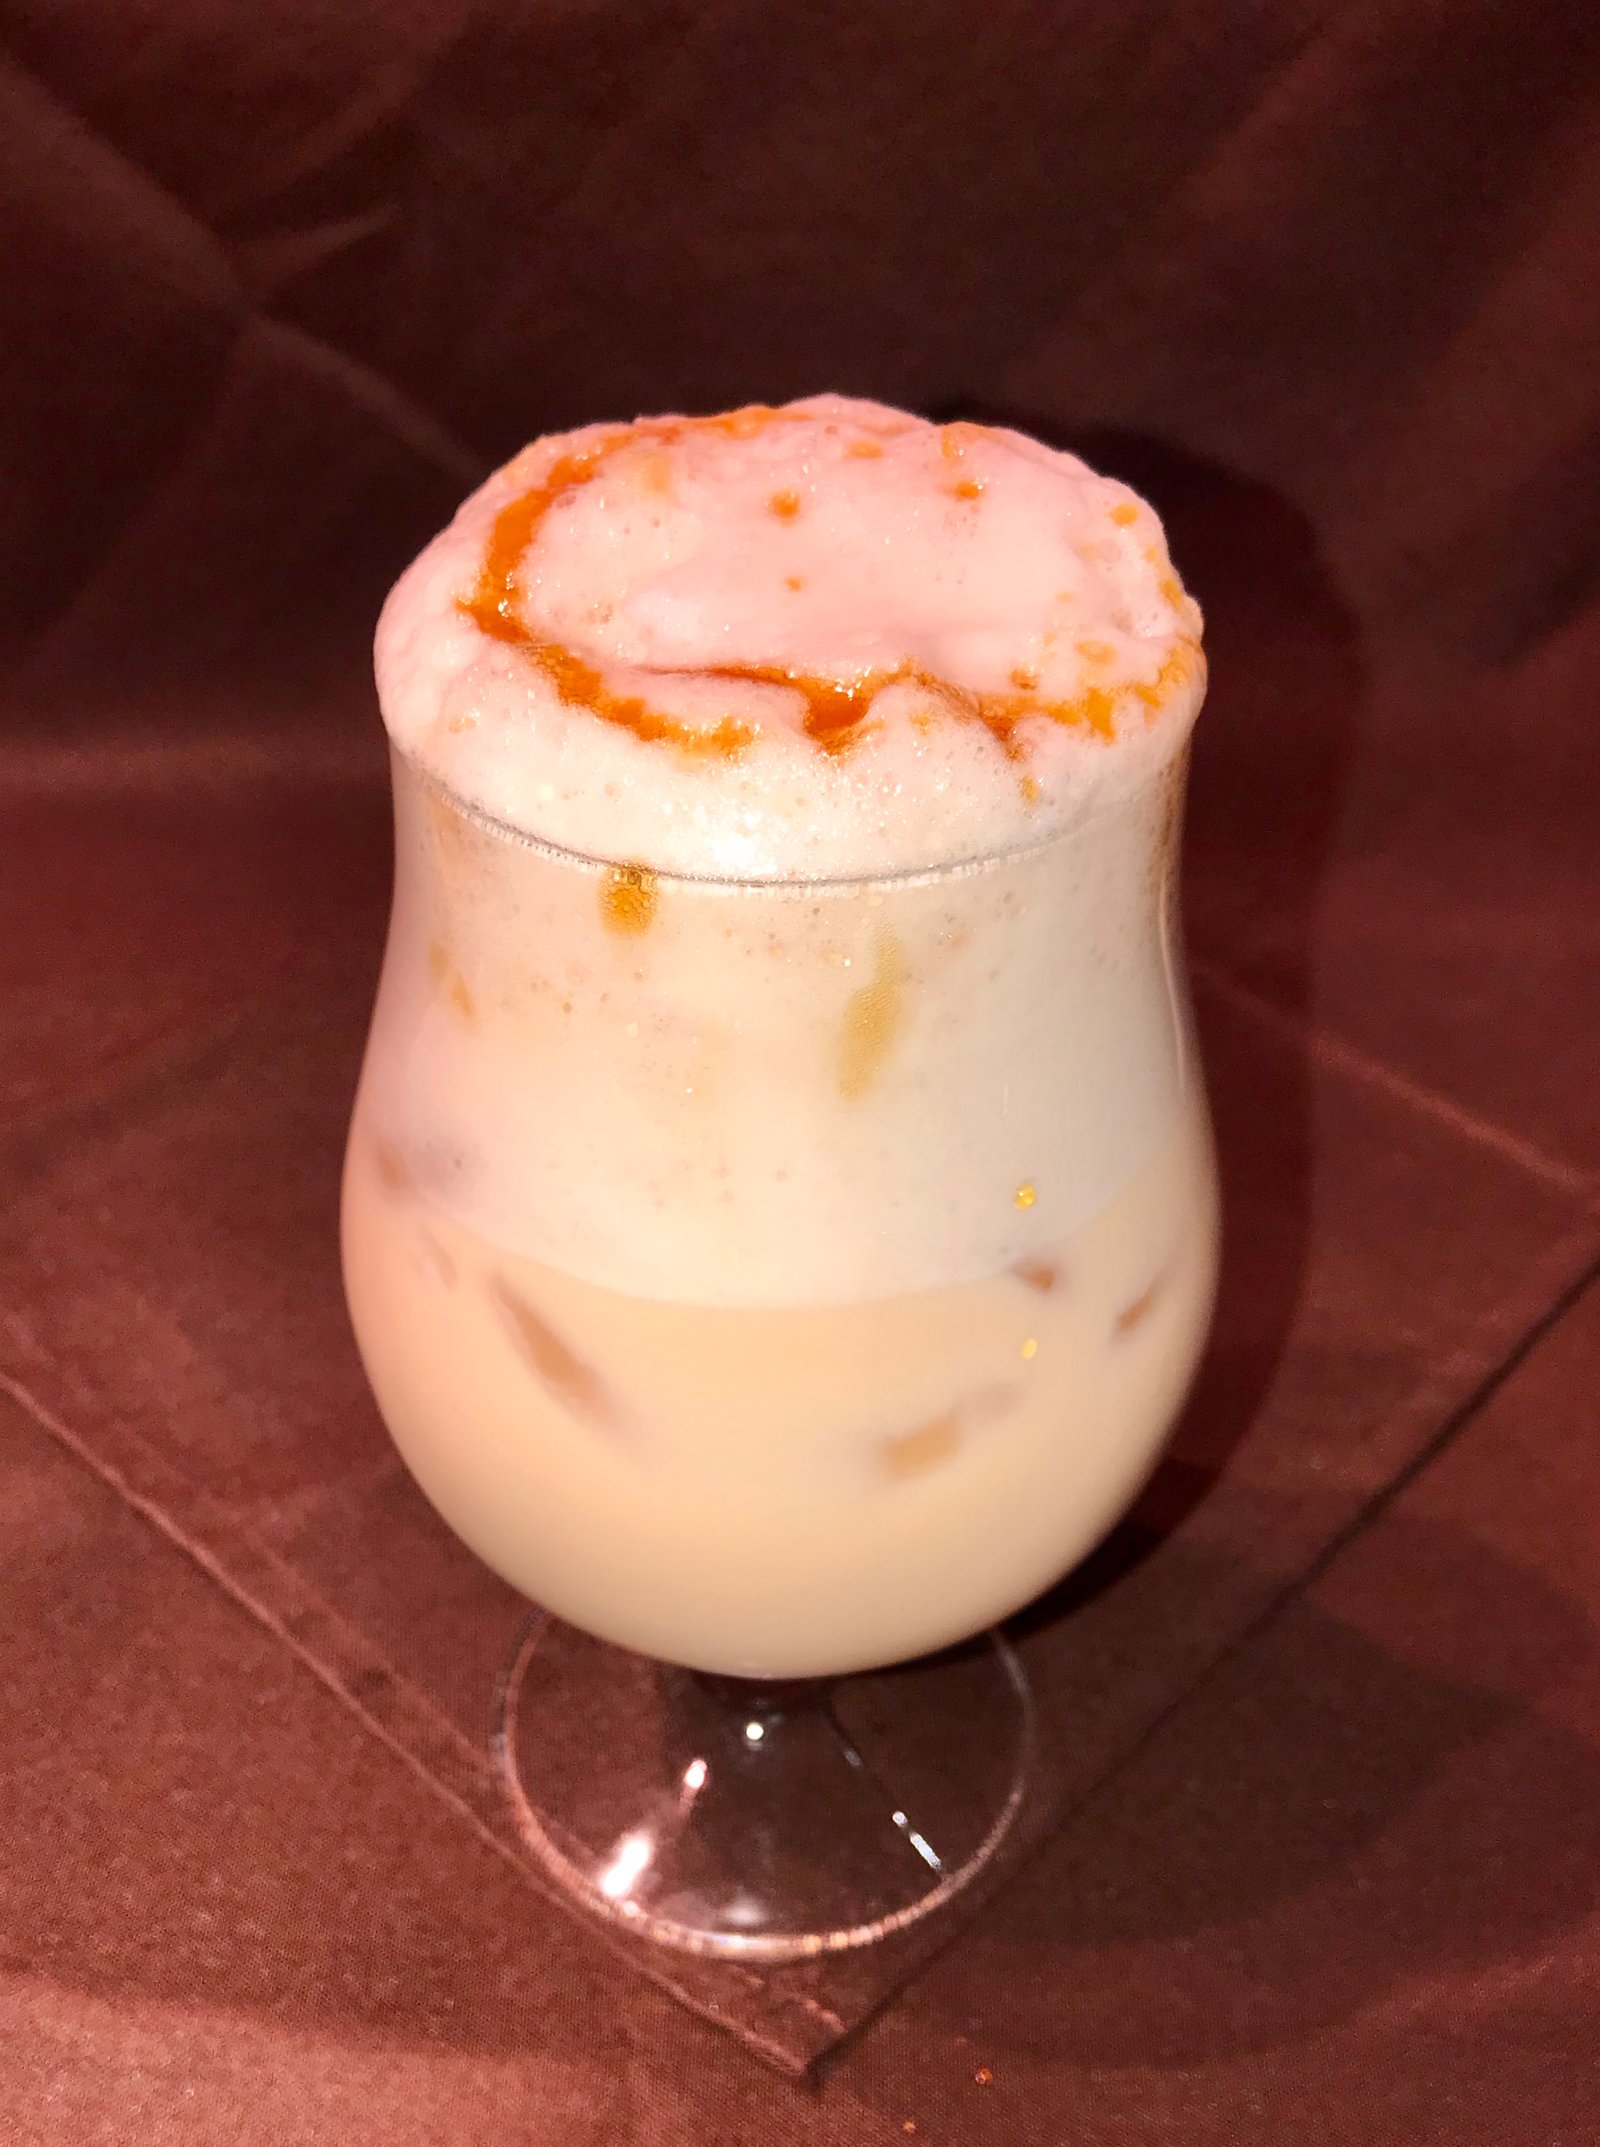
Irish coffee milk
Coffee milk is another Rhode Island staple but it might be a little harder to find now that coffee shops are everywhere. I looked at several places and it was never on the menu, but I bet they would make you one if you asked. This is exactly what it sounds like, the chocolate milk from your childhood, only made with coffee syrup. I found several different brands of coffee syrup available around town but none compared to Dave’s Coffee. Made in small batches, it only has three gradients: cane sugar, fresh ground coffee, and water. The way it should be done. You probably won’t be able to find coffee syrup and your local supermarket but you could make your own. Start with four shots of espresso and put that in a saucepan with half a cup of sugar. Heat until sugar is dissolved and pour into a bottle or jar to cool.
1 cup whole milk (you could use a milk substitute, but it will change the flavor)
3 tablespoons of coffee syrup
1 shot of Irish whiskey, such as Jameson’s
Pour all of the ingredients into a shaker over about a cup of ice. Shake vigorously. Uncapped the shaker and pour everything into a glass. Don’t use the shaker’s strainer or you will miss all of the delicious foam. Garnish with a drizzle of coffee syrup and relive a grown-up version of a favorite childhood treat!
We hope you enjoy our cocktail series. Leave us a comment below if you have a favorite from Rhode Island that we missed.
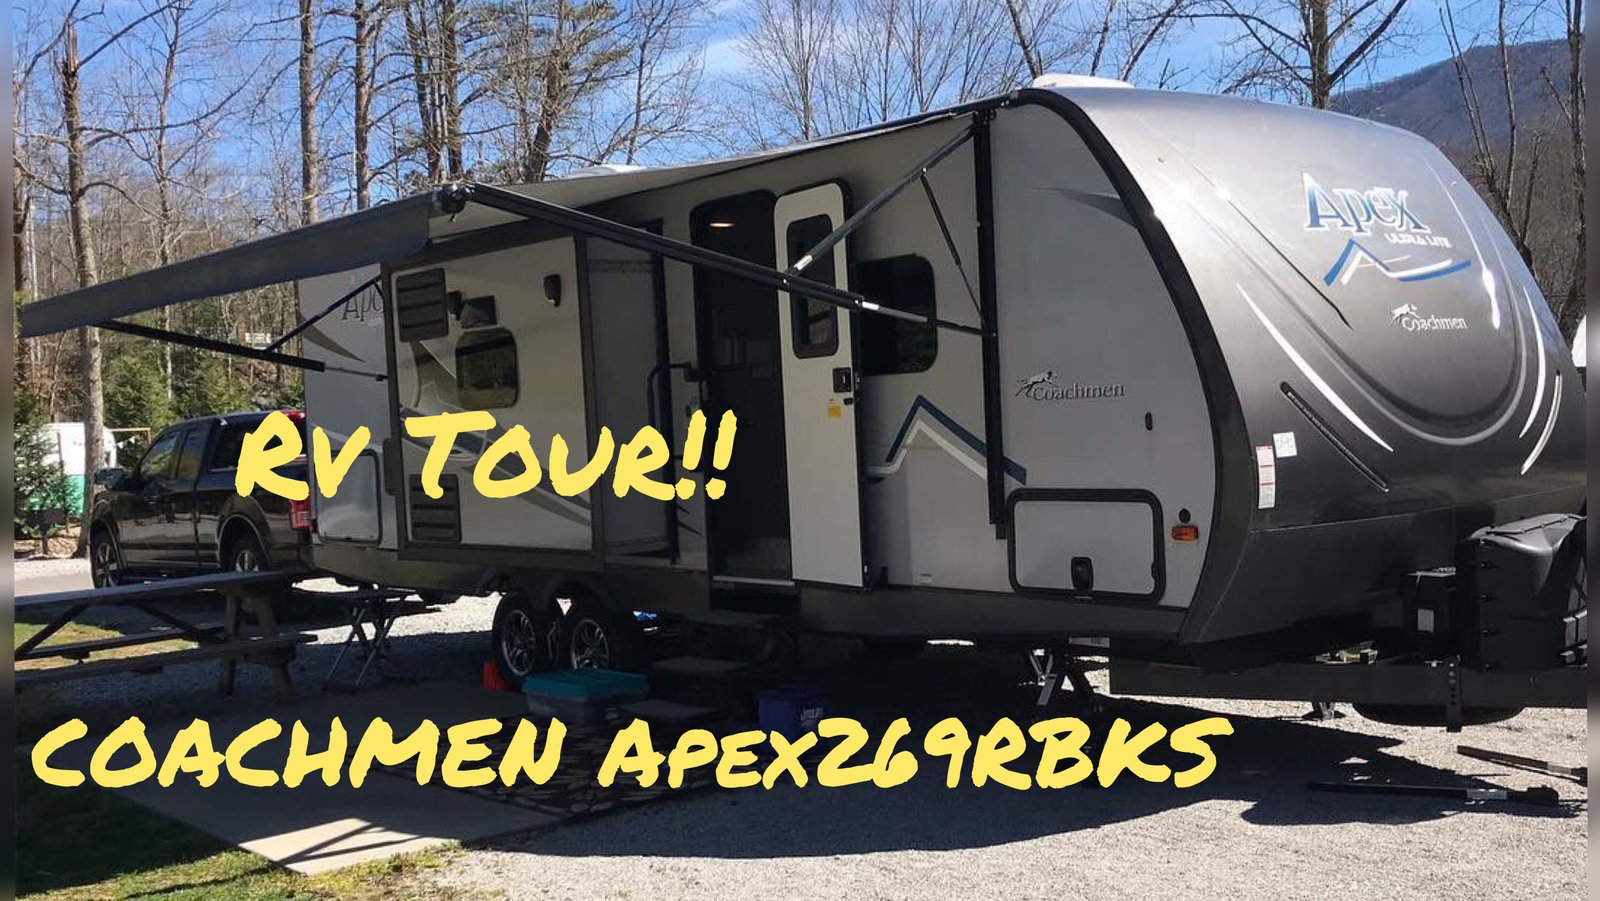
You know when you are excited about something and you feel like you have to tell everyone because they need to know too? This is how I feel about our Apex and all of the things we have done to personalize it, upgrade it, and just make the best possible use of our small space. I love seeing what other people have done to their RV because it inspires us. That’s the goal of this blog post, to inspire you and give you ideas to personalize your rig.
We purchased almost everything I am referencing in this post on Amazon. We love using Amazon because it can be shipped anywhere, and with Amazon Prime, it can usually be delivered in just a day or two. You may or may not know, but Cruisin’ with the Colemans is a new venture for us (we started in June 2018), and we are hoping that travel blogging will become our full-time gig in the future. Therefore, we are starting to figure out how to make money and one way we can do that is Amazon Affiliate links. This means if you buy any of the products we suggest then we get a small percentage of your purchase when you use our link. There is no extra cost to you. We can make two promises when we share products with you – (1) We will never share products that we haven’t used. (2) We won’t share products if we don’t think they are amazing!
On the outside of the rig, we haven’t done too much. Brian told you about what we have done to add stability to our rig, which included using x-chocks and added 2 additional stabilizer jacks. He also gave you his favorite outdoor hack and upgrade. Lightweight rigs are great because they don’t use as much fuel and you can tow it with a smaller truck. We tow our rig with a Ford F-150. Our F150 has a 12,000 towing capacity. One of the drawbacks can be stability inside of the rig when you have a lot of people walking/jumping around.
Necessary: X-Chocks
If you have duel axel tires, you will like the x-chocks. They keep your rig from moving. Bonus: It’s harder to steal your rig with x-chocks between your tires!
Upgrade: Stabilizer Jacks
These are so much better than what came with the rig! I can’t wait until we upgrade all of our stabilizer jacks.
Brian’s Favorite Hack: Command Cord Bundlers
As you saw in the video, these are great for storing items on the sides of the walls in your pass-through.
Upgrade: Bumper Bike Rack
We weren’t sure about adding this weight to the back bumper, we have heard that you shouldn’t put anything on the back bumper. However, this bike rack is very lightweight, coming in at only 21 pounds. We carry 2 bikes on the rack and have not any problems.
Upgrade: Slim Shade RV Window
If you have not heard about the slim shade, you are missing out. We heard about it in our Apex Facebook group and it took less than an hour to install. It makes your RV window a useable window while providing shade at night.
Hack: Cat Doors
Brian showed you how we converted the outdoor kitchen into the cat litter box space and storage area. This the cat door we used. I am sure an outdoor kitchen is great for many people, but this was the best decision we could have made to ensure cat litter isn’t all over the inside of our rig.
Inside the Rig
Time to move inside the rig! There are so many things we have done, I am sure something will be missed in this blog post. No fears though – just leave a comment and we’ll help find whatever we leave out. I listed my favorite hack as the IKEA baskets; however, it is so hard to pick just one favorite. Everything we have done, inside and outside, has made both our lives easier, made time in the rig more enjoyable, and has creates less clutter overall because everything has its place. Let’s start with comfort!
Upgrade: Dorel Living Slim Recliners
The couch that came with our rig was so uncomfortable! If you are active, like we are, you need a comfortable chair to come back to and put your feet up. Yes, we lost a hide-a-bed; however, we still have the dining table that can convert to a bed and we have no plans of having that many people sleeping in our rig. Haha These recliners are so comfortable, they come broken down so they are easy to get in the rig, and they fully recline.
Hack: Collapsible Drink Holders
My dad is a truck driver and I remember these cup holders from when I was little riding with him in his semi. Putting together the right keywords to find them on Amazon was the hardest part. This is something so small, yet so helpful when you need a place to put your drink while you relax in your recliner.
Hack: Acu-rite Weather Station
A hack? An upgrade? A necessity? I don’t know what to call it but we love this weather station. We actually bought 3 different ones before we settled on this version. The first was too small, the second needed to be plugged in if it was going to work, but this one was just right. 🙂 Another reason I love Amazon, easy returns!
Necessary: Rosewill Electric Oscillating Tower Heater Fan with Thermostat/Portable Ceramic Space Heater with Remote Control
This is called a heater fan; however, in the summer it works as a cooling fan. All you need to do it set the temperature at whatever you want the rig to be set at and it will either warm up the room or blow cooling air. It helps us use less propane in the winter and keeps the air moving in the summer.
Hack: Mounted Spice Rack
As you learned in the video, I am not the cook in the family. Brian not only cooks but enjoys being creative in the kitchen. If you have tried any of his recipes from his “Recipe of the Month” blog posts, you know how good his food can be! What Brian tells me, is when you’re cooking it’s important to have a few basic things close by, like oil, salt, pepper, etc. We found this spice rack on Amazon and then Brian cut a piece of pipe insulation which just sits behind the spices to keep them from moving when we’re going down the road. Brillant, I tell you!
Hack: Flexible Cutting Board for Freezer
This wasn’t our idea at all, we saw this idea in other RV Tour videos and it works great to collect the build-up of ice in your freezer. We bought this flexible cutting board and then cut it down to fit our freezer. I mentioned in the video that we hadn’t determined if it worked yet and I am happy to report that it works beautifully! No more puddles of water or scraping the back of the freezer! All we do is pull out the cutting board, shake it off outside or in the sink, and put it back. Voila!
Michelle’s Favorite Hack: IKEA Rimforsa Baskets
Installing the boards on the wall and then hanging these baskets was so brilliant. We tried using command hooks and hanging baskets with them but it was pulling off the wallpaper. This hack works perfectly and now we can store fresh fruit and veggies, bread, and stuff that you would have in your “junk” drawer. One thing I mentioned in the video was that I store the baskets on the dining table bench while we drive but I didn’t mention that I put non-adhesive gripping shelf liner on the bench first and then set the baskets down and they don’t go anywhere. I use that liner on all of my shelves. It works great!
Oooohhhh my pantry! Didn’t you love it? It’s big and there is plenty of room for everything I need to store. We have the laundry basket, various cleaning rags, kitchen towels, and of course food and snacks. It was tough to find a door organizer that was narrow enough for our RV pantry door but Amazon came through again! Brian drilled this into the top and the bottom of the door where it’s not hollow and so far, so good! As you saw in the video, I use this organizer for all of my cleaners, cans, and just odd shaped stuff. I am not sure if I will always organize it this way, but it works for now.
Necessary: Bissell Bolt 2-n-1 Lightweight Vacuum
This is an absolute necessity in my mind. It weighs only 5 pounds and has a removable handheld vacuum. It works great on the carpet and laminate flooring. It works on a rechargable battery and the charge lasts a long time. I have one in the RV and in my home.
Upgrade: Homlody High Pressure Shower Head
I feel like we have tried every showerhead out there! Haha It took a while for us to agree on the perfect showerhead but I am happy to report this is the one! We know that a lot of people rave about the Oxygenics showerhead. Brian liked it but I hated it. To me, the Oxygenics felt like a clogged hose. The showerhead pictured below has great pressure, turns off with ease, and doesn’t use a ton of water. Now we don’t boondock so I can’t attest to how it works when boondocking but we do camp with electric and a full tank of fresh water. We can easily go 3-4 days with just electric.
Hack: Shower Light, Motion Sensor, Waterproof
Who would have guessed that it would be dark in the shower at night with a skylight in the shower? I would assume we aren’t the only ones who shower at night when we smell like a campfire. But I need light in my shower at night! This light is perfect because it’s a motion sensor and only goes off when we open the shower door. It runs on batteries and it’s waterproof because it’s an indoor/outdoor light. How did we hang it up? Command strips of course!
Hack: Shower Foot Rest
Ladies, can I have your attention for a minute? We all know that men design showers because they don’t think about us and our need to lift a leg while we shave. Haha This footrest is one of five that I tried out, again thank you Amazon. Brian hung it up with the sticky pads and silicone caulk that it came with and thankfully it won’t be coming down!
Necessary: Adhesive Towel Bars
This is a simple but necessary hack. We have command hooks for extra stuff to dry but we like towels laying flat to dry as they dry faster. They are up with adhesive and we got the same style for our toilet paper holder.
Hack: Folding Bathroom RV Door
As we said in the video, we needed to remove the door that came with the bathroom because of the cat tower. The tower and the door were just too much in the same space. The only downside to this door is that your opening is just a bit narrower; however, we haven’t found it to be a problem.
Hack: Stick On LED Lights with Magnetic Backing
These are in our closets in the bedroom and in the passthrough. They provide plenty of light in those small spaces. They have magnets that hold the light to the base and then we have the base held with command strips. The idea is the you can leave the base up when you take it off to change the batteries. They only downside is that they are battery suckers, but we are in/out of our closets a lot.
Hack: Shoe Holder Storage Cart
Ok, did this one make you get excited? I love this hack! My only question to Coachmen is why the heck is there this dead space between the bed and the center console? Well, now I am glad there is this space! It took quite a bit of searching to find the right size. We tried using shoe boxes but the stacking and re-stacking of boxes irritated me and Brian’s giant shoes didn’t fit, haha. This is perfect, the wheels make it easy to slide in/out and it fits plenty of shoes.
Not Mentioned in the Video...
There were a few things I meant to talk about in the video but I forgot. So here are just a few more ideas to inspire your creativity as you personalize your rig.
Vinyl Lettering Over the Bed
This is a small touch that makes a big statement and adds a pop of color over our bed. Unfortunately the vinyl lettering that we used throughout the rest of the video is no longer available, I am sorry. If it becomes available again, I will update this blog post.
Outdoor Rug
Everyone needs a good outdoor rug that easily rinses off and adds a bit of personality to your home of the road.
Caravan Sports Zero Gravity Chairs with Cup Holders
Zero gravity chairs are all the rage and we love ours – especially the price coming in at only $40! That’s why I had to share the link with you. We bought one for our daughter-in-law, fell in love with it, and then bought some for ourselves. Below the link to the chairs is the cup holder. Be warned, there are several sizes, this is the biggest one. The last link is the bags we bought for our chairs. The chairs fit perfectly in them and we store the chairs in the back of the truck.
Our tour comes to end. Did you play the drinking game every time I said command hooks and tension bars? Haha! Command hooks are your best friend in an RV. If you enjoyed the video, please help us build our future by subscribing to our website and our YouTube channel. Then give them both a thumbs up. This helps to ensure more people see our content.
Do you have questions? Need to know more? Leave a comment below. We love hearing from you!!
Not only do we love to try local food when we are traveling, but we also love to search for local wineries, breweries, and distilleries. See our Florida Cocktails post for a great example.
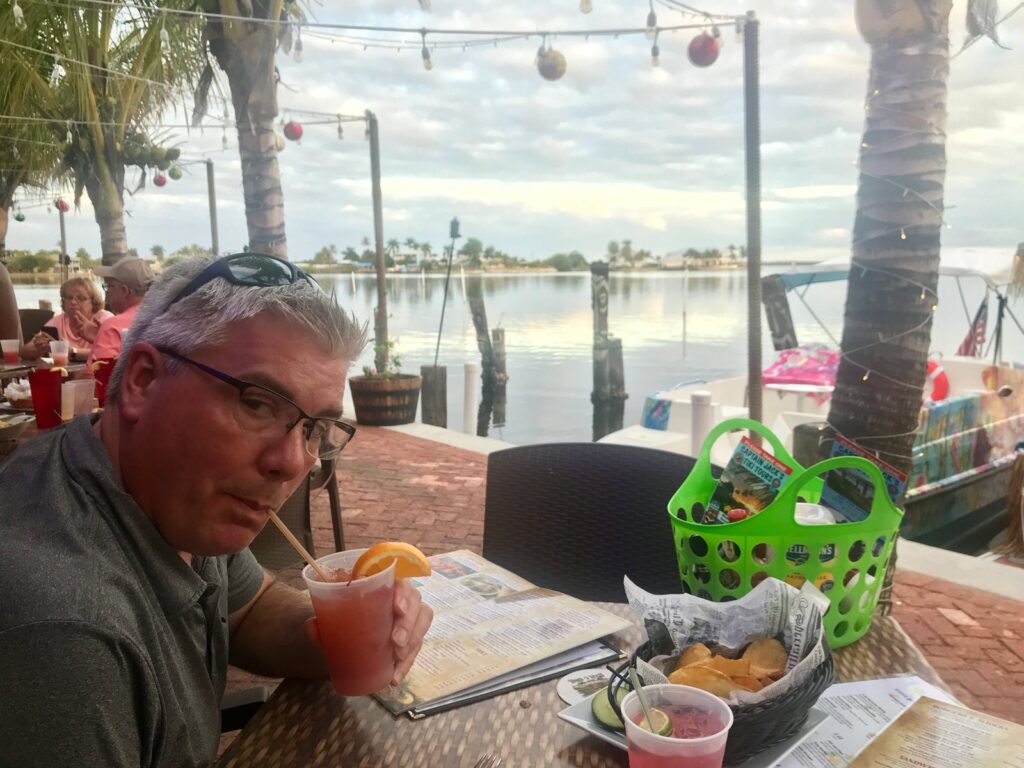
While visiting the Smoky Mountains, it is difficult to get out of the Gatlinburg, Pigeon Forge, Sevierville area without trying two things: fudge and moonshine. We are wine lovers but for the most part, Tennesee wine is not our thing. We prefer dry red wines and the local specialties are sweet and mostly fruit wines. Now when it comes to moonshine, we’ll try anything once! On the Gatlinburg strip, there are currently four different places to sample the local goods all within stumbling distance of one another. A short trolley ride or drive away there are several other distilleries that offer samples as well. While the days of free moonshine on the strip are over, samples are only $5 a person making moonshine tastings the cheapest drink in town.
So we have done extensive research during our week in Gatlinburg to bring you our top choices of the local distilleries and three brand new cocktails created just for you, our faithful Cruisers!
Ole Smoky
Ole Smoky advertises themselves as the first legal moonshine distillery in Tennessee and they certainly set the mold for what is expected in a moonshine tasting. “The Holler,” the original location, has restaurants (Mellow Mushroom and Dick’s Last Resort) allowing you go get a tasting while waiting for a table, an entertainment stage which often features local musicians, a daiquiri bar (just in case someone in your group prefers low-alcohol, over-priced drinks over moonshine), a Paula Deen store, Starbucks, and a 7D Adventure Ride just in case you’d prefer to do shots without the kids watching (although no one will judge and they won’t be the only kids around). Your $5 tasting fee gets you a dozen samples and at least that many corny jokes from the person pouring them. The flavors available rotate but you can count on tastes of some straight moonshine and the most popular flavors of Apple Pie, Cinnamon, and Blackberry. During our research, we also tasted their new Dill Pickle (actual pickles soaked in moonshine) and Cinnamon Toast Cream (think of the milk left behind from Cinnamon Toast Crunch cereal).
Just down the street, Ole Smoky has a second location that was formerly Davy Crockett’s Whiskey. Now called the Ole Smoky Barrelhouse, this location also features a $5 tasting but here you will get mostly whiskey with a different round of related bad jokes. Make sure you try the Salty Caramel and avoid the Pecan (“tastes like a mouth full of nuts, and not the good kind”).
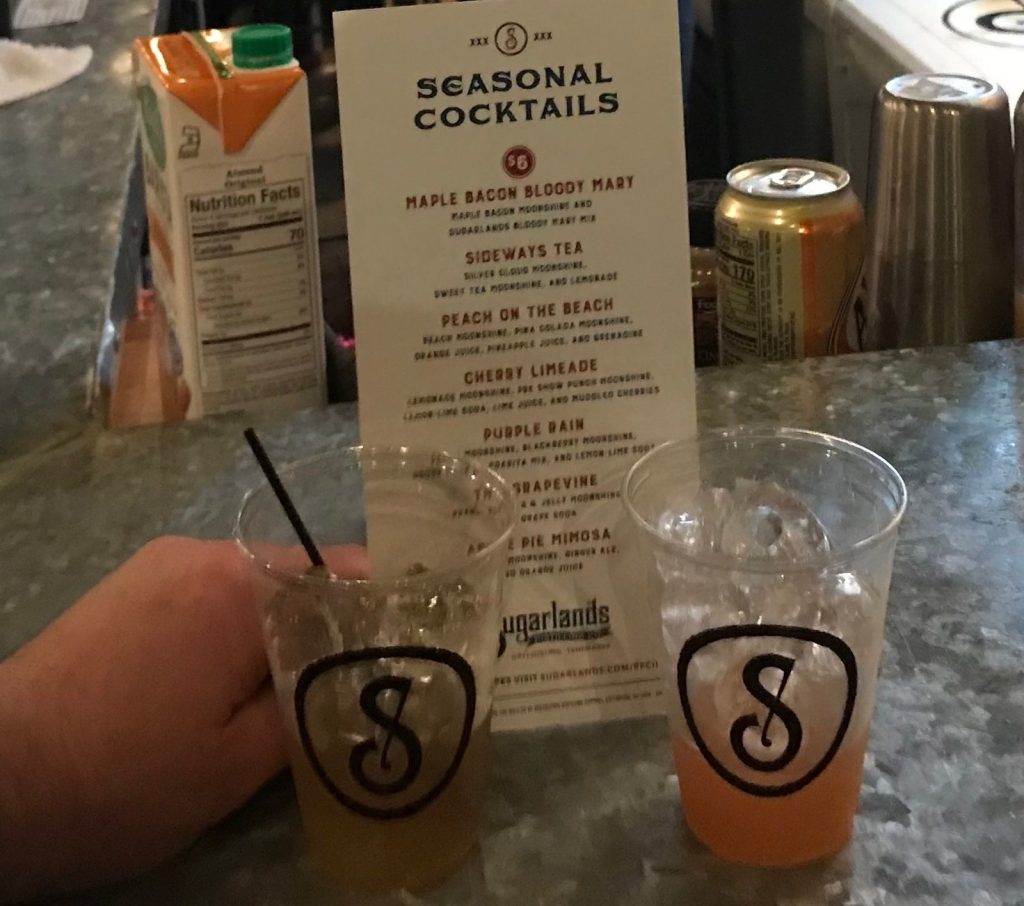
Sugarlands Distilling Company
Sugarlands is one of our favorite stops on the strip. The flavors are a little more refined and their apple pie is hands down the best we’ve ever tasted. The process here is just like the one above but at Sugarlands there is a bar in the back where you can purchase drinks and if you buy three bottles or more, your first round is “buy one, get one.” Unusual things to try here would be the Maple Bacon Moonshine (which makes a wicked Bloody Mary) and Hazelnut Rum. Like everywhere else, your $5 tasting fee is refunded with a purchase. If you’re lucky, you will get a real show as part of your tasting, like ours with Stokes.
Doc Collier Moonshine
Our other favorite stop is Doc Collier’s. All of their spirits are made in small batches and we were among the first to taste their products when they first opened in 2014. Back then they only offered straight moonshine, using flavored water drops to create flavored ‘shine. Now they offer a full range of craft spirits including whiskey, brandy, and cream liquors. Make sure you try the ‘Naner and Root Beer Float. They also offer moonshine slushies and your $5 tasting fee can be used towards the purchase of a drink or bottles of product.
And now, on to the cocktails!
Most purists would tell you that moonshine goes best with bad decisions and no regrets, but we prefer to mix ours. Almost any of the fruit flavors will mix well with cola or lemon-lime soda The cream flavors are often really good mixed into a Wendy’s Frosty or milkshake. We have come up with three combinations of flavors that we think you will really like. We’ve tested them out on family, campground neighbors, and of course, ourselves.
Caramel Apple Dream-Cicle
1 oz Sugarlands Appalachian Apple Pie Moonshine
1/2 oz Evan Williams Bourbon
1 oz half and half
Combine all ingredients in a shaker with ice. Shake and strain into a whiskey glass.
Funky Monkey Martini
1-1/2 oz Doc Collier’s Chocolate Cream
1/2 oz plus a splash of Doc Collier Naner’ Moonshine
1 oz Grey Goose Vodka
1 Doc Collier ‘Shine Cherry
half a grind of Himalayan Pink Salt
ground Ghiradelli chocolate
Combine cream, moonshine, and vodka on a shaker with ice and shake well. Strain into a martini glass and top with a half grind of salt, chocolate, and a cherry.
Mountain Mojito
4-6 fresh mint leaves
1/4 lime
1/2 t sugar
1-1/2 oz Bacardi Silver Rum
1/2 oz Sugarlands Peppermint Moonshine
Lemon-Lime soda
Squeeze two slices of lime into a glass and add 4-6 torn peppermint leaves and sugar. Muddle together. Add rum and moonshine and stir. Top with soda. Garnish with mint leaves.
Bonus Cocktail – ‘Shine Glow
1 oz Sugarlands Wild Mayhal Moonshine
1/2 oz Sugarlands Peach Moonshine
splash of pineapple juice
Lemon-Lime Soda
Miranda, a bartender at Sugerlands, shared with us her creation that will be featured on the summer cocktail menu in the Sugarlands lounge. Pour both moonshines over ice in a cocktail glass and add a splash of pineapple juice. Top with soda and enjoy!
Do you have a favorite moonshine mixer? Let us know in the comments below and make sure to subscribe to our YouTube channel to see more of our adventures in the Great Smoky Mountains in the coming weeks.
★ 25 years guiding★ 48 U.S. states★ 10 countries★ 3,000+ Camino miles
RV tips, travel inspiration, and updates on the trips we're planning — delivered to your inbox each month.
Questions about this trip?
Send us an inquiry.
Tell us what you'd like to know about this trip and we'll get right back to you.
Know before you go
Activity Level.
Every Cruisin' with the Colemans trip comes with an activity level so you know, before you lace up, roughly how hard the walking will be. Think of it as the overall rhythm of the trip — a few days might push a little past it and a few will feel gentler, but it's an honest read on what your legs are signing up for.
Nobody knows your body better than you do. We're all for a good challenge, but pick a level that matches your current fitness and trail experience and the whole walk gets more fun. Not sure where you land? Reach out — we've walked every one of these ourselves and we're always happy to talk it through.
Grades
EasyEasy0–8 km (0–5 miles)
Gentle, mostly flat days on well-kept, easy-to-follow paths. Ideal if you're new to multi-day walking or simply want a relaxed pace with plenty of time to soak it all in.
Easy – ModerateEasy–Moderate8–16 km (5–10 miles)
A little more distance over mixed ground — mostly maintained trails, quiet lanes, and the occasional gentle climb. A good fit if you're reasonably active and ready for a few longer stretches.
ModerateModerate16–20 km (10–12 miles)
Fuller days on varied, sometimes rugged terrain with regular ups and downs. Great for steady hikers in good shape, or determined first-timers chasing a real sense of accomplishment.
Moderate – StrenuousModerate–Strenuous20–24 km (12–15 miles)
Long days with sustained, often steep climbs and descents on rough trail. You'll want solid fitness; a few exposed spots call for a head for heights, and navigation can get trickier when the weather turns.
StrenuousStrenuous24–28 km (15–17 miles)
Big days on demanding, often remote mountain terrain — serious distance and elevation for experienced, fit hikers. Expect rough footing, the odd exposed or aided section, and higher altitude on some routes.
ExtremeExtreme+28 km (+17 miles)
Our toughest walking, built for very fit, very experienced hikers. Rugged, sometimes remote mountain terrain with scrambling, exposure, and aided sections — plus altitude, weather, and navigation that all add to the challenge.
Where you rest
Accommodations Levels.
Where you sleep is part of the story, so we hand-pick locally run places that welcome you like an old friend. The level shifts a little from trip to trip depending on the route, but the goal never does: a clean, comfortable, genuinely local stay at the end of every walking day.
Most nights you'll land in friendly, independent or family-run hotels, guest houses, and B&Bs chosen for their charm and the little touches that feel like home. Some trips lean a touch more luxurious; others, especially in the remote stretches, mean simpler refuges or huts. Either way, we've picked each one to help you rest up and wake ready for the trail.
Basic – A Place to Rest Your HeadBasic
Mountain huts, refuges, and simple B&Bs. Ensuite rooms aren't a given, and you may share a dorm with fellow walkers — but what you trade in polish you more than gain back in camaraderie and a big, rustic welcome.
Classic – Charming Without the FrillsClassic
Locally owned B&Bs, guest houses, and small inns that feel like a home away from home — usually family-run, cozy or freshly kept, and well placed for the next day's walk. A warm welcome comes as standard.
Comfort – A Little More...ComfortableComfort
Characterful, locally owned hotels and B&Bs with the little extras that make a stay feel special — décor rooted in the region, the occasional spot to unwind, and sometimes a kitchen worth lingering over.
In Style – For Those who Want to Treat ThemselvesIn Style
First-class stays in boutique hotels, vineyards, and country manors — often in the best seats in the house, from hilltop towns to the water's edge, with standout service and, now and then, a truly memorable table.
Mixed – Boutique Hotels to Mountain Huts, all in One TripMixed
One trip, a bit of everything. You might bed down in Classic or Comfort rooms through the towns and villages, then a refuge or other Basic spot up in the mountains where that's all there is — an honest, memorable mix that matches the journey.