If you read Brian’s blog post on Monday, you learned he LOVES Halloween. I love to indulge his passion, I mean the benefit are numerous including watching the trick-or-treaters smile, watching him be creative, and eating good food!
Halloween + our RV takes the holiday to an entirely new level! A year ago when we purchased this rig we had no idea what Halloween meant in the world of the camping. Just check out this Pinterest page or you can search online for “RV Halloween,” you will be surprised by how much inspiration you will find. We have heard that Ft. Wilderness at Walt Disney World has a fantastic Halloween celebration, but hello it’s Disney, of course, it’s over the top! Do It Yourself RV has a top 10 list of best campgrounds for Halloween. Someday, I am sure we will get to all of them and more!
Ceasars Creek State Park is where we have spent our first 2 Halloween weekends. It is perfect because it’s only 40 minutes from our house. Though not well-advertised, there are things going on all weekend – scavenger hunt, Halloween movies, campsite decorating, costume contest, square dance, haunted trail, and a monster bash dance party! It is a full weekend of fun.
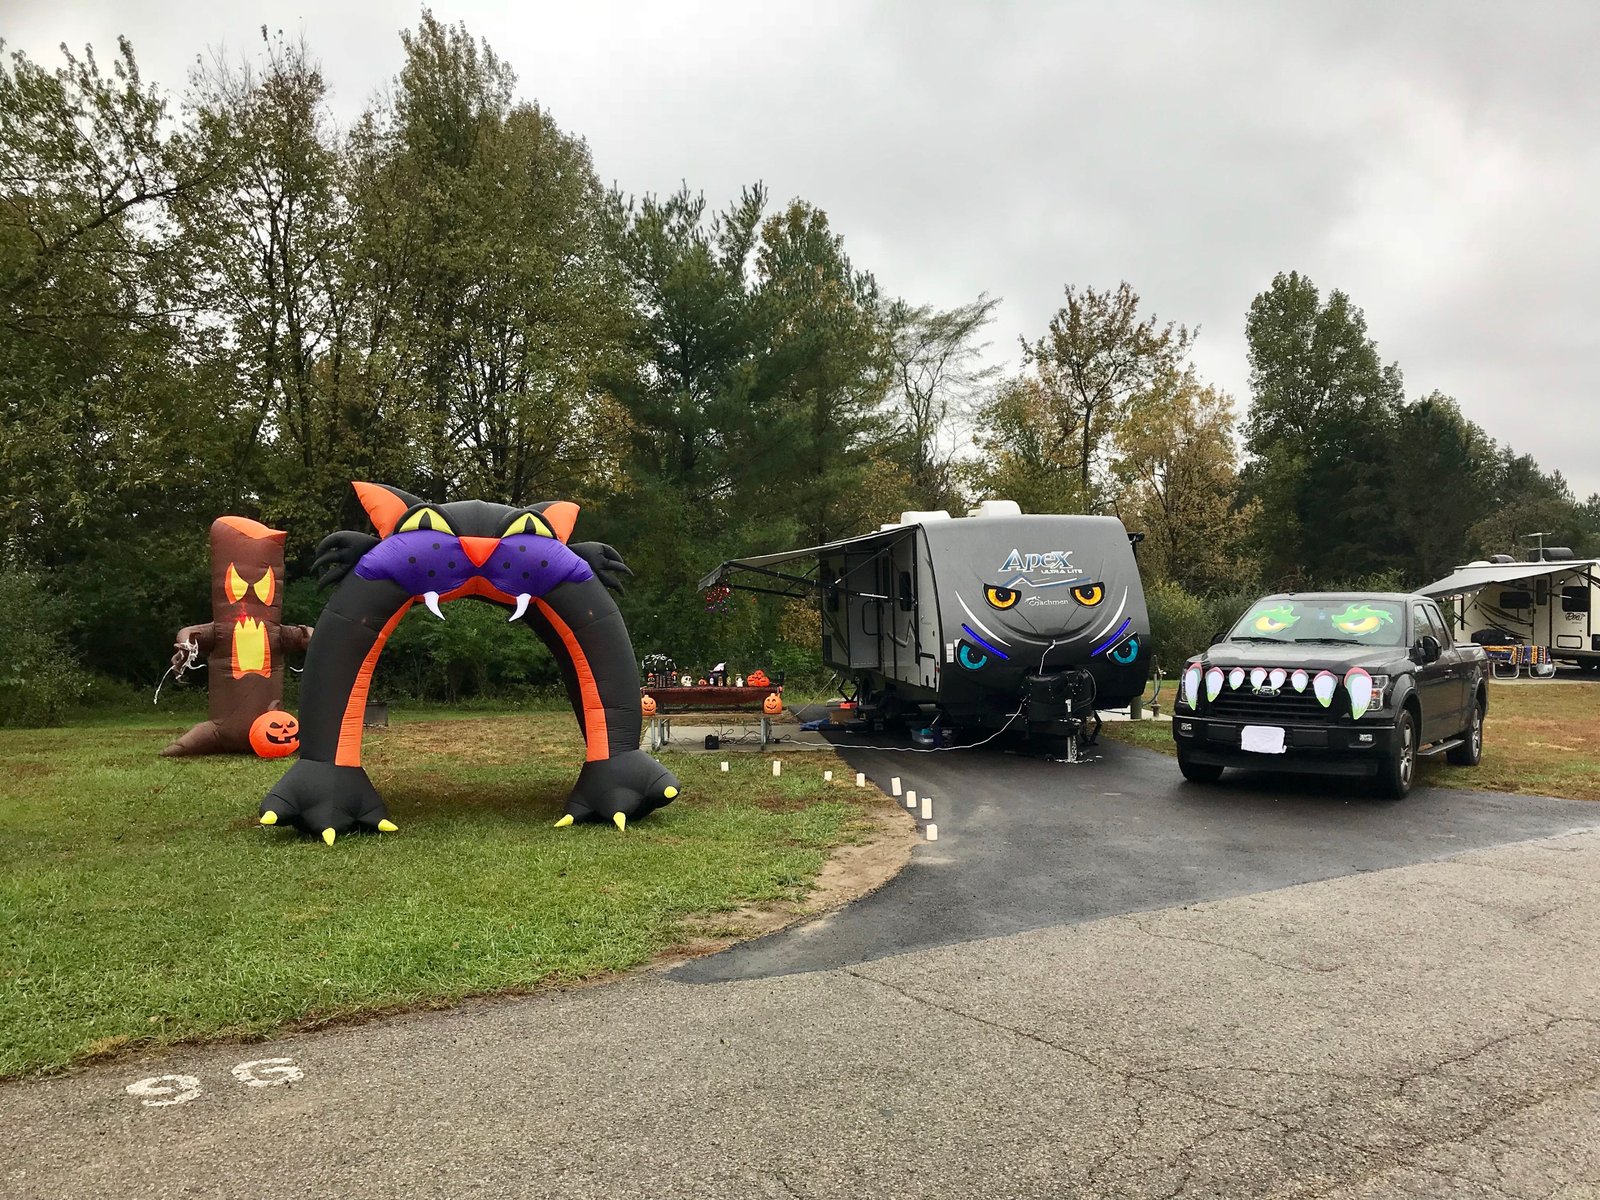
Here are just a few of the photos we took of our campsite and other campsites. Unfortunately, it was a rainy weekend so participation was not as abundant as last year. We weren’t even able to do all of the decorating we planned because the rain would not stop all day Friday or Saturday. 🙁
Brian and I won the best couple costume (for our age group). We went as Winifred Sanderson and her lover Billy Butcherson. Brian won for scariest (for his age group). The best part about his award is the young girl was too afraid of Brian to give him his award. Haha! Then there were these two little girls and were over the moon for Billy Butcherson, fortunately, we got a photo with them. They were so cute!
Unfortunately, for us in Ohio, winterizing the rig is the grand finale for many of us at the campground. All of that decorating on Saturday came down on Sunday morning, boxed away for another year. The “undecorating” took about two hours. Then we started the winterizing and deep cleaning the RV which took about the same amount of time. Haha! Fortunately, as I mentioned earlier, home was only 40 minutes away because it was a long day!
If you go camping for Halloween, send us your photos. We would love to see how you decorate. You can comment to this post or use the hashtag #cruisinwiththecolemans on your Instagram post so we can see what you do!
Have a fantastic Halloween – try not to eat too much candy. Oh, what am I saying – have fun, eat candy!
Month: October 2018
Recipe of the Week – Chili

I love Halloween! From decorating the house to creating and building costumes it is one of my favorite times of year. Thankfully, Michelle tolerates my compulsion and plays along most of the time. One of our annual traditions is the first pot of chili of the season is always made on the night of trick-or-treat. My recipe for chili has evolved over the years and I’m always making little changes from time to time to adjust the flavor. Here is the current version. Oh, and this year we dressed as Winifred and Billy from Hocus Pocus. Michelle will have more on that later.

Start by cooking a couple of slices of chopped up bacon in a large pan. Add a large diced onion and cook until the onions are soft.

Add a pound of ground beef and two cloves of minced garlic. Continue cooking until the hamburger is browned.

Meanwhile, in a crock pot pour a can of crushed tomatoes, diced tomatoes, beans (I used tri-blend this time, but usually I use pinto), and a bottle of beer. Did you know that the FDA considers Corona to be gluten-free? It’s an ongoing debate that you can read a little more about here. If you’re feeding a bigger crowd, add a second can of beans.

Also add three tablespoons of chili powder, one tablespoon of Worcestershire sauce, and a half teaspoon each of cumin and garlic powder. A note about chili powder. There are about a million varieties of chili powder out there and they range from sweet and mild to hot and spicy. Even two bottles of the same brand my vary in their heat level so always error on the side of caution if you are cooking for someone who is sensitive to spicy foods. You can always add more chili powder later in the cooking process. Notice that no salt has been added to the recipe yet for the same reason. This is definitely one trick you don’t want to spring on anyone who tastes your chili!

Add the cooked ground beef mixture to the crock-pot and stir. Cook on low for 3-4 hours, or longer if you don’t need to eat so soon.

Taste the chili and adjust seasonings if needed. Add salt, chili powder, cayenne pepper, or even a little sugar if you need to tone down the acid of the tomatoes or the spiciness down a bit.
We love to add a little Greek yogurt and cheddar cheese and serve this with Krusteaz Gluten Free Honey Corn Bread and leftover trick-or-treat candy.

Trick-or-Treat Chili
- 2 slices of bacon
- 1 large onion, diced
- 1 lb lean ground beef
- 2 cloves garlic, minced
- 1 can diced tomatoes, with juice
- 1 can crushed tomatoes
- 1 or 2 cans pinto beans, undrained
- 1 12 oz bottle of beer (gluten-free if necessary)
- 2-3 T chili powder
- 1 T Worcestershire sauce
- 1/2 t cumin
- 1/2 t garlic powder
- salt, sugar, as needed
Chop the bacon and fry in a large pan. Add onion and cook until softened. Add ground beef and garlic and cook until browned.
Meanwhile, in a lined crock pot, combine remaining ingredients and stir. Pour the ground beef mixture on top, being careful not to melt the liner with the hot ingredients.
Cook on low for several hours to allow flavors to combine. When it’s time to serve, taste the chili. Add salt if needed. This is also the time to add more chili powder or Cayenne pepper if you want extra heat. I often add a teaspoon of sugar at this time to cut the acidity of the tomatoes.
Serve with Greek yogurt, sour cream, or cheddar cheese.
Do you have interesting additions to your chili? The bacon and Worcestershire sauce are my newest additions. The bacon adds a little saltiness and well, it’s bacon. The Worcestershire sauce gives the chili a little more depth. Leave a comment below to tell us what unusual ingredients you add to your favorite chili recipe.
Five Steps to Planning our 2019 Camino
I can’t wait anymore – I have to talk about the Camino! There is so much to say! This is the first of several blog posts over the coming months on the subject of the Camino de Santiago. We hiked the Camino Frances in 2017 which was a life-changing experience for both of our adventurous spirits. Many times we had heard the phrase, “you never hike the Camino just once,” but we had no idea what it meant until the draw of the Camino pulled us so hard we could not resist it. I have to admit, I am still shocked at how much I want to go back and hike the Camino again. Brian felt the same draw to go back, but he wasn’t as surprised as I was. There will be more on the reasons we both felt the draw in future blog posts.
Let me begin by telling you some people decide to hike the Camino and don’t plan a thing. This is not who we are, we like to plan, I can go so far as to say we love to plan. Spreadsheets are life to us! For us, the spreadsheet takes something that can be quite intimidating – hiking across a country – and making it more manageable. Our spreadsheet broke down the 550 miles trek into small sections so we had more confidence and set achievable goals. All of that being said, we have a lot of respect for the many thousands of people who complete the Camino annually without any planning. There is something to be said about just picking up and going, just because it is not for us doesn’t mean we don’t admire those who do.
It was about May 2018 when we both finally admitted to one another that we wanted to go back to the Camino; it was less than a year from being back in the states from our Camino 2017. I remember where we were standing in the new house we just purchased in April 2018 when we admitted our desire to hike the Camino again because my heart skipped a few beats. It took a few months to make any progress on that decision, mainly because we were in the midst of preparing for our son’s wedding and our summer 2018 adventure but we knew we were going! We plan the details of our next big summer adventure the moment we finish the adventure we are on and often while we are on the current summer adventure. So in September 2018, the real planning began. Determining when we are going to travel is not a step for us because we are teachers so we know that we’re traveling in June and July whether we like it or not. With that being said, before I outline the steps we have taken thus far, I strongly encourage you to join the American Pilgrims on the Camino Facebook group. With over 18,000 members, everything and anything you need to know to plan your Camino is in that group! Ok, without further delay, here are the steps we have taken thus far to plan our Camino 2019:
Monitor International Flight Prices
I cannot tell you how important it is to sign up for some sort of flight monitoring website. We signed up for a few and the winner of finding our cheap airfare was Scott’s Cheap Flights. You can pay up to about $1500 a person to fly internationally but with a bit of legwork, you can fly a lot cheaper. A couple weeks ago, I received an email from Scott’s Cheap Flights that Air Portugal was having a great sale so did further investigating and found great prices. If you are willing to fly from one of the main hubs (we picked Boston), they had round-trip tickets as cheap as $300. This means we still need to get to Boston, but we will monitor flights until we find a good price to get to Boston.
Determine the Route
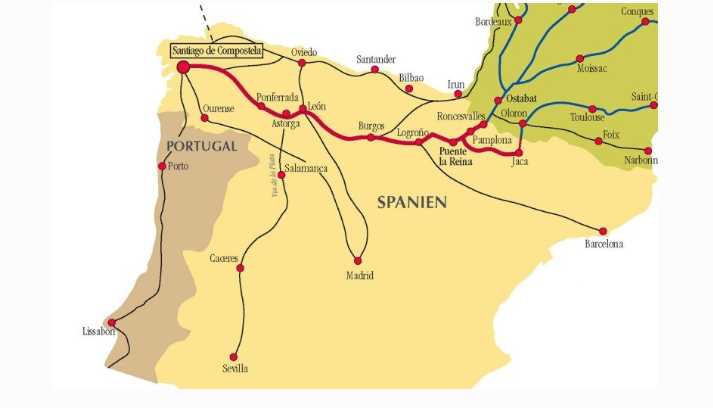
Next, you need to determine which of the Camino de Santiago routes you will choose to hike. The most popular and the one we did in 2017 is the Camino Frances. Many people are inspired to hike the Camino Frances because of the 2010 movie, The Way, starring Martin Sheen, and we were no different. The moment we saw this movie we knew it was a bucket list adventure, and it only took us seven more years to get there.

This time we are going to hike the Camino Portugués which is 640 kilometers. Since we have the time, and we want to go back, we are going to hike part of the Camino Francés from Leon to Santiago. Finally, we are going to hike the “extra loop” to the “end of the Earth” which is Santiago de Compostela to Finisterre to Muxia and back to Santiago. We hiked to the end of the Earth in 2017 to celebrate our anniversary but this time we want to complete the loop and go on to Muxia and then walk back to Santiago. Our total hiking mileage is coming it at 1162.3 kilometers. This is epic for us! The last time we were there we had 38 hiking days, averaging about 14 miles a day. This time we will hike 44 days and average 26.4 kilometers or 16.4 miles a day. We like a challenge – and well – we have one before us!
Buy Guidebooks
There are several guidebooks out there about the Camino and we have two favorites. The first, and most popular, guidebooks are by John Brierly and you can find any of his books on Amazon. This is the basis for our spreadsheet and provided us with everything we needed to know about hiking the Camino from villages, distances, terrain, details about where to stay, and notes of stuff to watch out for as you travel. Many people carry his book with them on the Camino and just rip out pages as they don’t need them anymore or they have the electronic version on their Kindle.
The second guidebook we use is the Village to Village guidebook by Anna Dintaman and Matthew Harms, their books can also be found on Amazon. You should also check out their website too. It has been a great resource for planning where to stay, what to wear, what to take, and has links or email addresses to albergues.
Buy your guidebooks about 6-8 months before you leave. You don’t want to buy them too early because you want the latest edition; however, you want to buy them early enough to have the time to read the books so you can, at least, mentally prepare for this undertaking.
Make Spreadsheet
Disclosure: We were not the original creators of this massive spreadsheet! One of our fellow Ohio APOC friends, Greg, created this spreadsheet and shared it with us. We have shared it with others so as to pay it forward because if you are a planner, this spreadsheet is amazing!
Ok, here is where we went crazy! But you need to know that we plan our summer adventures with this type of spreadsheet every year. Our rationale is that when we are gone for two months, we need a spreadsheet to ensure we meet our goals for the adventure.

For our first Camino, we were not going to plan anything because we heard that most people don’t plan their daily goals on the Camino. It was about five months before we left for the Camino when we decided the no-planning philosophy was not going to work for us. There were a few determining factors going on here – (1) we have to travel during the busiest season, (2) we heard stories of people coming into a village and there were no rooms left (and we saw this happen!!), (3) we wanted to know where we were sleeping each night even if we had to bus ahead due to illness or injury, and finally most importantly, (4) our minds were at ease the moment we started planning our stays. For us, the spreadsheet is our lifeline and we love having it. Would we ever go without one? We could, yes. If we were only going for a couple of weeks, a good possibility, yes. If we weren’t going during the busy season, possibly. It is all a matter of preference.
Training Time
If you have the time, we would strongly encourage you to start walking! Walk 5, 8, 10 miles at a time as much as you can, build up to longer walks whatever that looks like for you. Start where you are comfortable to prevent injury. Since we are still about seven months out, we are walking once or twice during the week and have one long walk on the weekends. Do what works in your schedule. If you can get consecutive long walking days in, that would be perfect for your training! If you have any old Roman roads in our neighborhood, walk on them! Haha But seriously, do not go for a walk in the woods, which is what we would normally be doing. Walk on gravel roads, brick roads, pavement, anything to toughen up your feet. Carry a backpack with about 12-15 pounds in it during the last couple months of your training. I will talk about gear, I promise, in another Camino post! For now, here are a few more big suggestions to train for your Camino:
- See your podiatrist and get insoles. They saved our feet! You have to find the shoes and insoles that work for your feet. It is critical. We both love Merrell shoes and insoles that are fitted for our feet.
- Know how to care for blisters (see the APOC Facebook group, everyone has an opinion on what to do)
- Do lunges and squats, just 10-20 a day, 3-4 days a week. Your knees will thank you for that specific training, I promise you!
- Have your backpack fitted, we went to REI and both love our packs for different reasons.
- When you know what you are going to wear on the Camino, wear it in your training. You want to minimize gear surprises.
Don’t overthink the training, just walk. There are people of all ages, backgrounds, and fitness levels on the Camino. We met two 12-year-old girls hiking the Camino, lots of 20, 30, and 40 something folks, and even more 50, 60, 70+ folks walking the Camino. If you can walk, you can walk the Camino. Even if you can’t walk the Camino will provide, see the 2017 movie, I’ll Push You if you need the motivation to walk the Camino.
Extra Step: Making Reservations
This step is not for everyone but it certainly made our Camino the most “relaxing” adventure we have ever had! I referenced making reservations in the “Creating the Spreadsheet” point but it needs to be clarified. The site we used to make most of our reservations was Booking.com. It won’t help you with every single reservation, for some villages you will need to email the albergue to make your reservation because they are not on Booking.com.
Before you make your reservations, check out the APOC Facebook group because everyone is talking about various albergues and may provide you with insight about where you want to stay or avoid staying because it does not meet your needs.
I didn’t talk about the budget in this blog, it’s a topic for another post. However, in short, you can spend very little or stay at 5-star hotels throughout your journey. You can find municipal albergues for $3-5 a night. We averaged about $40 a night for a private room. Sometimes that included dinner but often, for us, it did not. I will talk more about our “teacher budget,” this means that we had more resources than a college student but not as much as someone from Corporate America.
There are so many blog posts about the Camino, this is just our point of view from our experience. Read as much as you can before you hike your Camino. It’s your journey, it’s your Camino, make it what you want it to be. As we say on the Camino, Buen Camino!
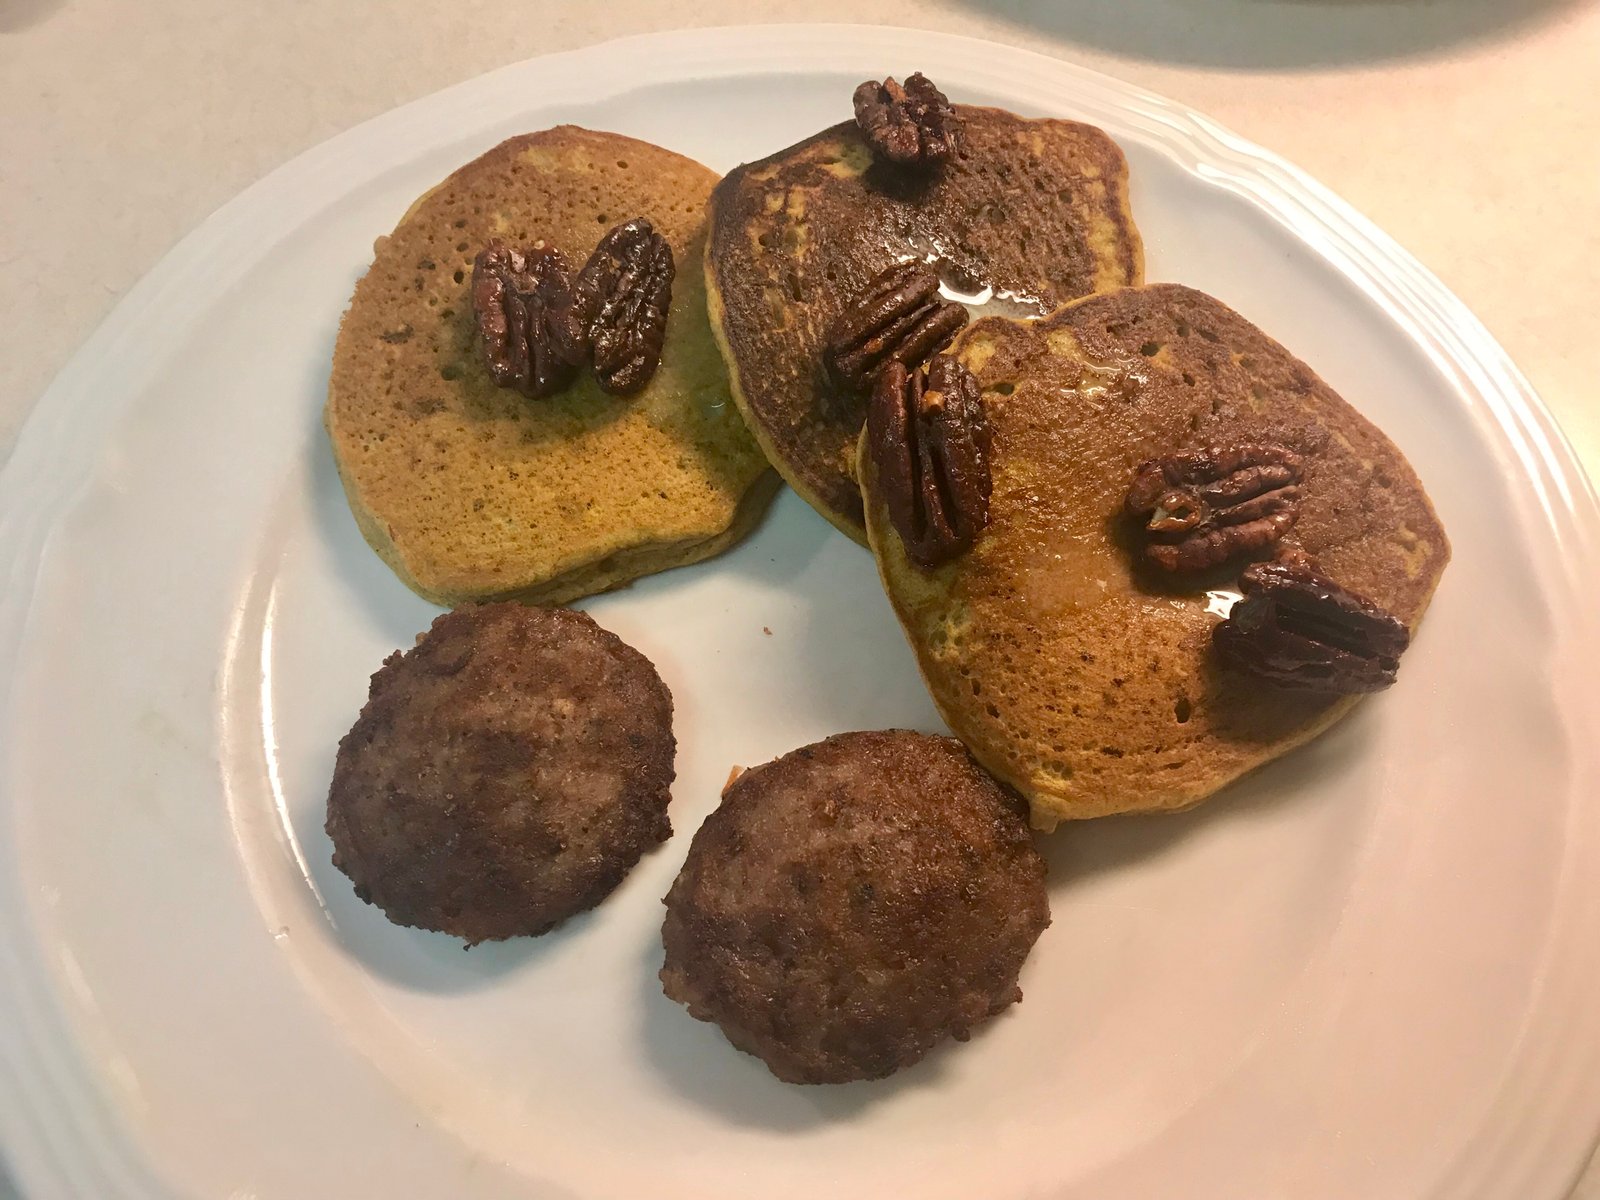
Recipe of the Week – Pumpkin Pie Pancakes with Sweet & Salty Pecans
The weather has changed, the leaves are turning colors, and the smell of fireplaces fill the air! Time for pumpkin spice anything and breakfast for dinner!! I did a search online for Pumpkin Pancakes and Once Upon A Chef delivered with a recipe that looked promising. Using Chef Jenn Segal’s recipe as a jumping off point and my favorite pumpkin pie recipe for inspiration, here’s what we came up with for dinner the other night.
Start by preheating the oven to 350º and mix a half cup of Whey Low Gold brown sugar substitute with half a teaspoon of salt, one teaspoon of cinnamon, and half a teaspoon of cayenne pepper (*full disclosure, I only use a heavy dash of cayenne because Michelle does not like a lot of spice), with about a tablespoon of water. Stir in two cups of pecan halves.

Spread the coated pecans onto a cookie sheet covered with parchment paper (NOT wax paper) and pop in the oven for about 15 minutes.

For the pancakes, in a large bowl, combine a half cup of canned pumpkin with three tablespoons of melted butter, and two eggs. Whisk until well mixed.

Add the following spices (yes, all of them!): one and a half teaspoons cinnamon, one teaspoon each of ginger and allspice, half a teaspoon each of nutmeg, clove, and salt. Yes, this seems like a lot of spice but it is an amazing combinations of flavors that you will not regret!

Mix together with one and a half cups of Pamela’s Gluten Free All Purpose Flour Artisan Blend, two teaspoons of baking powder, a quarter teaspoon of baking soda, one and a half cups of half and half, two eggs, and three tablespoons of REAL maple syrup (yes, you could use one of those brands that are on the shelf next to the pancake mixes but you are making breakfast for dinner, splurge). The mixture will seem like a thick cake batter.

It’s probably about time to check on the pecans. These are a little over cooked. Take them out of the oven and let them cool on a cooling rack. If the nuts are sticky, the are not done, put them back in.

Make the pancakes in a hot skillet. For some reason, I did not take any pictures during this step. I pour about a quarter cup of batter for each pancake and use a spatula to flatten the batter out so they are not too thick. Flip once you see some bubbles form on top. As each batch of pancakes is done, place them on the cookie sheet from the pecans and pop them in the oven (which is now turned off) to stay warm.

Break apart the pecans and store the extras in an airtight contain once completely cool. Top the pancakes with pecans and serve with sausage or bacon. We also made mimosas because, well, why not?

What is your favorite breakfast for dinner side? We love maple sausage but tell us yours in the comments!
Sweet and Salty Pecans
- 1/2 C Whey Low Gold Brown Sugar Substitute (or regular brown sugar)
- 1/2 t salt
- 1 t cinnamon
- 1/2 t cayenne pepper (or less depending on your heat tolerance)
- 1 T water (or more if needed)
- 2 C pecans halves
Preheat oven to 350º.
Combine all ingredients except pecans in a medium bowl. The mixture should be thickish. Add the pecans and stir until well coated.
Pour the pecan mixture onto a parchment lined baking sheet. Make sure that the nuts are spread in a single layer and bake for about 15 minutes.
Remove the nuts from the oven to check. If the nuts are sticky, bake a little longer. They should look a little crusty on top and caramelized on the bottom. Slide the parchment onto a cooling rack to let the nuts cool.
Break apart the nuts and keep extras in an airtight container, if you can resist eating them all!
Pumpkin Pie Pancakes
- 1/2 C canned pumpkin
- 3 T butter, melted
- 2 eggs
- 1 1/2 t cinnamon
- 1 t ginger
- 1 t allspice
- 1/2 t nutmeg
- 1/2 t clove
- 1/2 t salt
- 1 1/2 c half and half
- 3 T real maple syrup
- 1 1/2 c gluten-free flour blend (such as Pamela’s Artisan Blend)
- 2 t baking powder
- 1/2 t baking soda
In a bowl, mix together pumpkin, butter, eggs, all of the spices, and salt. Whisk until well combined. Add the milk and syrup and combine.
Add flour and other dry ingredients and mix well.
In a hot skillet, add a little cooking spray if needed, and use 1/4 c of batter for each pancake. Cook until bubbles form on the top and flip. The pancakes will rise quite a bit and be very fluffy. Keep in a warm oven until all of the pancakes are ready to serve.
Top pancakes with butter, pecans, maple syrup, and serve with your favorite breakfast sides.
6 Reasons we love Pictured Rocked National Lakeshore
Our time in the upper peninsula of Michigan began at Pictured Rock National Lakeshore. We were here a few years ago, but when we decided we were going through the UP this year, stopping at Pictured Rock was a no-brainer.
Before we jump in, I have to tell you that we skipped Tahquamenon Falls State Park and we regret it. The park is beautiful with upper and lower waterfalls, great hiking, and a wonderful campground. If you make your way to the UP, stop at Tahquamenon Falls. Also, make sure you stop at the Tahquamenon Falls Brewery and Pub which is located in the park at the trailhead to the upper and lower falls. The food is outstanding and the beer is bubbly good!
To best explore Pictured Rock, we camped at the Munising Tourist Park and highly recommend it. We stayed at this campground the last time we were through here. The reason we love this campground is that it is right on Lake Superior. The sunsets will take your breath away! Campsites #72-80 provide the most privacy, have plenty of room for RV’s, and are right on the water. It’s a small campground but there is a playground, it’s right off M-28, and of course, it’s on the water! This city of Munising is a small but quaint town to just wander around. We love hanging out at Falling Rock Cafe and Bookstore. The food is fabulous and it’s a good place to enjoy one of the many books on their bookshelves.
Let’s get to it – here are 6 reasons we made Pictured Rock National Lakeshore a priority in our UP travels.
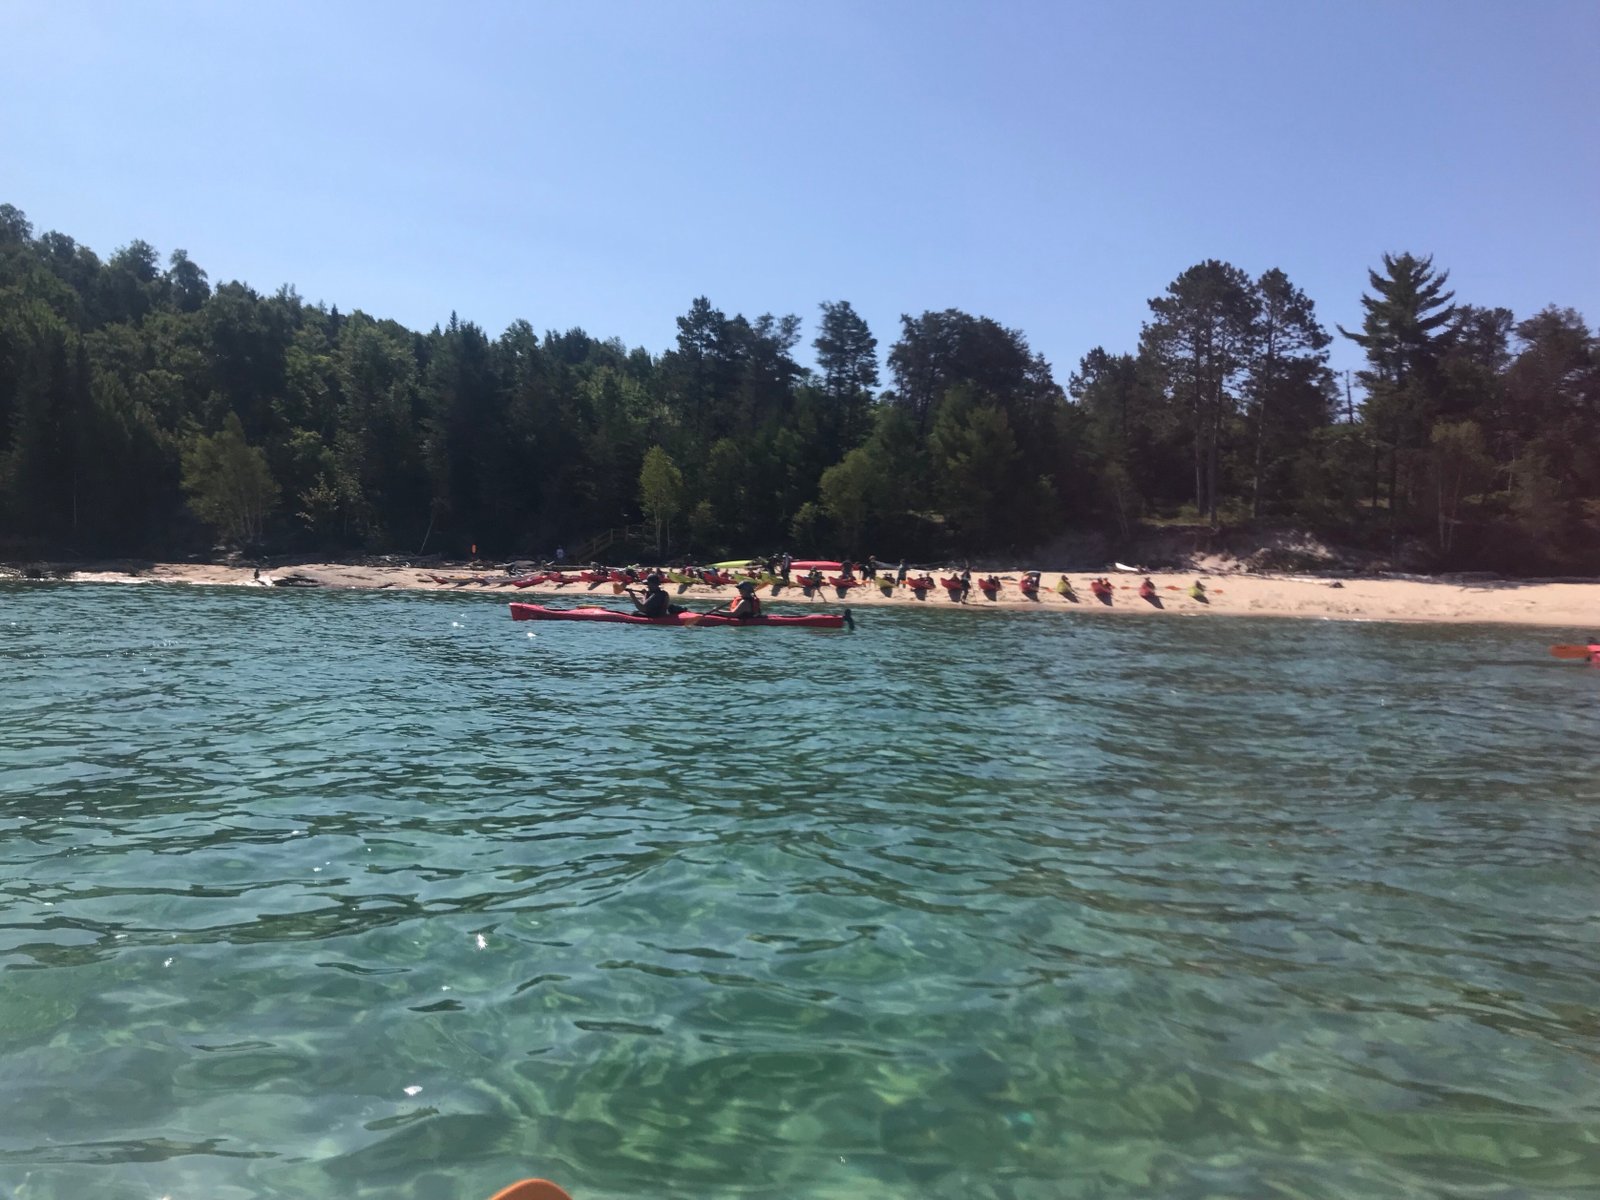
#1: Sea Kayaking
Of course, I have to start with sea kayaking because it was the primary reason for stopping here. There are several companies that have half day and full day tours, we chose Northern Waters for our tour this time around. Kayaking on Lake Superior is some of the most beautiful kayaking we have ever done. You go out in a tandem kayak so make sure you bring someone you trust, haha. Every company we have gone with does a great job of providing the group with some basic kayaking training. However, we would suggest you are not brand new to kayaking as it will really slow the entire group down. In Dayton, we have Five Rivers MetroParks and they do a fantastic job of providing people with opportunities to “try out” various sports to prepare you for activities like this one. If you are a more experienced kayaker, we strongly suggest going on a full day tour as you won’t have as many new folks.
If kayaking is not something you can or want to do, there are plenty of boat tours so you can still explore Pictured Rocks.

#2: The Colors
Pictured Rock lives up to its namesake and is simply stunning. When the sun hits the rock the color explodes. There are all of these nooks and crannies to slide your kayak into and feel like you are holding up a thousand plus tons of rock. Just look at the pictures below. If you like what you see, imagine how gorgeous it looks in person. It left us speechless.


#3 Rock Formations
I love sliding the kayak through these small spots! You have to wonder how or when this happened to the rock. The last time we kayaked this area we came around a corner only to see a big wave and a lot of kayakers looking up. A big piece of rock fell right before their eyes! Fortunately, nobody was hurt but a lot of people were quite startled. I am conflicted – I wish I would have seen it but I doubt we would have come back, haha!


#4: The Clear Water
It feels like you can see all the way to the bottom of this very deep water. The only other time I have seen water this clear was in Florida as I snorkeled around the coral. I am confident there are places around the world with crystal clear water, but I was raised on the Mississippi River and there is nothing clear about that body of water. Therefore, when I am around clear water, I am mesmerized. There is something so breathtaking about crystal clear water. At one point the guide showed us a ship wreckage and it was amazing how much you could see. If I had the right gear, I would have loved to have snorkeled around it. Lake Superior was a warm 60 degrees the day we were on it.

#5: The Hiking
The best part of Pictured Rock National Lakeshore is there is so much more to do besides kayaking. You can day hike and backpack the area. According to the National Park Service, you can backpack about 43 miles. We did a 10-mile loop to explore Chapel Rock and the Mosquito Falls area. Pictured below is Chapel Rock, a most impressive balancing rock overlooking Lake Superior.


#6: The Waterfalls
You can see about 18 waterfalls in the Munising area. The last time we were here it was our goal to see all of them! This trip we didn’t have the time so we only saw a few. The one pictured below is Miners Fall which is part of an easy 1.2 mile hike. There are some waterfalls that you can only see from a kayak and some only after a good rainfall. Then there is Mosquito Falls which you only see if you are covered in enough deet, haha!

That is an oversimplified summary of Pictured Rock. We didn’t explore the Grand Island National Recreation Island and we wish we would have had time to do it, but you can only do so much when you have time constraints. Pictured Rock is a beautiful place to visit with plenty to keep you busy. If you check it out, let us know your favorite spots. If you liked what you read here, be sure to like and/or comment on the post so we know what you want to hear more about next time.
Until we adventure again…
Recipe of the Week – Creamy Chicken Soup
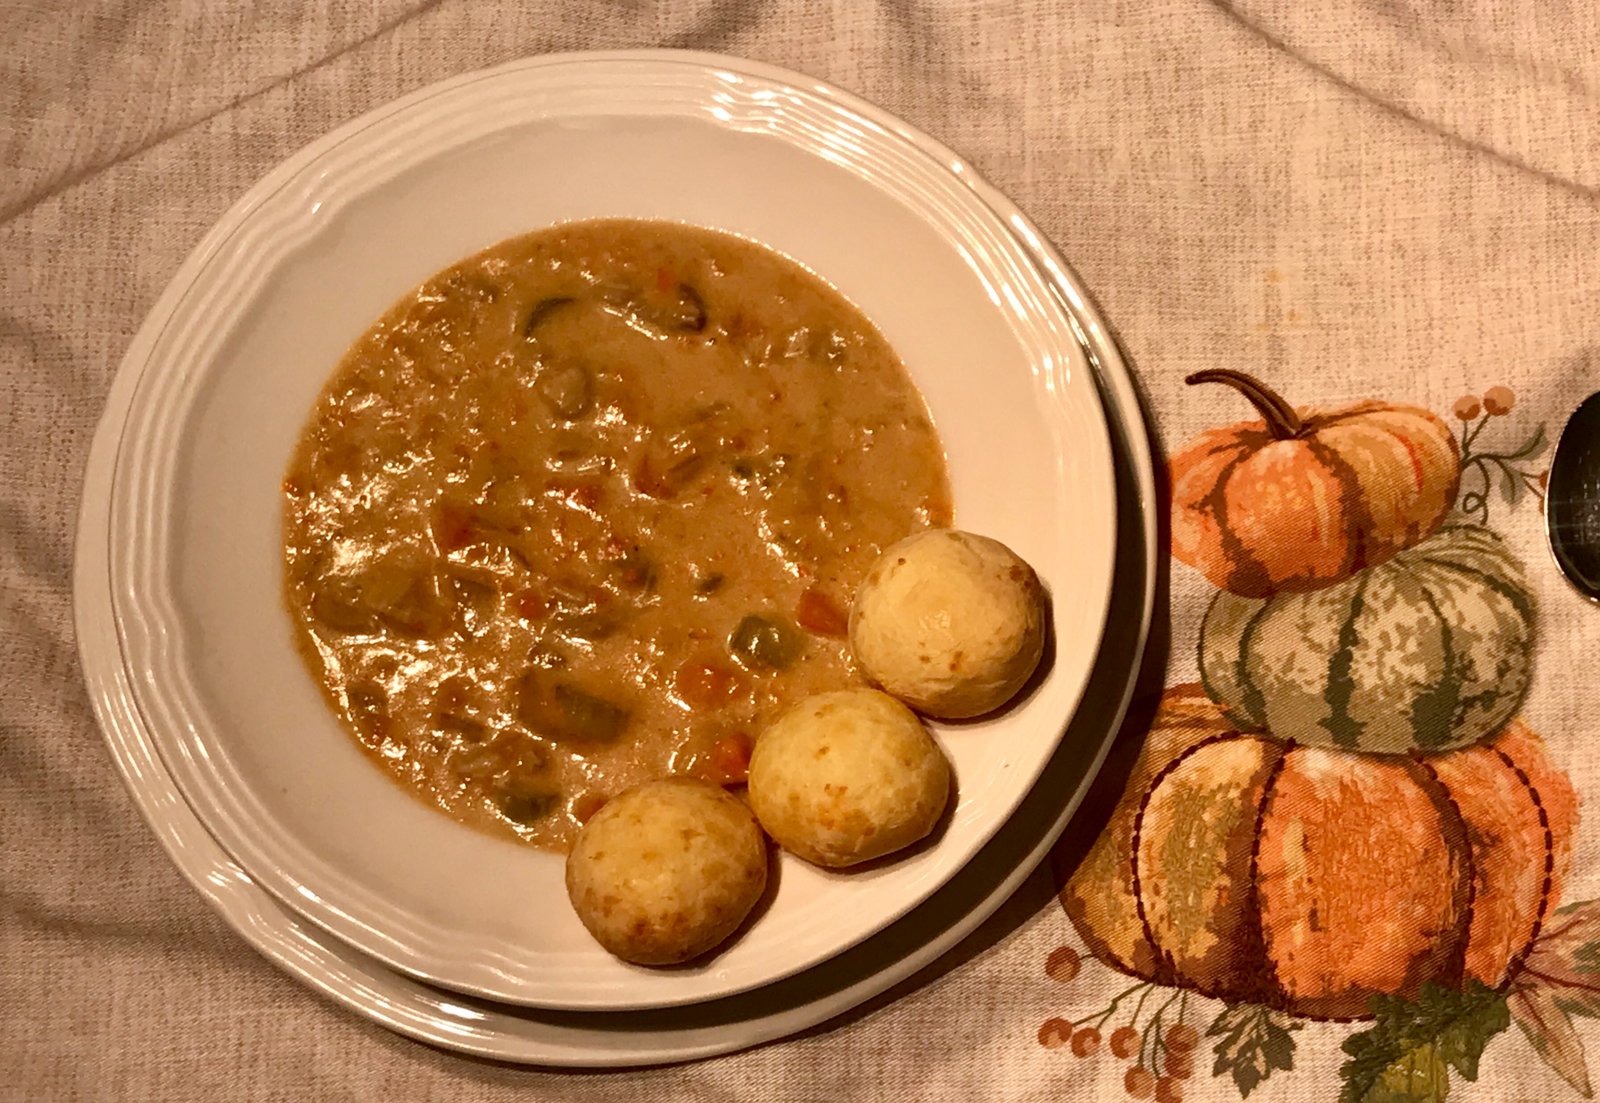
As the weather cools, we love to start making heartier meals and one of my favorite things to cook are creamy, thick soups. Krissy at SelfProclainedFoodie.com has created a wonderful rich and creamy soup with lots of flavor and wonderful texture. I’ve made a few adjustments to her recipe as I’ve given it here, but you can compare her original recipe here.
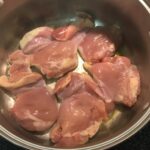
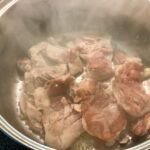
Begin by heating one tablespoon of olive oil in a large pot over med high heat. Add one pound of chicken thighs, making sure that the pot is not too crowded. The chicken will stick to the bottom of the pan, it will release on its own as the chicken cooks. Turn the chicken after about seven to nine minutes. Continue to cook until the chicken is done. Remove it to a bowl to cool.
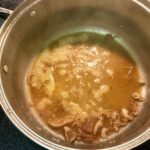
Deglaze the pan with a half cup of dry white wine or dry sherry. A note on cooking with wine or sherry: never cook with wine that you wouldn’t drink. Most “cooking” wines have lots of added sugar and salt. If the wine tastes bad by itself, it will taste bad in a recipe. I never use expensive wine for cooking, but a $10-20 bottle that tastes good will add depth and complexity to any recipe that you add it to. Adding wine to the pan at this time will allow you to scrape up the bits of stuck chicken and browned bits that are full of flavor. Remove the bits and remaining liquid to the same bowl as the chicken.
While the chicken is cooking, dice one large onion, four stalks of celery, and two large carrots. Add two tablespoons of butter to the pot and once melted, add the diced veggies, called a mirepoix, to the pan and lower the heat to medium. If the butter starts to brown, the heat is too high. The liquid released from the veggies should help keep things from burning. Let the vegetables cook until soft and lightly browned. Remove the veggies to another bowl.

Add three more tablespoons of butter to the pot along with three or four cloves of minced garlic. Cook until fragrant and bubbly. Add six tablespoons of gluten-free flour blend and stir well. Cook the roux over medium heat until lightly browned, about five minutes, stirring constantly. Roux can be tricky, once the color starts to change, it can burn very quickly. If the roux gets too dark, or if you see black flecks, toss it out and start over because it will make the entire soup tasted scorched and bitter.
Add two cups of half and half and whisk until the soup thickens. Add four cups of chicken broth along with all of the accumulated juice and wine from the bowl of chicken. Add the cooked vegetables and use an immersion blender to partially puree the mixture. I like some larger chunks left behind.

Dice up the chicken, add it to the pot, and season to taste with salt and pepper.

We love to serve the soup with Pao de Queijo, a Brazilian cheese bread that is naturally gluten-free and a glass of the wine that was used to deglaze. If you try the soup, let us know in the comments what you serve on the side.

Creamy Chicken Soup (based on the recipe from Self Proclaimed Foodie)
- 1 lb boneless, skinless chicken thighs
- 1 T olive oil
- 1/2 c dry white or dry sherry
- 5 T butter, divided
- 1 large onion, diced
- 4 stalks of celery, diced
- 2 large carrots, peeled and diced
- 3-4 cloves of garlic, minced
- 6 T gluten-free flour blend
- 2 c half and half
- 4 c chicken broth
- salt and pepper, to taste
In a heavy pot, heat olive oil over medium high heat and cook chicken thighs until browned, about 7-9 minutes on each side. The chicken will stick and then release from the pan when ready to be turned. Transfer the chicken to a bowl.
Deglaze the pot by adding wine and scrapping the browned bits from the bottom of the pot. Add bits and remaining liquid to the chicken bowl.
Add 2 T butter and lower heat a little. Add all vegetables except garlic to the pot and cook, stirring occasionally, until vegetables are soft and slightly browned, about 10 minutes. Remove to another bowl.
Melt remaining 3 T of butter and add garlic. Cook until fragrant, 2-3 minutes and add flour. Stirring constantly, cook flour until a rich light brown color. Be careful not to burn or scorch the roux. If it begins to burn, toss it out and start this step over after cleaning the pot.
Add half and half to the roux and whisk until thickened. Whisk in the chicken broth and accumulated juices and wine from the bowl of chicken.
Add the cooked vegetables to the pot and use an immersion blender to slightly puree the mixture. Leave chucks to your liking or puree completely smooth.
Dice the chicken and add to the pot. Taste the soup and adjust the seasonings to your liking with salt and pepper. Makes 5-6 servings.
A Fishing Charter, a Rescue “at Sea,” and the Most Expensive Fish Tacos Ever
For those who like to skip to the last page of a book to find out how everything ends, we’re fine, the boat is fine, the rescue at sea was not us. More on that later.
We are always looking for new adventures and to experience things that are not only unique to the areas that we are visiting, but out of the box and our own comfort zone. While in Michigan this summer, I knew that we would be able to get amazing fresh fish from Lake Superior and during menu planning one week I convinced Michelle that we should buy some and plan on fish tacos. Then we discovered that we couldn’t find a fresh fish market within a reasonable drive. A few nights later, probably after a bottle of wine, I say “would you ever consider doing a fishing charter?” The next thing I know, we have computers open and are researching options in the area around the Keweenaw peninsula. Captain Brian at Sand Point Charters tells us that we will definitely be coming home with some lake trout and probably even some salmon but he has one question. Do we want the bigger or smaller boat? What’s the difference Michelle asks. The big boat has a toilet. One credit card deposit later and we are on our way to a big boat and the most expensive fish tacos that I have ever eaten!

The Fishin’ Mission is a comfortable 30′ yacht with plenty of room, lots of gear, and of course, a head (that’s boat talk for toilet).

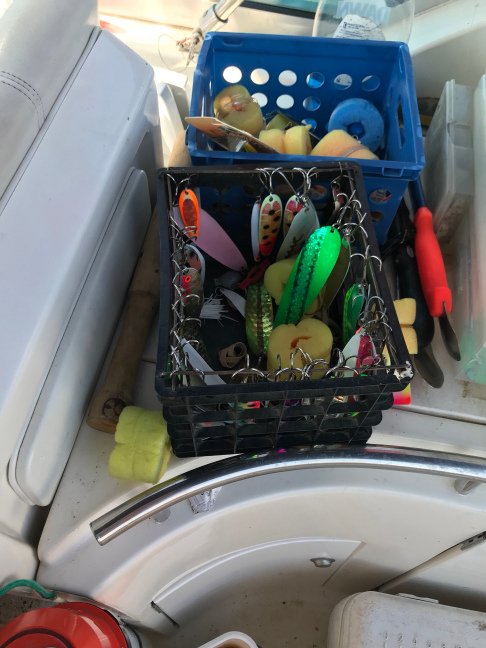
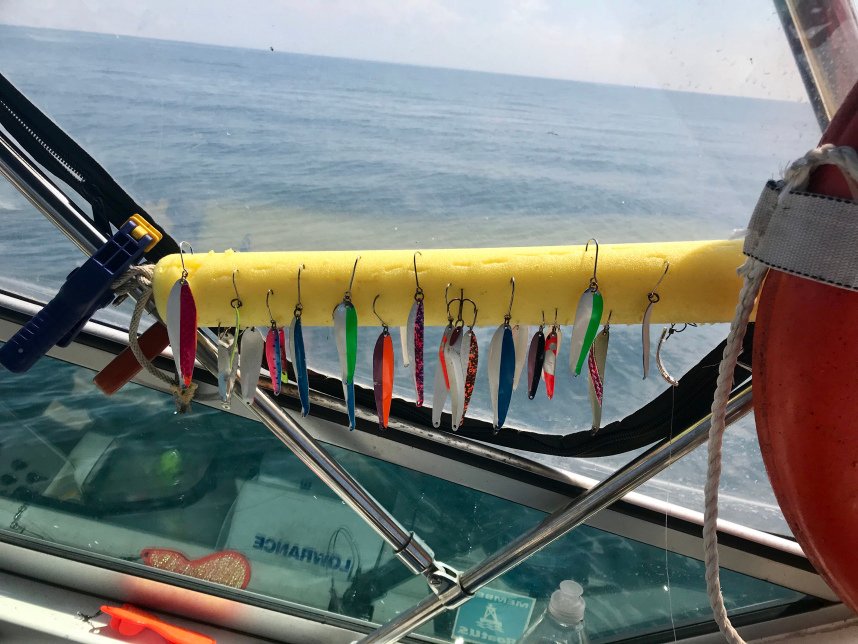
Captain Brian Helminen piloted us out onto the water and told us about his background and family (he and his wife have raised 15 children!). After boating through Lac La Belle and out onto Lake Superior, he begins the arduous task of teaching us both about Great Lakes fishing. Now don’t get me wrong, we have both been fishing before, but it’s been a while, and never with this much gear. We learned about dipsy divers, lure, setting depth, and many other things that have since left my memory.

By the time we have six lines out, I notice that one is moving. It was on Michelle’s side, so time for her to get to work!
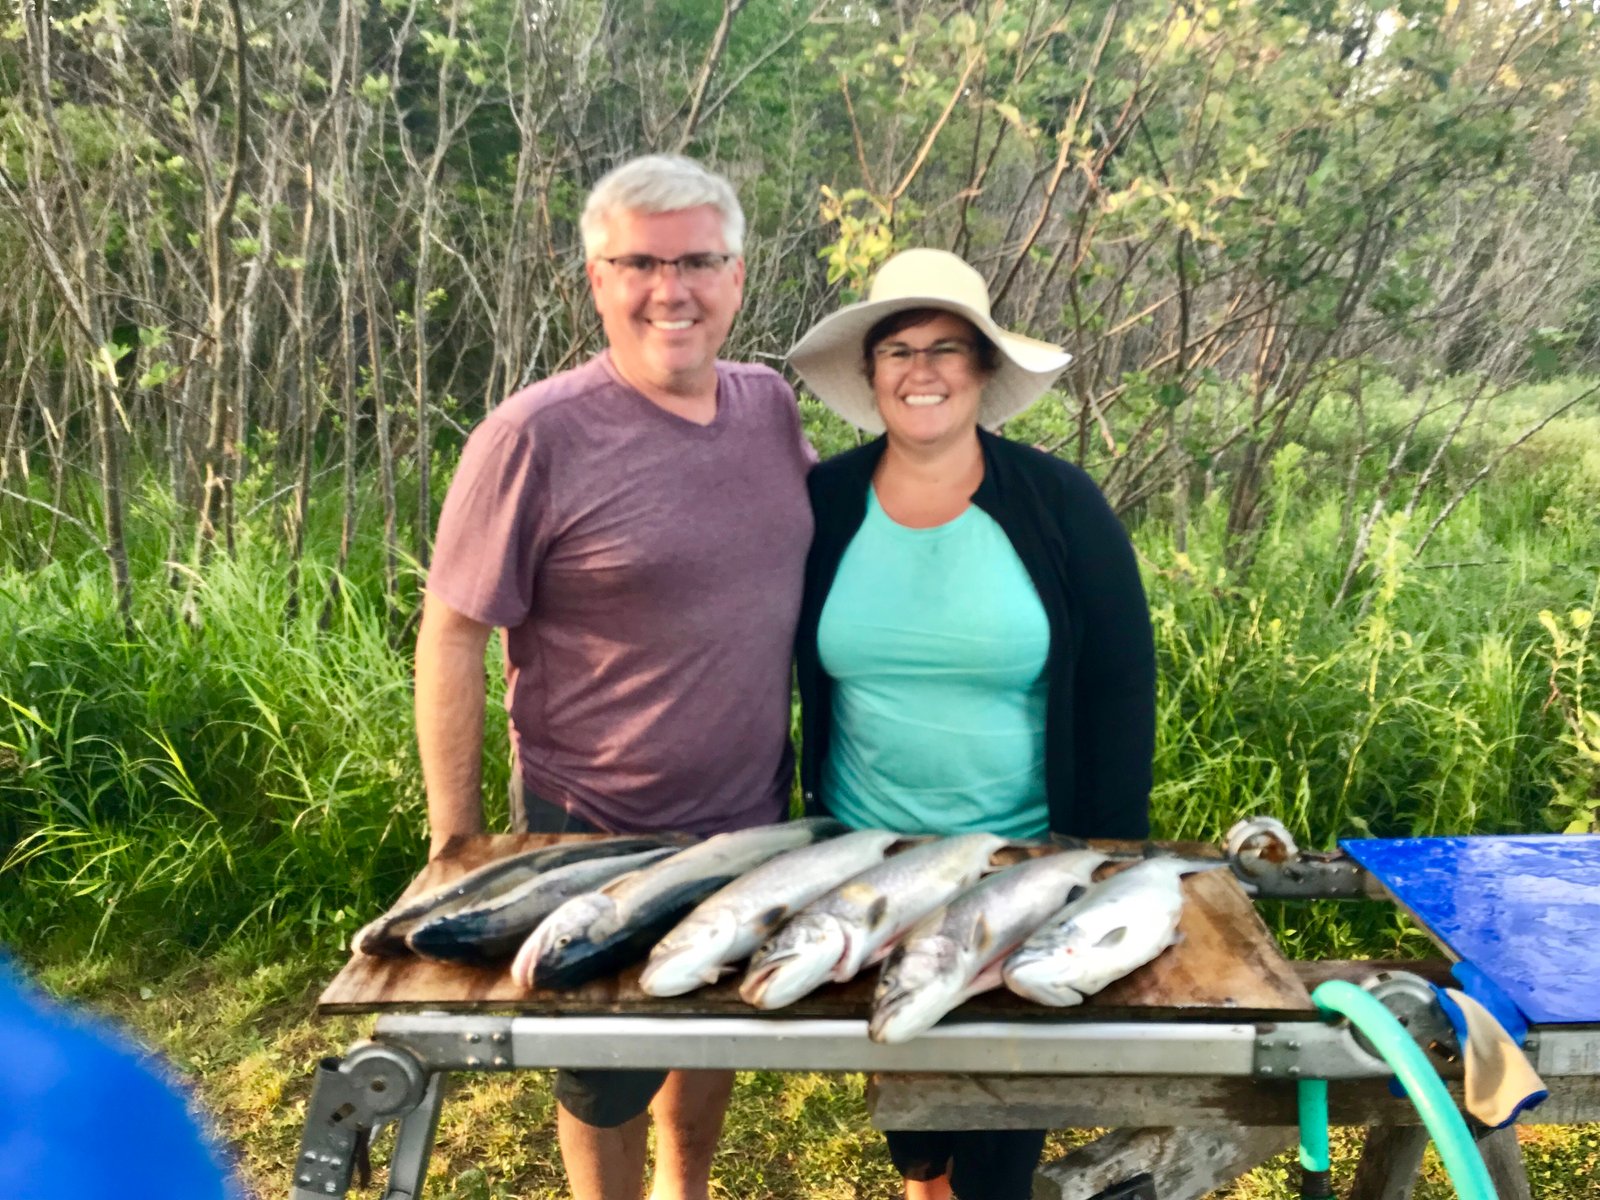
After some initial squeamishness, Michelle does pose for the official first fish picture. It was a small lake trout, barely big enough to keep, but we did just in case it was the only thing we caught. Eventually, we threw this one back in favor of the larger ones we had pulled in.


Fishing was going quite well. Every time we got a line out, after a few minutes something got a hit. On the radio, Captain Brian hears an SOS call from a sailboat that had run into some rocks a few miles away. He notifies the Coast Guard that we are in the area but he is concerned that we would not have enough fuel to get to the distressed boat, perform a rescue, and get back to our dock. They put him on standby in case we are needed to help out.

Over the next hour and a half or so, we brought in seven more fish including this one, our largest lake trout. We also got two Koho salmon.

Everything was going well and we decide that we were only going to keep salmon from this point forward. Captain Brian has been monitoring the situation with the Mother Superior, the stranded boat. Turns out that there are no other boats in the area and the Coast Guard has decided to not send out a rescue boat (I didn’t know that was an option).
Captain Brian explains that it is the responsibility of any boat to help out another boat in distress. He has recalculated our fuel and we should have no problem reaching the boat, pulling her free, and making it back. We are underway, with about 15 minutes to get to the other boat. Along
We get to Manitou Island and find the Mother Superior. The captain did not know that there were rocks under the surface that were not on the charts and his rutter snagged on them. There was no damage but his engines could not help them break free.
Once we get close enough, I am supposed to throw this rope to the other boat so that it can be tied off and we will pull them free. ME, throw the rope, on a bobbing boat!
Yes, please replay that, because that throw was that good! Once they were freed, it was time to head back to get our fish cleaned and packed up. But first, the captain wanted to show us a couple of tourist attractions since we were on a section of the Lake that we had not planned to visit. Manitou Island is known for this quartz vein that runs down the cliff face and into the water. It is a local favorite swimming hole (we opted out, the water temp was in the 50’s).

We also went past Gull Rock with its 1967 lighthouse. The small building is actually an outhouse with a flush toilet. Built above the rocks, each time a wave crashes in, the toilet is automatically cleaned. The island was recently acquired by a preservation society who hopes to restore it.

As we returned to Lac La Belle, Captain Brian gave us a little history of the area. There were copper mines along the lake but to get the ore out to Lake Superior, a channel was dredged out in the 1860s. That is the channel we rode through in the time-lapse below. It was a beautiful ride as the sun began to set and my mind drifted to fish tacos.
Once back at the lake house, our haul was laid out to be cleaned. Thankfully Captain Brian took care of that too!


After an hour

We did get fish tacos the next night and they were delicious! Maybe I’ll post that recipe sometime.
Have you ever had a misadventure on a boat or an excursion that didn’t go as planned? Tell us about it in the comments below.
When Talking about Adventuring is Hard
This past summer was filled with the highest of highs and sadly the lowest of lows. The highs consisted of our son’s, my cousin’s wedding, and time with a breadth of my family. Sadly, what brought my extended family together was the passing of my grandfather. My grandfather was, simply stated, the most amazing man I have ever meet. Together

my grandparents provided the world with 5 boys, 20 grandchildren, and countless great-grandchildren. They loved attending every possible special event of their grandchildren and great-grandchildren, and even the not so special events. Family brought them genuine joy. They taught me how to love unconditionally, what to look for in the perfect mate, to appreciate and enjoy live theater, and the value being committed to your community. I can only strive to be half as amazing as they were collectively. I am thankful I had 41 years with my grandmother and 47 with my grandfather. I am a better human because I knew them.
My grandfather affectionally referred to as the gentle giant, survived World War II, the Depression, drought after drought as a dairy farmer, and six years ago, the loss of his bride, my grandmother. I respected him as a husband, a grandfather, and a man, more than any other human being I know. He was smart, frank, graceful, loving, patient, kind, generous, and non-discriminatory.
When I knew his end was near this summer it was like I was frozen in fear of the inevitable. I didn’t want to go adventuring, I wasn’t in the mood to leave the RV, and all I wanted to do was go home to be with my grandfather. We finally made it to his side, his passing was slow, but fortunately, all of his family made it home to say our good-byes. The time with family was the greatest gift we could give him. It lifted all of our spirits and we could feel our grandmothers presence everywhere which was precisely what we all needed.
So comes the sudden stop of my newly developed appreciation of weekly blogging. My heart needed time to mend. My mind needed time to reconsider my goals. I wanted to blog, I tried to blog, I have 3 drafts waiting for me to finish, but my focus hasn’t been there. I come to you with a heart that is trying to mend and a new focus on greater goals to achieve undeniable happiness. I have had several conversations with my grandparents in my dreams. They were my greatest fans and thoroughly enjoyed listening to every single detail about any story I was willing to share with them. Therefore, I will write again. I will share our adventures with you. Maybe there is someone out there who needs to hear about them. Maybe somehow my grandparents are listening and smiling because all they wanted was for their family to live their best lives.
Brian and I have a lot to share with you. Next week I will pick up where we left off as we entered the UP of Michigan to finish our summer 2018 adventure. Then I will share with you what has been going on as we have begun to the plan our summer 2019 adventure which is going to be hiking the Camino Portuguese. My goal is to post an adventure blog every Wednesday morning at 8:00 a.m. EST. Brian will continue to post his “Recipe of the Week” every Monday morning at 8:00 a.m. EST. If you like what you are reading, please like, comment, share, and follow! We write our blogs for you. We write them to inspire an adventurous spirit in all of us. We write them to remember what it looks like for us to live our best life.
To everyone who helped me through the passing of my grandfather, thank you. To Brian who kept our posts coming while I mended a broken heart, thank you. I see my grandfathers spirit in Brian and that is the ultimate compliment. To anyone who still has either or both of their grandparents on this Earth, call them. Share everything that is is going on in your life with them. They are waiting to hear from you.
Recipe of the Week – Sautéed Chicken with Garlicky Pasta
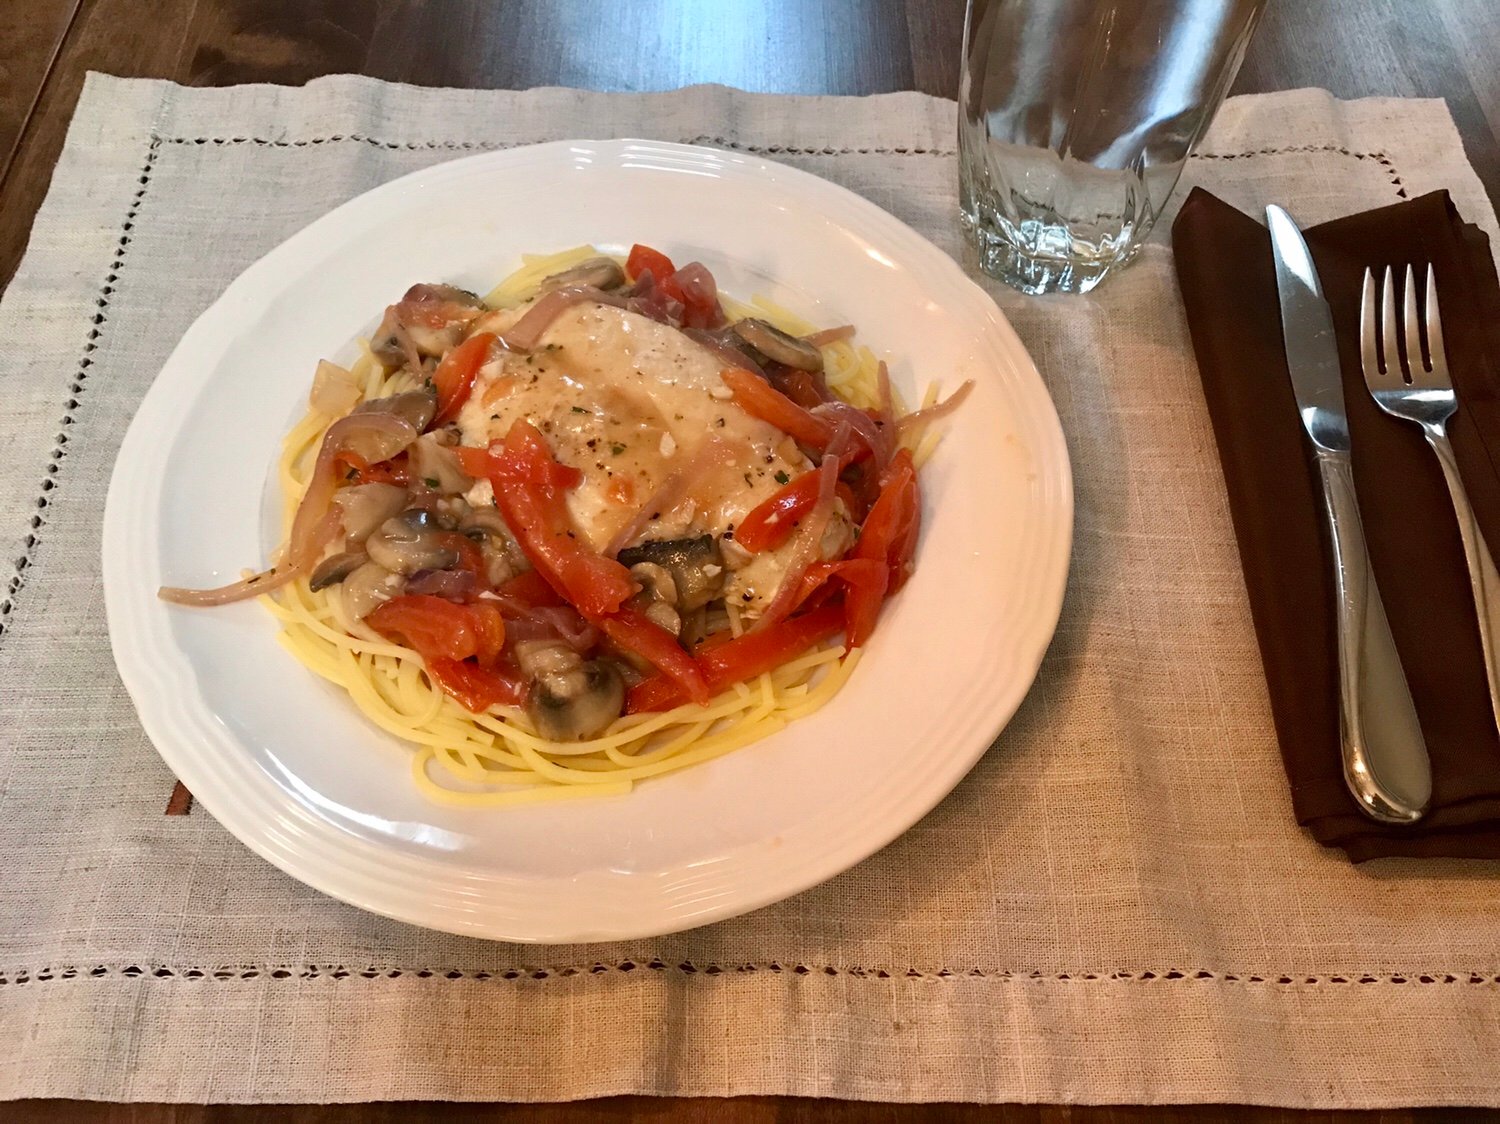
We love to entertain guests but there are only so may opportunities during the weekend with our busy schedules. That leaves weeknight entertaining, but who has time for a fancy dinner after work? Sautéed Chicken with Garlicky Pasta comes together quickly and is perfect for a “Sunday dinner” any night of the week. Serve with a green salad and invite some company for dinner on a weeknight!
Start by heating some olive oil in a saucepan over medium high heat. Season four chicken cutlets with salt and pepper and cook for about 5 minutes per side.

While the chicken is cooking slice half of a red onion, a small package of baby bella or white mushrooms, four cloves of garlic and about one tablespoon of fresh thyme. Take two or three tomatoes and core then slice them thinly. Dispose of the seeds and juice that result.

Remove the chicken and keep it warm (I usually put it on a plate and stick it in the microwave to get it out-of-the-way). Add a little more olive oil to the pan if necessary. Toss in the mushrooms and onion and saute until soft. Meanwhile start a pot of water to boil for the pasta. Cook two ounces of spaghetti per person according to package directions.

Add garlic, thyme, and tomatoes and cook until tomatoes are heated through.

Pour two cups of chicken broth into the pan and scrape up any browned bits (this is called deglazing). Make a slurry by mixing one tablespoon of gluten-free flour with two tablespoons of water and add to the pan along with one teaspoon of Dijon mustard. Add the chicken and any juices on the plate back into pan and allow the sauce to thicken. Taste and adjust the seasoning if needed.

Portion out the spaghetti on plates and top with sauce and chicken. If you really want to get fancy, sprinkle some chopped parsley on top or a little parmesan cheese.

Sauteéd Chicken with Garlicky Pasta
- 1 T olive oil, plus a little more
- 4 chicken cutlets
- 1/2 pound white or baby bella mushrooms, sliced
- 1 small red onion, sliced
- 2-3 tomatoes, cored and sliced
- 4 cloves of garlic, minced
- 1 T fresh thyme, chopped
- 8 oz gluten-free spaghetti
- 2 C chicken broth
- 1 T gluten-free flour blend
- 1 t Dijon mustard
- 1/4 c fresh parsley, chopped (optional)
- 4 T parmesan cheese (optional)
Season chicken with salt and pepper. Heat oil in a saucepan over medium high heat and saute chicken about 5 minutes on each side. Place chicken aside and keep warm.
Cook pasta according to package directions.
Add a little additional oil to pan and saute mushrooms and onion until soft. Add garlic, thyme, and tomatoes and heat through.
Deglaze the pan with chicken broth and add a slurry of flour mixed with 2 T of water. Stir in Dijon and allow sauce to thicken. Taste sauce and adjust seasonings if needed.
Top with parsley and parmesan, if desired.
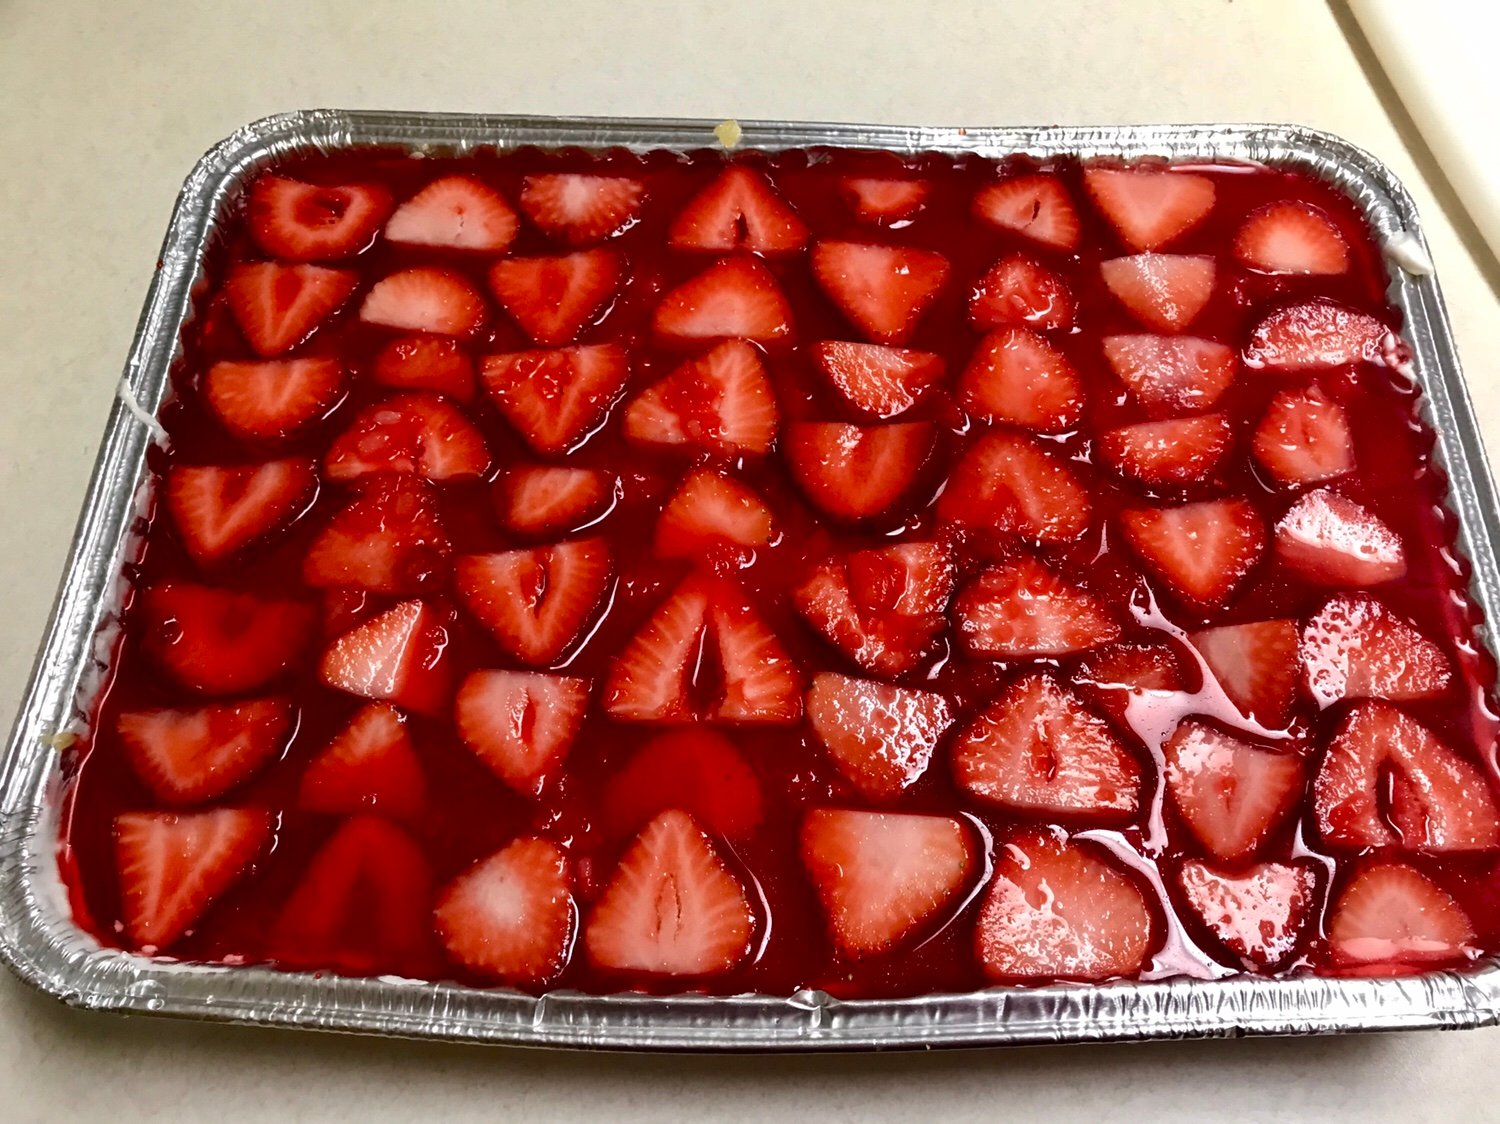
Recipe of the Week – Strawberry Pretzel Salad
Summer picnics and winter carry-ins are some of my favorite events because I get to try a variety of interesting dishes and a smorgasbord of flavors and cuisines. A few weeks ago our condo association had its annual end of the summer picnic, and boy can these people cook… pasta salads, cookie bars, cakes, deviled eggs, and three different kinds of slaw. I had to get two plates just to try a taste of everything!
Michelle found this recipe in an old Methodist church cookbook used to make it with her grandma for special occasions or just a random visit home. It always pleases a crowd. There is nothing groundbreaking here, but this version is a little different from most like it with the addition of the crushed pineapple and juice. I’ve lightened it up a little bit with some adjustments to quantities and ingredients, and of course, our version is gluten-free.

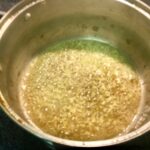
Preheat the oven to 350º and crush a bag of Snyder’s pretzel sticks in a food processor. You will probably need to do it in several small batches. These are our favorite GF pretzel because they have a great flavor and crunch. Melt 2 sticks of butter and pour over the pretzels in a 9×13 baking pan. Stir together until everything is coated and all of the butter is absorbed. Place into the oven for about 10 minutes. Remove from the oven and place directly in the freezer for a few minutes to cool it off.

While the pretzels are baking, cream together an 8 oz package of 1/3 fat Philadelphia Cream Cheese (also called Neufchatel Cheese) and 1 cup of Whey Low Type D Sugar Replacement (you could use regular sugar) until smooth and creamy. Fold in an entire regular size tub of Cool Whip Sugar Free being careful not to over work the air out.

Spoon the mixture over the pretzels and spread into an even layer. If the pretzels are still hot, they will melt the Cool Whip mixture. Make sure to seal all of the edges of the pan so that the jello layer doesn’t soak through and make the pretzels soggy.

Drain a 14 ounce can of crushed pineapple and reserve 1 cup of liquid. Sprinkle the pineapple over the pan as evenly as you can.

Cut a large package of strawberries into 1/4 inch slices and arrange on top. I like to make it look pretty, but you could just dice them up and throw them on if you’re in a hurry. If strawberries are not in season, you could thaw a package of frozen ones, but rather than layer them like this, chop them and add directly to the jello in the next step along with the pineapple and juice. Place the pan in the fridge while you make the jello.

In 1 cup of boiling water, dissolve a large package of sugar-free strawberry Jello. Add the 1 cup of reserved pineapple juice and cool in the fridge for about 10 minutes to thicken slightly. Pour over the top, getting jello into all of the nooks and crannies. Let the whole thing chill until solid, about an hour and a half, before serving.

I’m not really sure if this is a salad or a dessert, but at either end of the buffet table it will be good and you probably won’t have any leftovers. Speaking of, this does not hold very well overnight. I would really encourage you to make it the day you plan to serve it. The total prep time including the time for the jello to set up is about 2 – 2 1/2 hours and you really can’t rush jello.
What’s your favorite Jello salad recipe? Share a link in the comments.
Strawberry Pretzel Salad
- 1 bag of gluten-free pretzel sticks
- 2 sticks (1 cup) of unsalted butter, melted
- 8 oz 1/3 fat Neufchatel cream cheese
- 1 cup Whey Low Sugar (or regular)
- 1 regular tub of Sugar Free Cool Whip, thawed
- 1 cup crushed pineapple
- 20 oz package of fresh strawberries, cut into 1/4 inch slices
- 1 cup boiling water
- 1 cup pineapple juice (reserved from the crushed pineapple)
- 6 oz box of Sugar Free Strawberry Jello (that’s the big box)
Preheat the oven to 350º.
Crush the pretzels in a food processor and mix in a 9×13 pan with melted butter. Bake for 10 minutes. Cool in the freezer.
Cream the cream cheese and sugar with a mixer until smooth. Fold in the Cool Whip and spread over the pretzel crust. Make sure to seal all of the edges so the jello can’t leak through later.
Top the cream cheese layer with the pineapple and then arrange the strawberries on top.
In boiling water, dissolve the jello and mix in the juice. Chill slightly, but do not over thicken. Pour over the strawberry layer and chill in the refrigerator until set completely, 1 to 1 1/2 hours.