The 21 Pound Turkey… How to Handle Dreaded Holiday Leftovers!

In the midst of the COVID virus pandemic, we purchased a 21-pound turkey for two and it’s a good thing we love turkey leftovers! Now don’t get me wrong, I can only eat Thanksgiving (or Christmas) dinner with all of the trimmings twice at most but take that holiday turkey and divide it into dinner-sized portions and freeze it for later and you’ve got easy meal prep for multiple meals. Keep reading for some of our creative ideas and suggestions from some of our subscribers about how to use up all of the leftovers from your holiday dinner.

In the YouTube video that accompanies this post, we’re giving some quick walkthroughs of several recipe ideas. All of them are linked here with a quick description and some tips to turn your leftovers into new favorites. Plus all of these recipes can be made year-round by substituting chicken when you just can’t handle that big bird more than once a year.
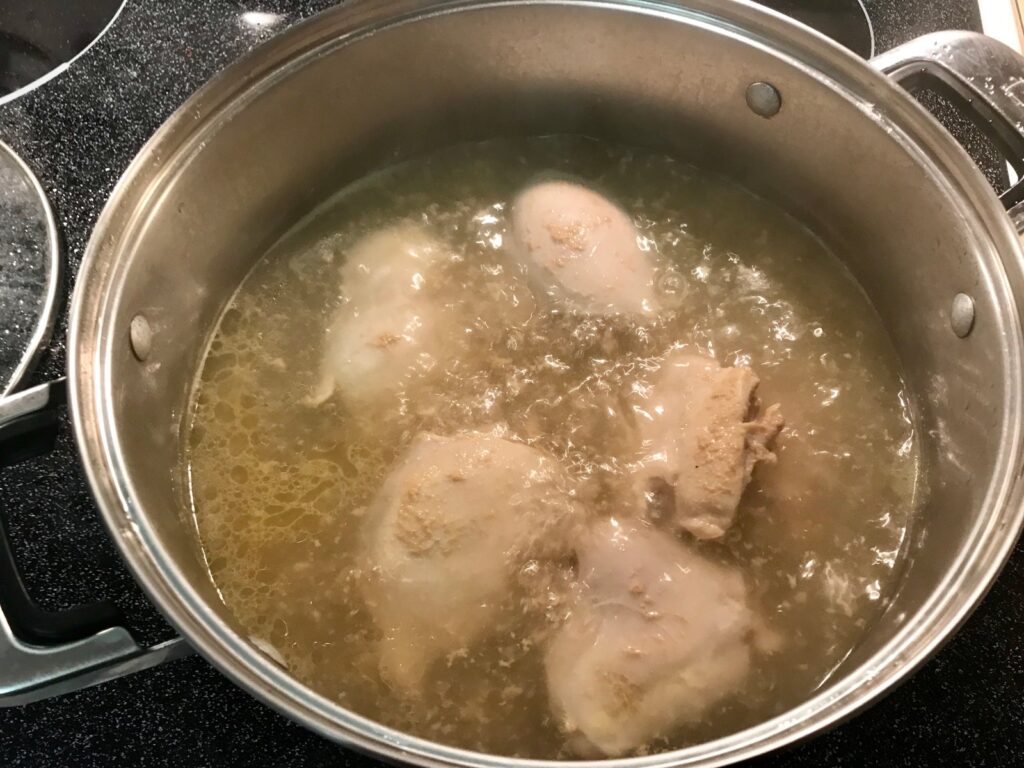
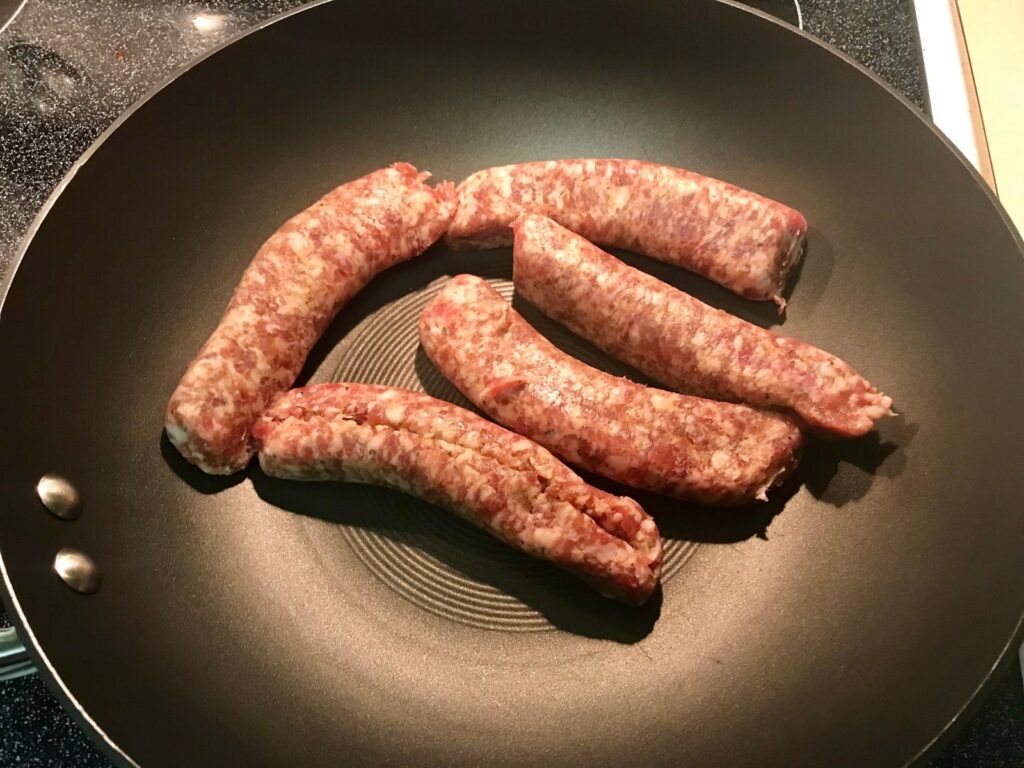
Turkey Stock

The first must-do for our leftovers is making a big batch of turkey stock. Stock is can be very simple. Take the bones and trimming from your turkey, add aromatics such as celery, carrots, onion, garlic, and any herbs you have in the spice rack, and cook on the stovetop or in a crockpot for as long as you can handle the aromas wafting from your kitchen! Here’s our basic recipe:

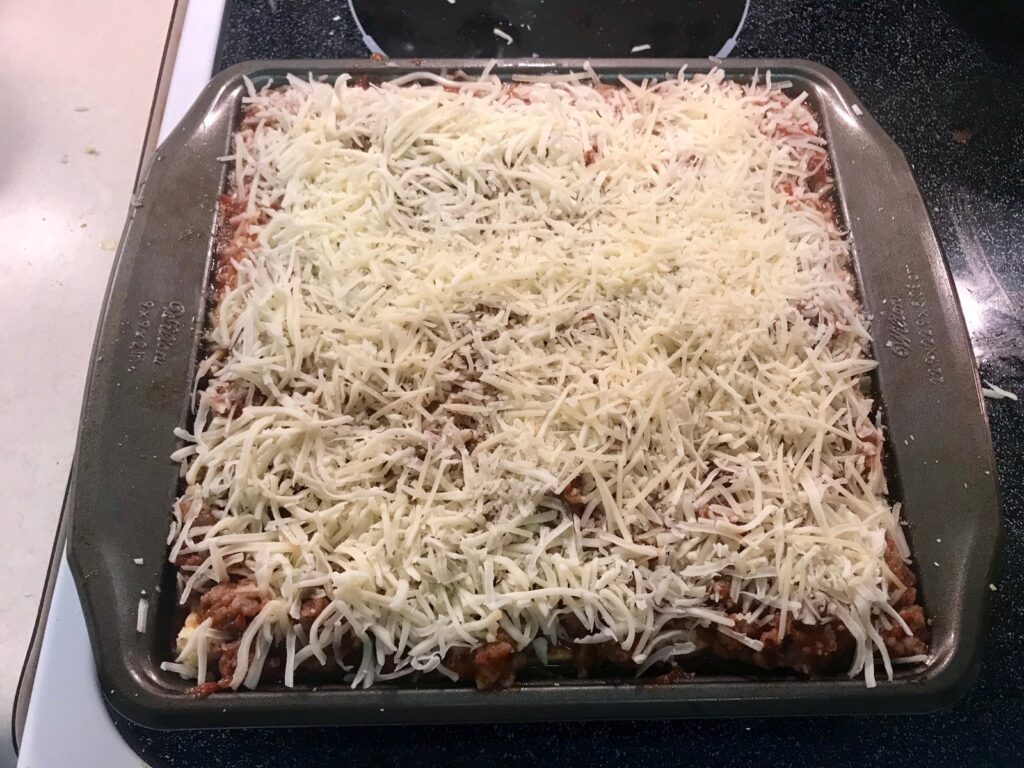
Cheesy Turkey Rice Casserole

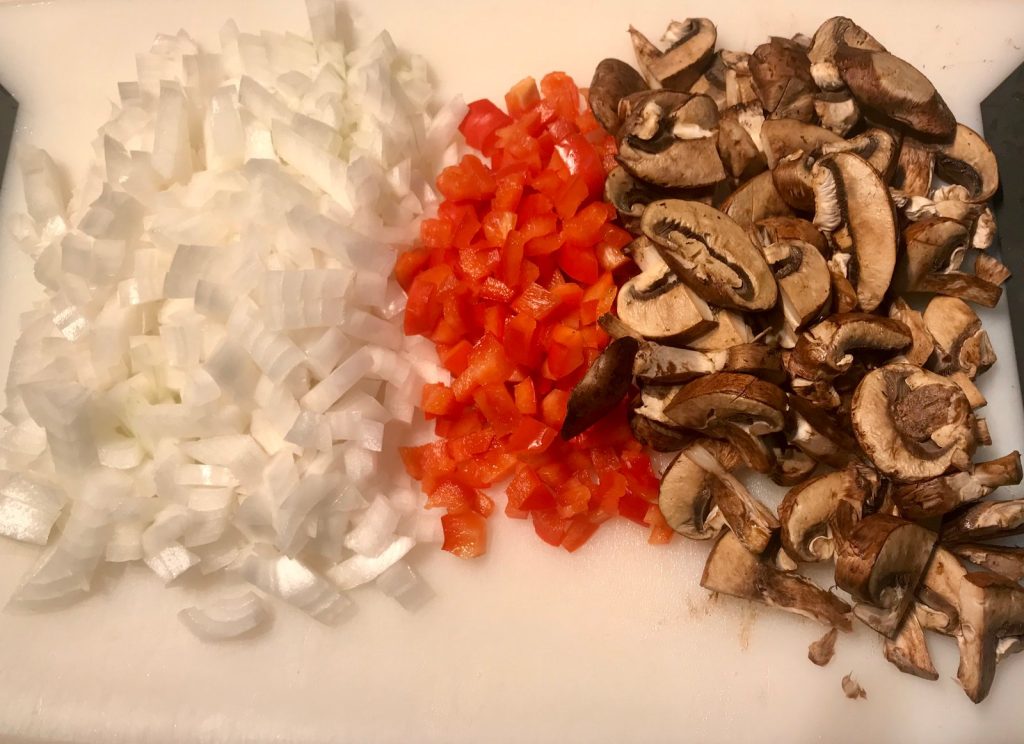
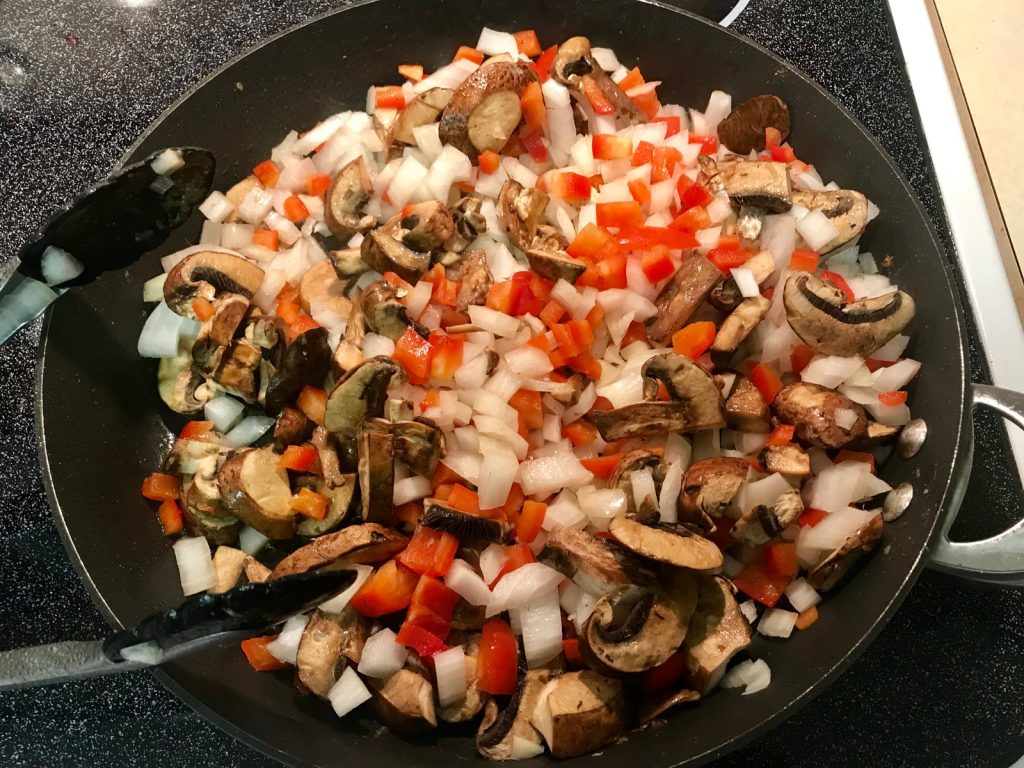
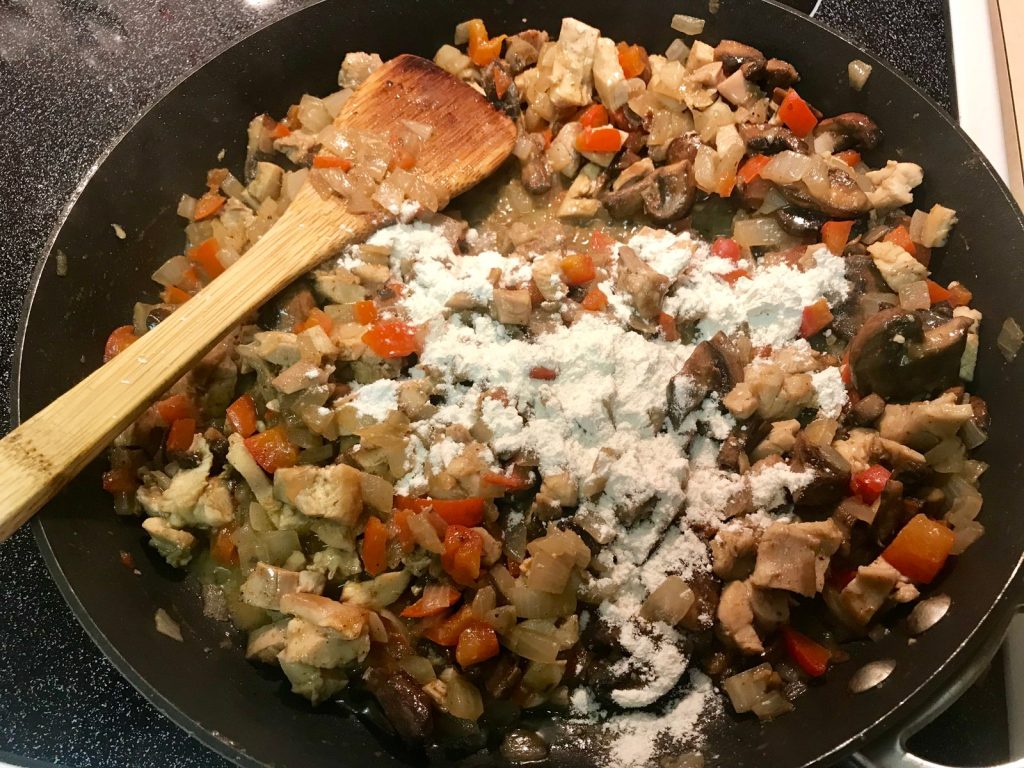
Most casseroles use some sort of “cream of something” soup as a base. If someone in your household can’t eat gluten, you know that this can be a challenge since most brands include wheat as a thickener. Have no fear, this scratch recipe is quick and easy… plus it’s delicious! By the way, substitute any leftover veggies in place of the peas. Broccoli and even leftover green bean casserole taste great here.

Turkey Sandwiches

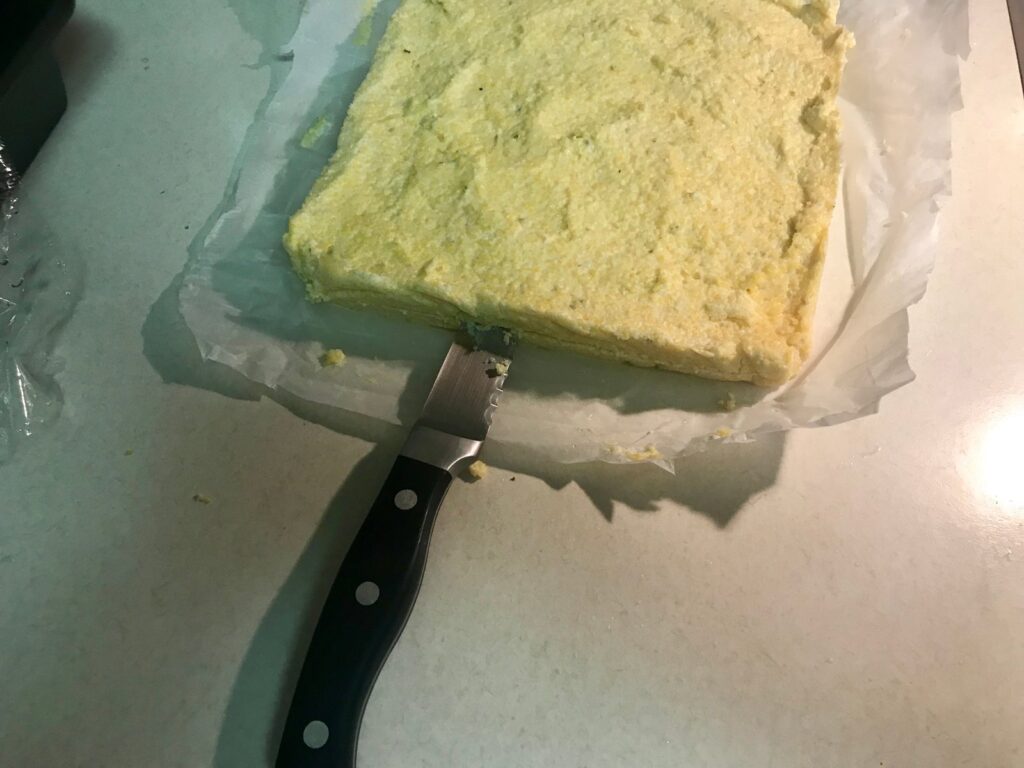
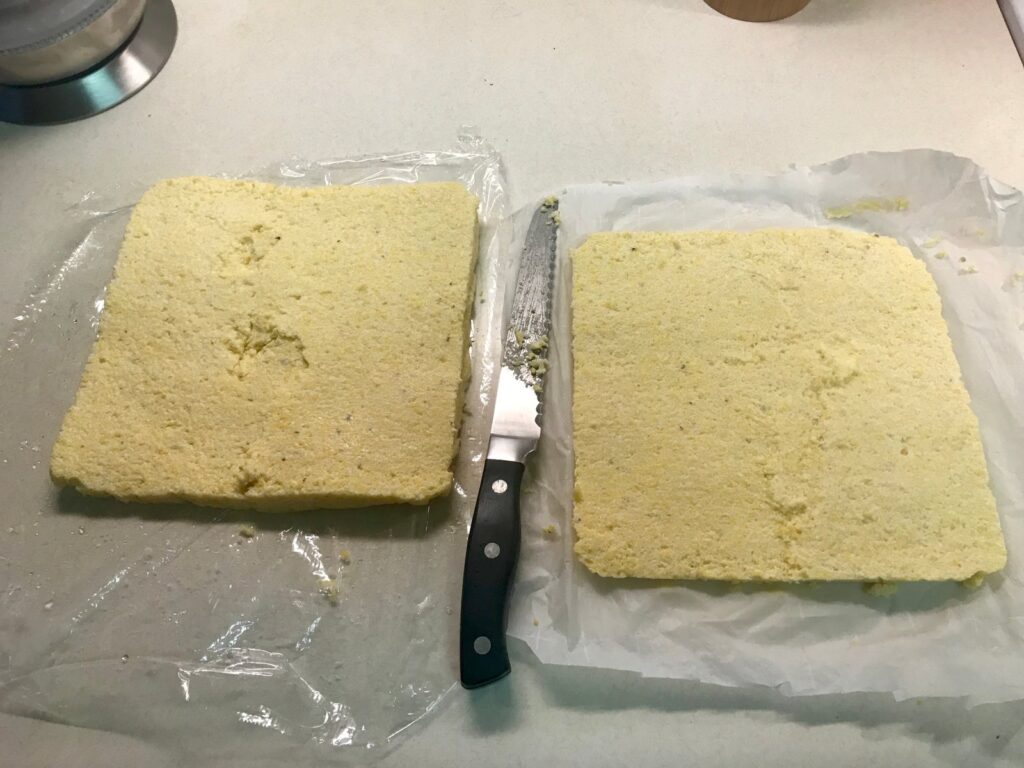
I know, everyone makes turkey sandwiches, where is the creative idea? But have you made one with a dressing waffle bun? Inspired by chicken and waffles, we take leftover dressing and press it into a DASH waffle iron. To make the sandwich, layer the waffles with gouda cheese, melted cranberry sauce, and turkey for a delicious sweet and savory sandwich that pleases.

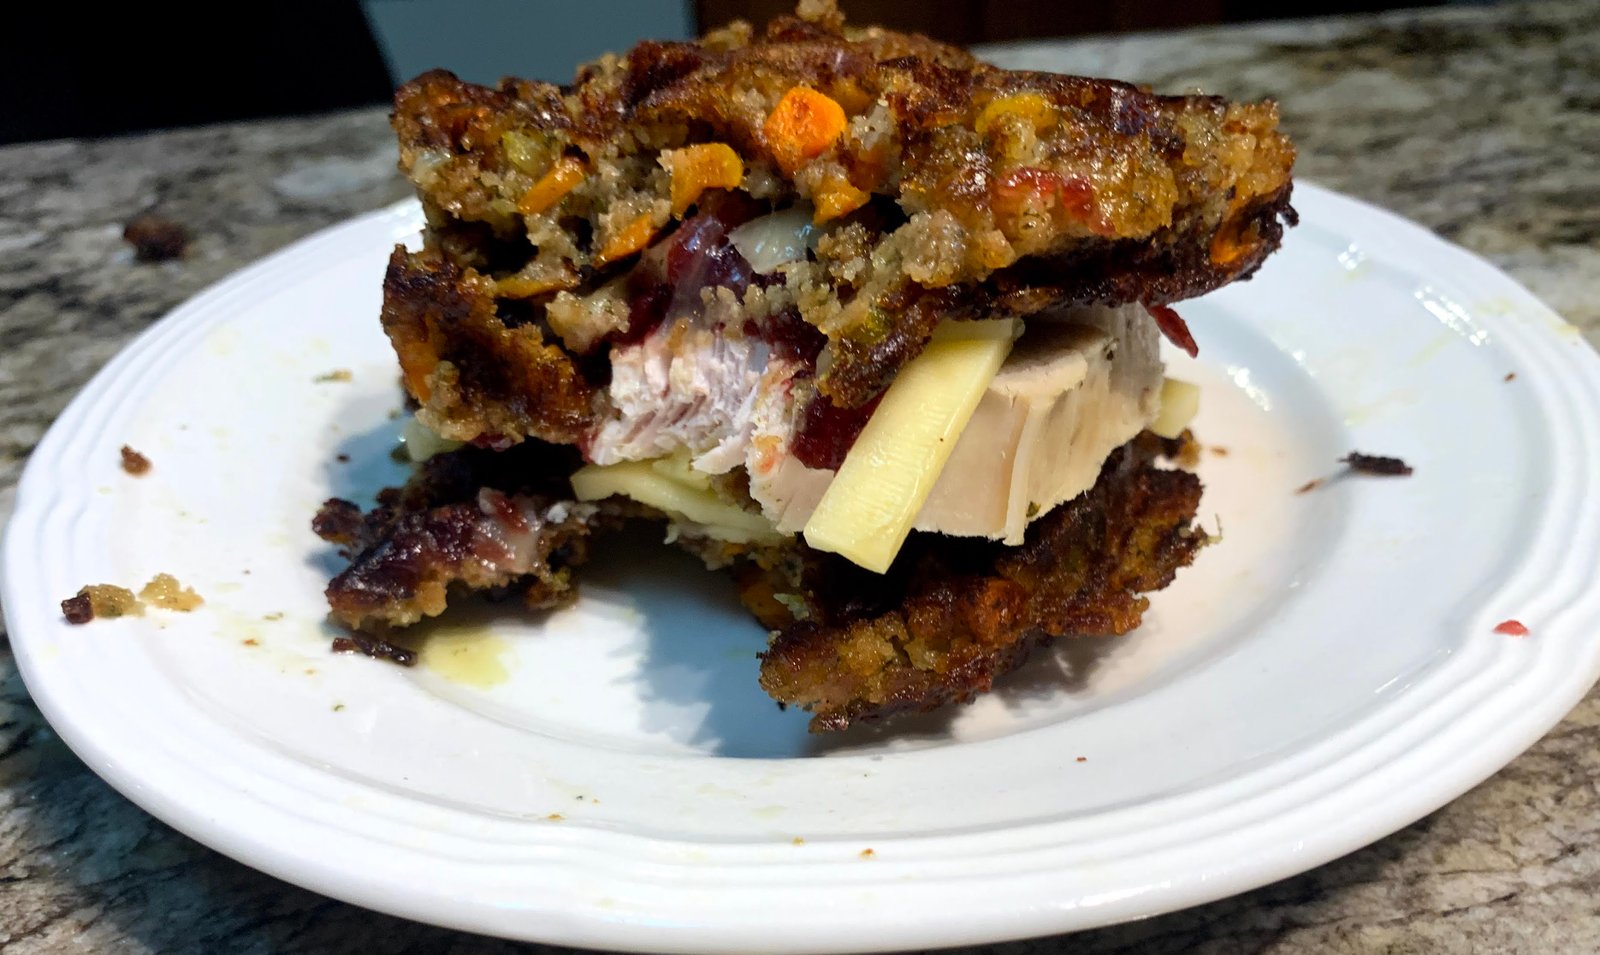
Photo of Dressing Waffle Bun sandwich

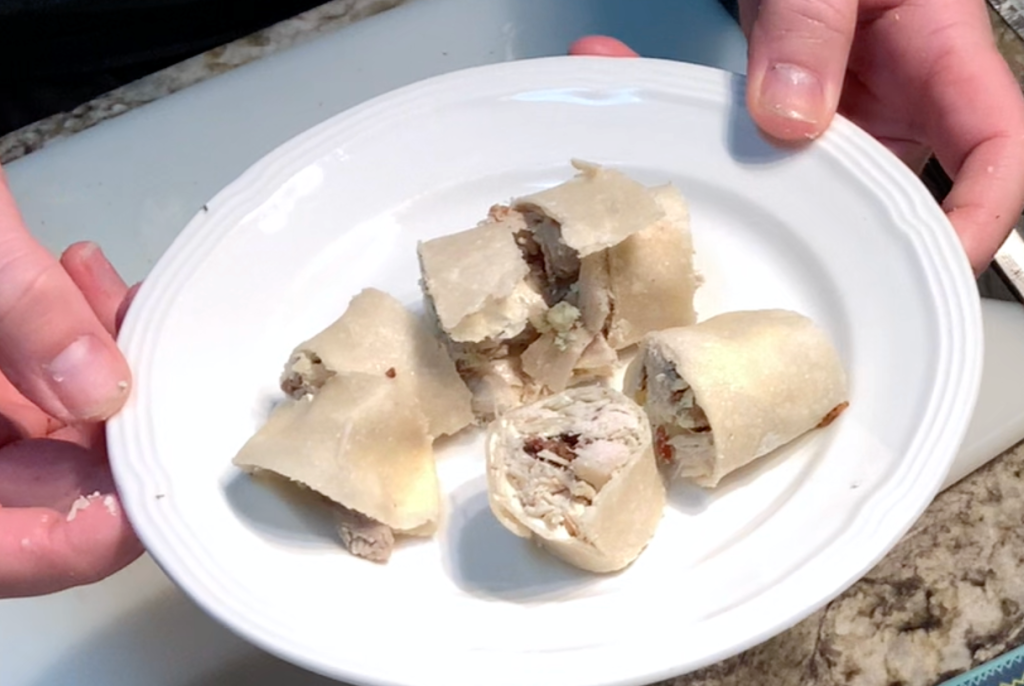
How about Turkey Bacon Pinwheels. Made with wraps, cream cheese, bacon, turkey, and your choice of cheese, it’s another quick way to get out of the turkey sandwich rut. This recipe is inspired by a keto version from Ruled.me.

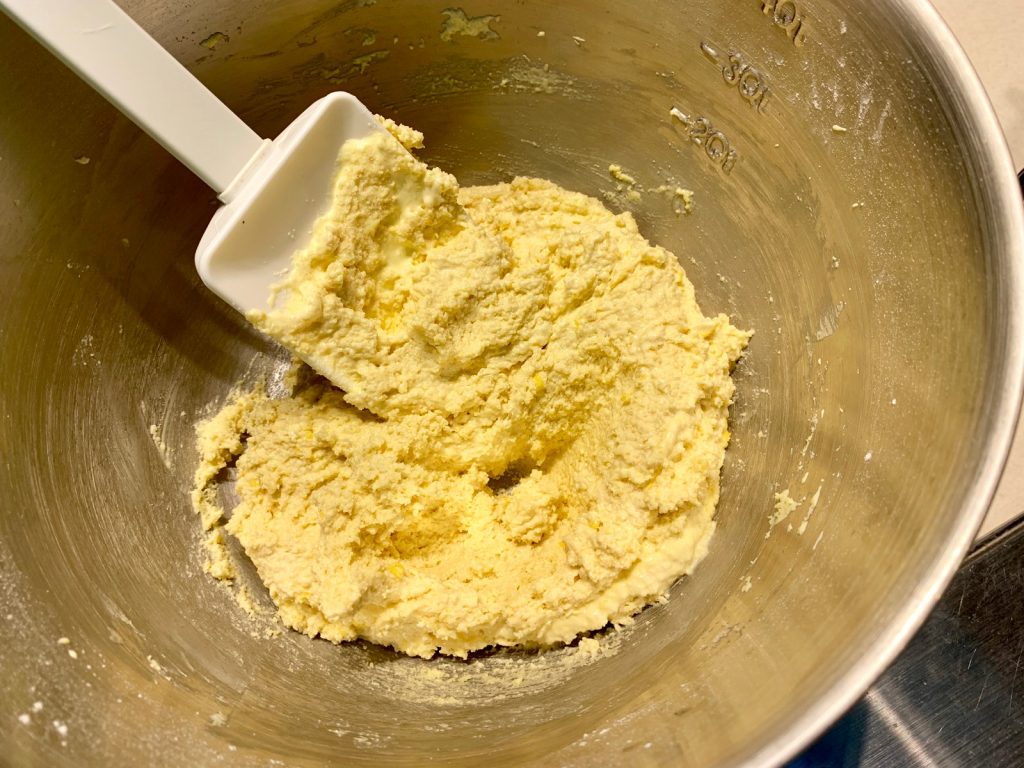
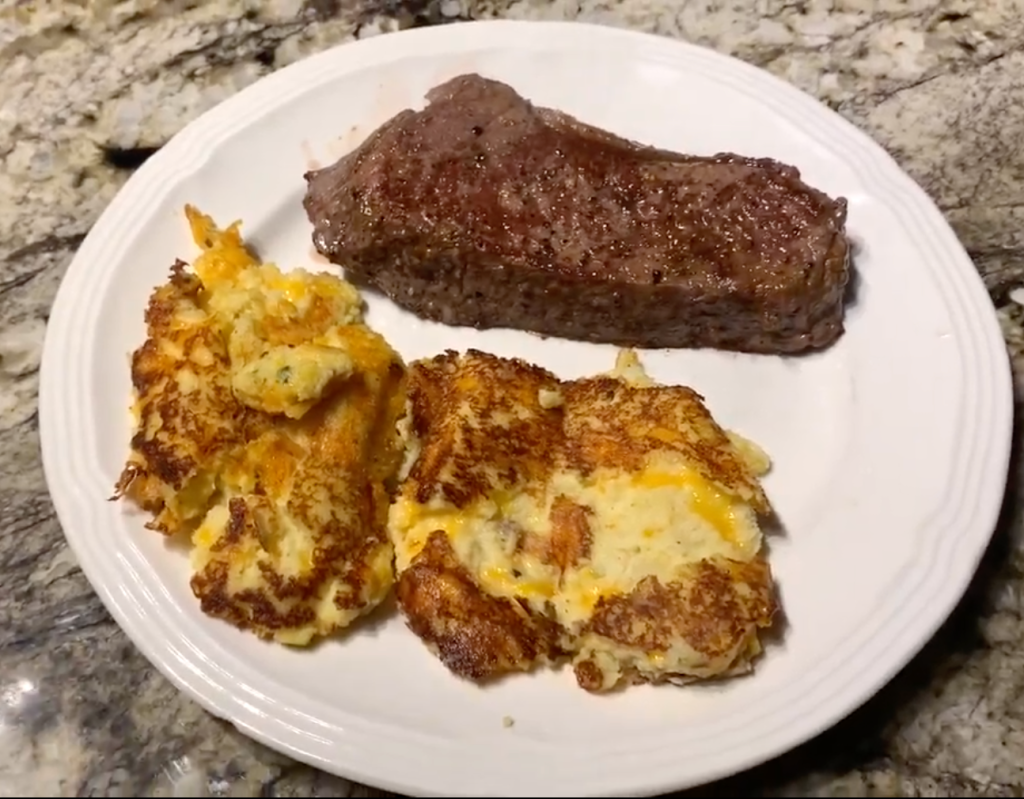
How about side dishes! Potato Pancakes

Michelle’s grandma’s Holiday Mashed Potatoes are fantastic the first time around. I’m not a big fan of them leftover because they always seem a little dry. To turn your leftover mashed into potato pancakes, follow these simple directions:

  • 2 cups mashed potatoes
  • 1/2 cup shredded cheddar cheese (or parmesan)
  • 1 egg
  • 1/4 to 1/2 cup milk
  • flour (if needed)

Mix everything together except the milk. Add milk as needed to get a spoonable consistency. If the mixture is too runny (or you started with wet mashed potatoes) add a little flour.

Heat a pan on medium-high heat with some olive oil and spoon out about 1/2 cup of potatoes for each pancake. Press them to about 1/2-3/4 inch thick. Cook on each side for 3-5 minutes or until lightly browned and crispy. Serve with sour cream, apple sauce (like latkes), or just as is.
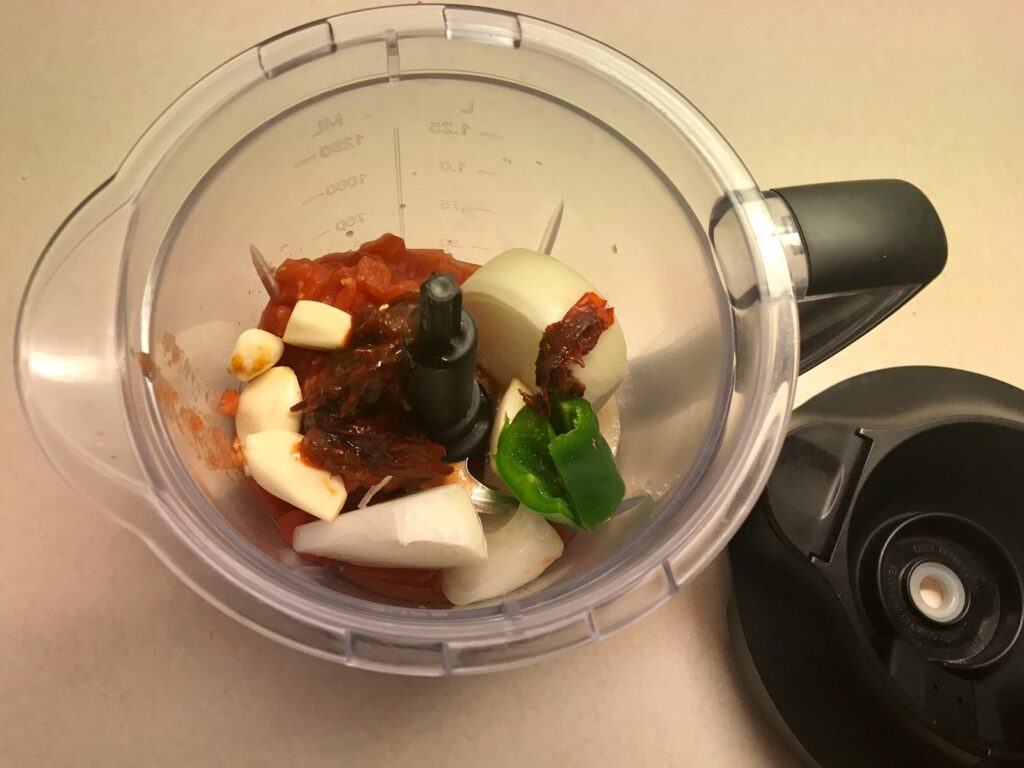
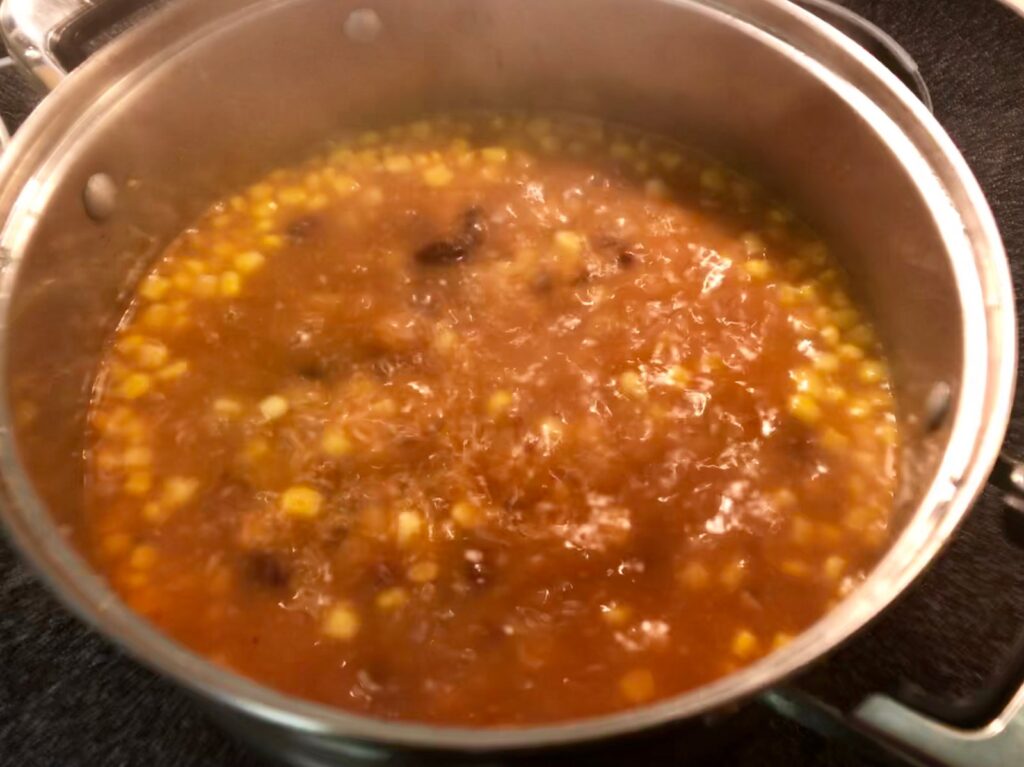
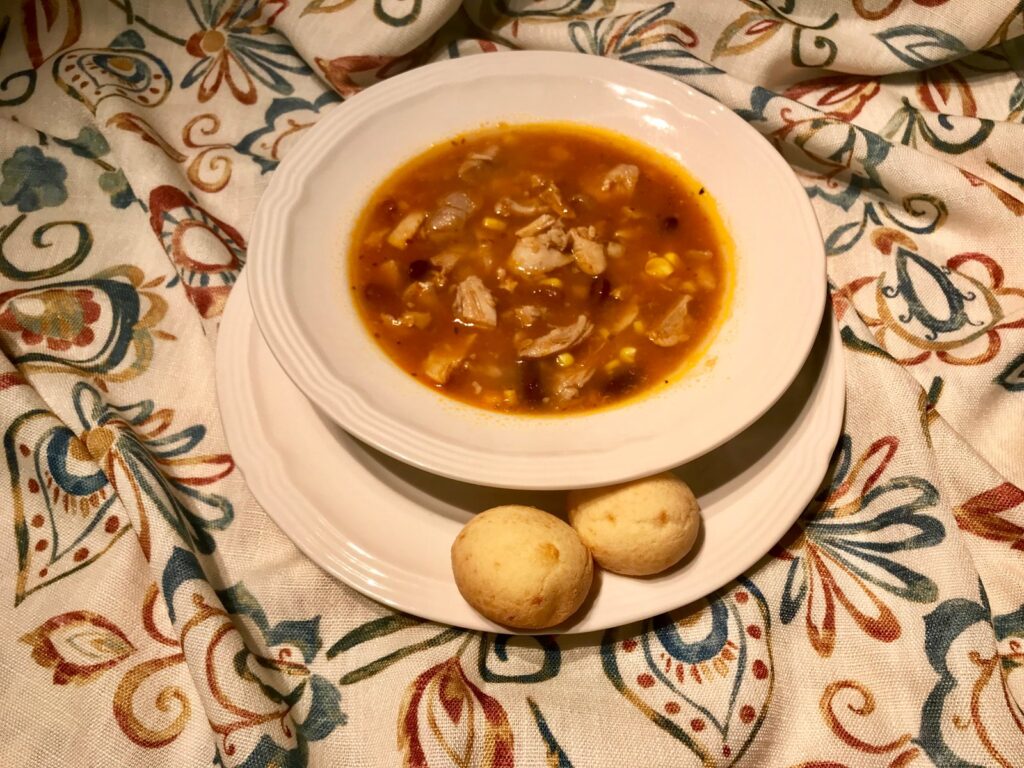
Thanks Cathy22 for the inspiration!

Turkey Fajita Soup

We love making anything with Mexican and Tex-Mex flavors! This soup is a quick and easy addition to our regular menu.

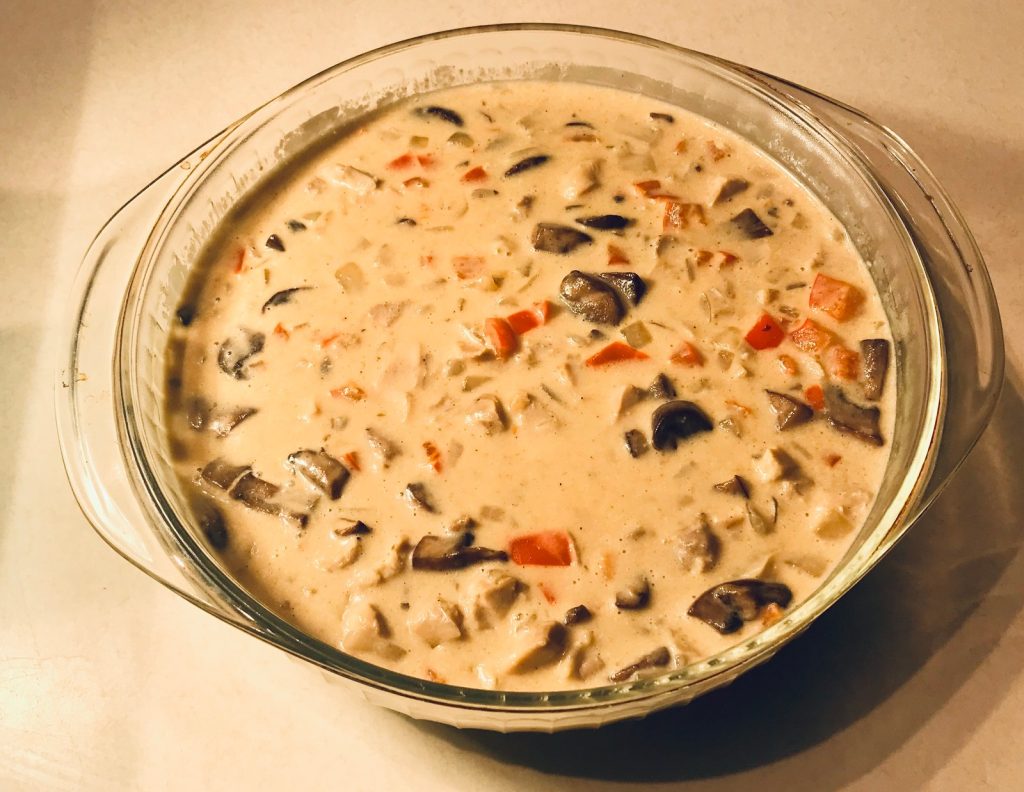
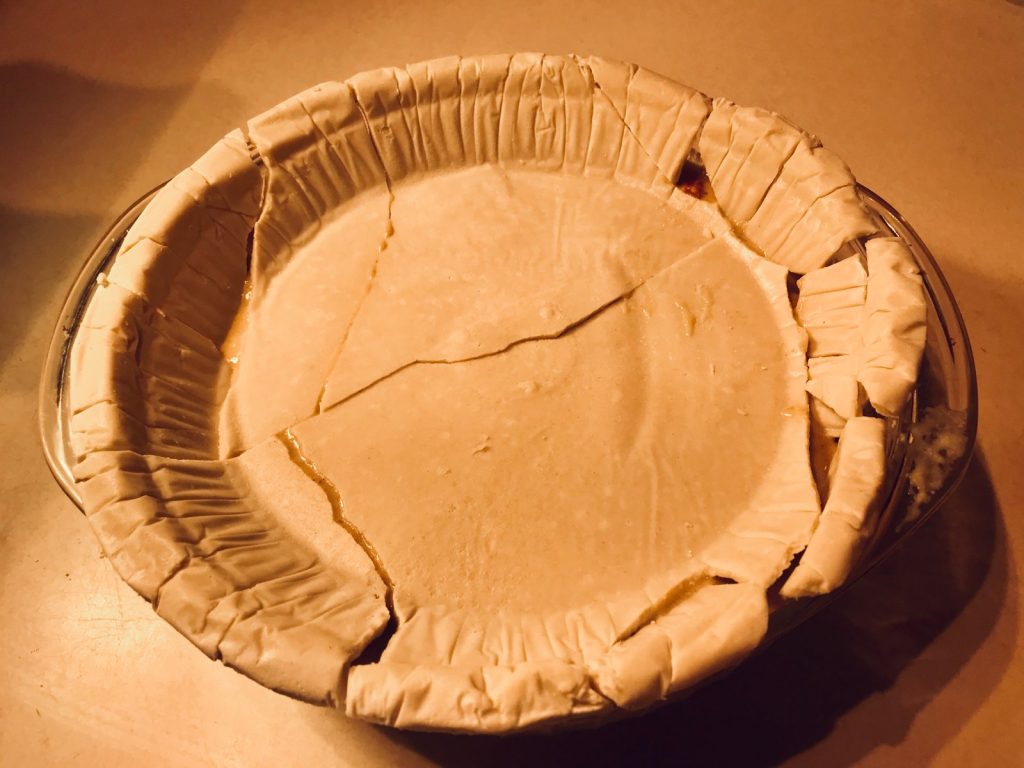
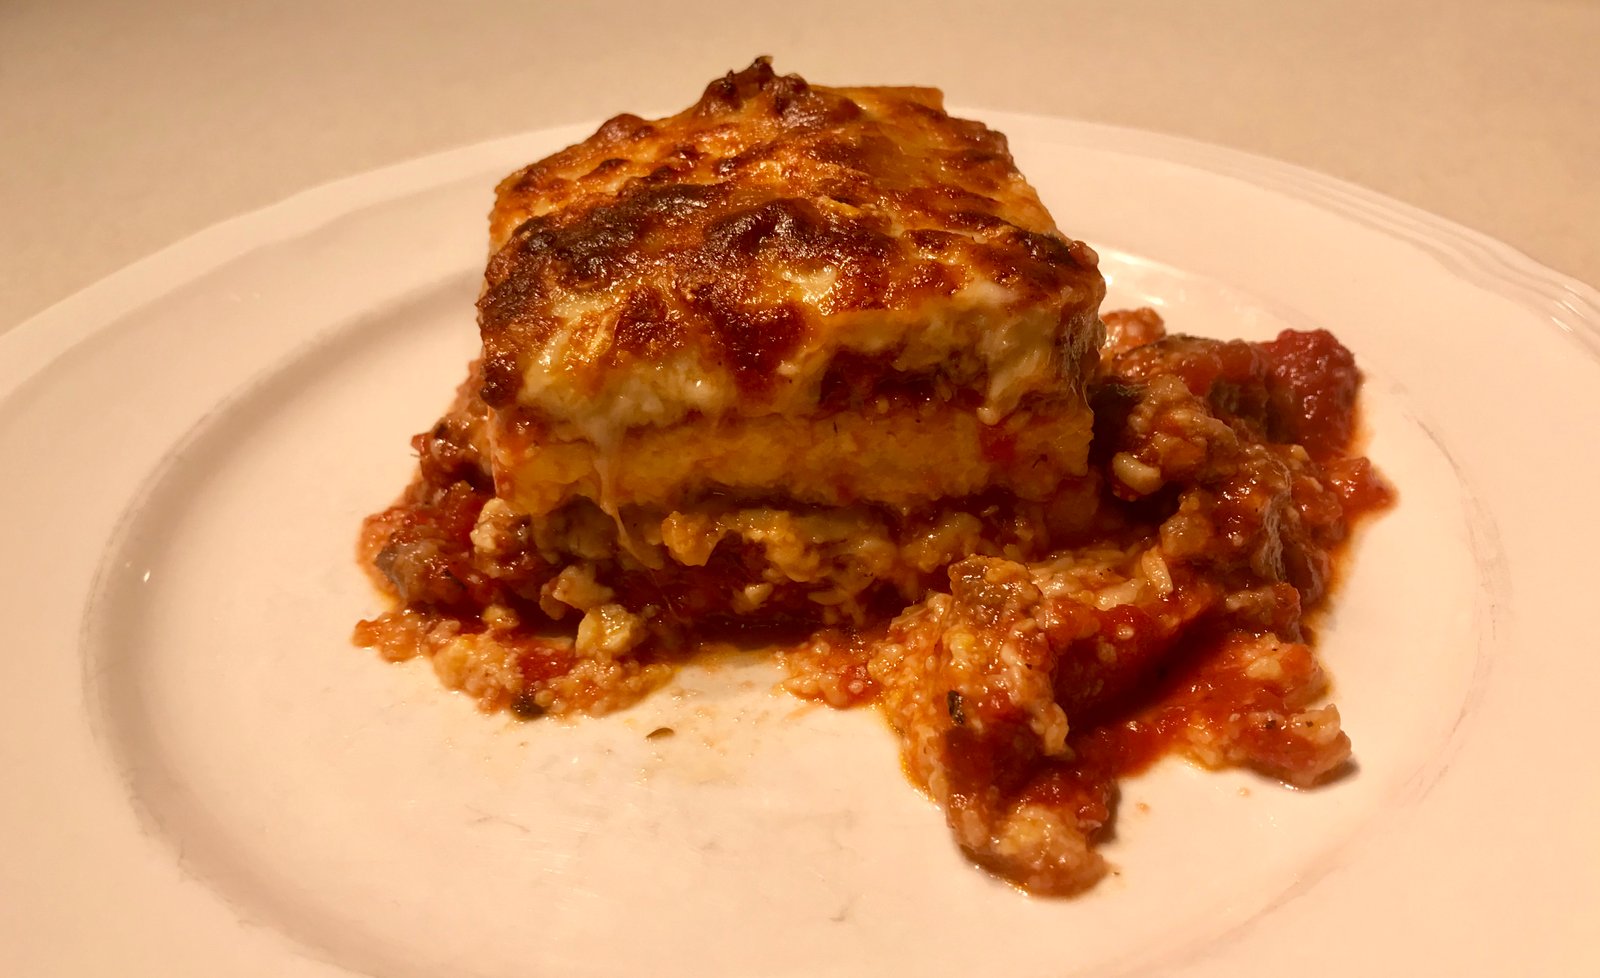
Modern Turkey Pot Pie

Not many dishes say comfort food like a pot pie. This really is a dish where you can add just about anything, including leftovers! This recipe comes from the New York Times Food Lab and it is one of our favorite versions of pot pie and it is classy enough to serve for company. Notice the wine pairings at the end of the recipe in the link below. Road to Shambala reminded us that we love pot pie!

BBQ Turkey Nachos

We mentioned that we love Mexican food right? Nachos are like ambrosia and we could eat them every week. Here is an interesting take inspired by pulled pork nachos that are popular on many bar menus now.

Recipes that didn’t make the video:

We have a bunch of favorites that we couldn’t include in the video but wanted to give you the recipe anyway. Here they are:
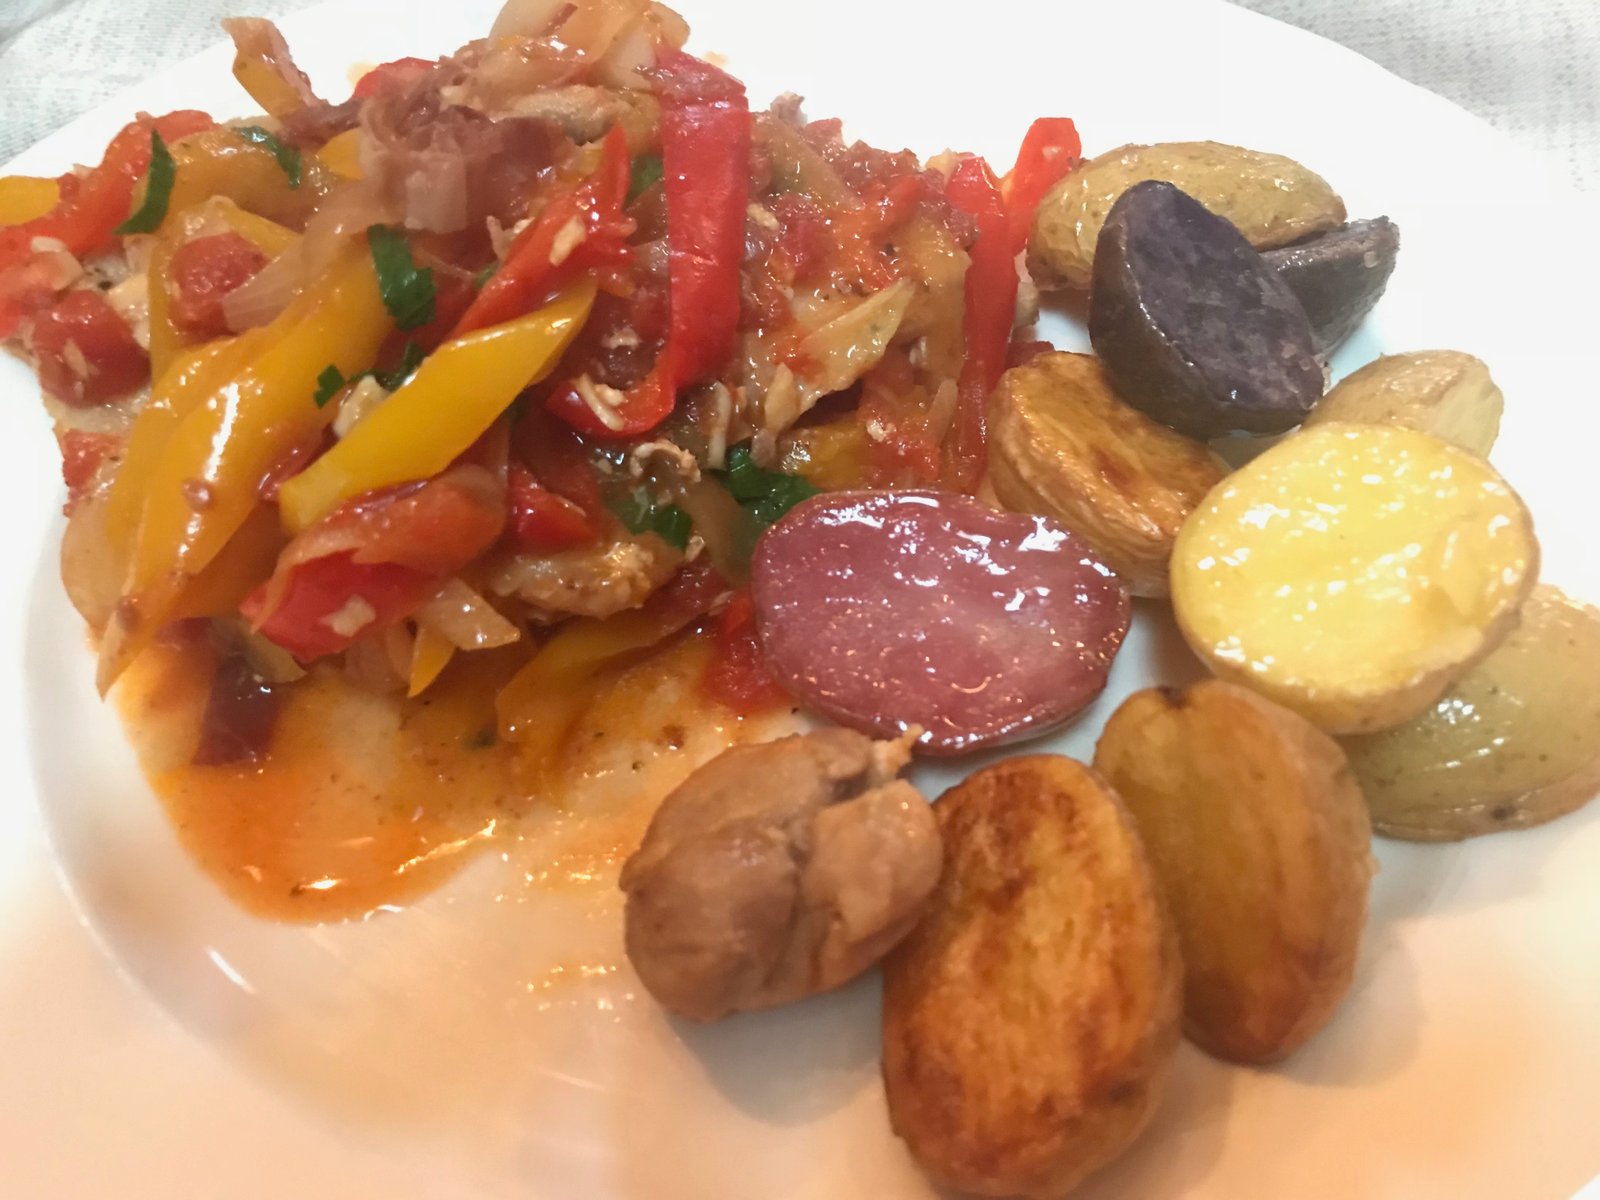
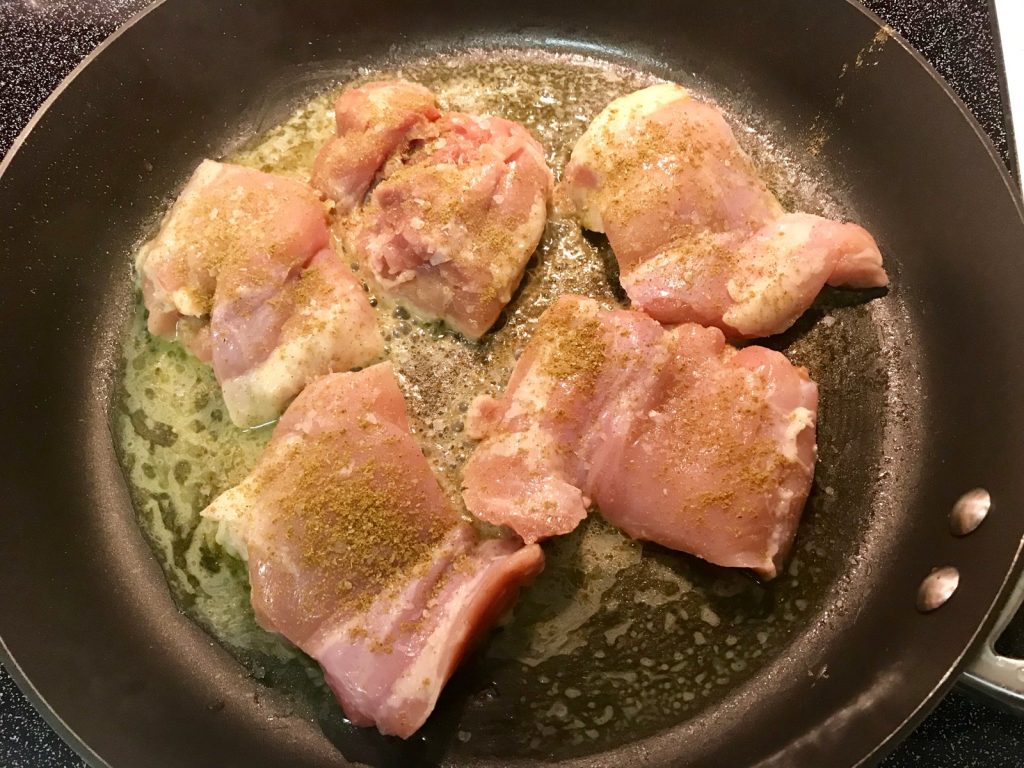
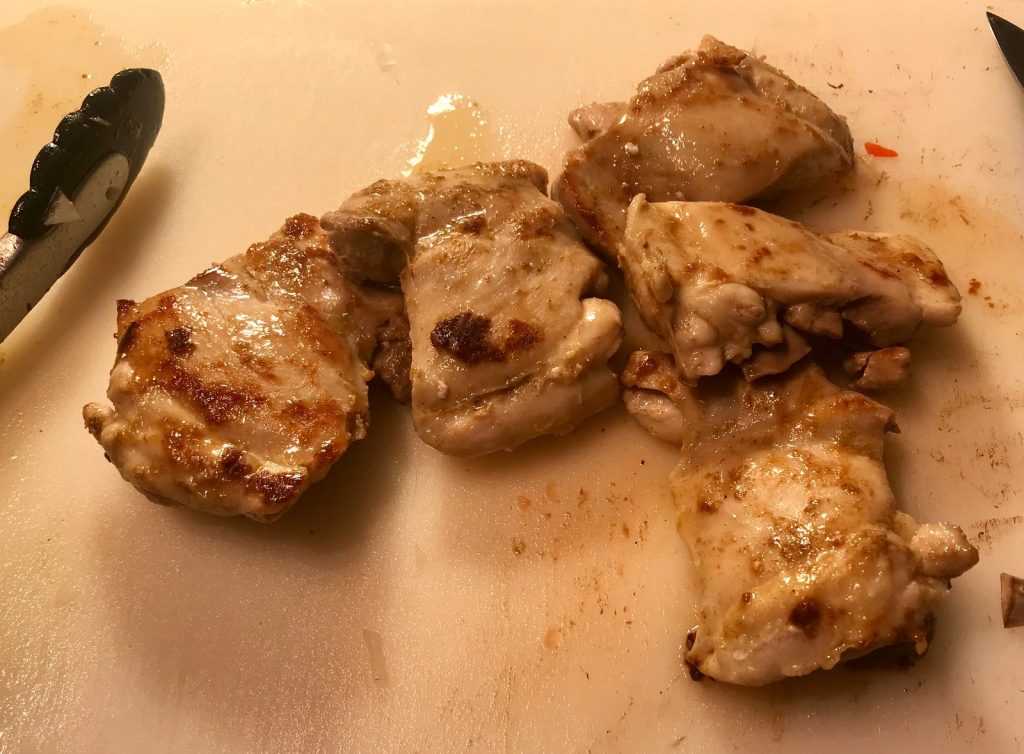
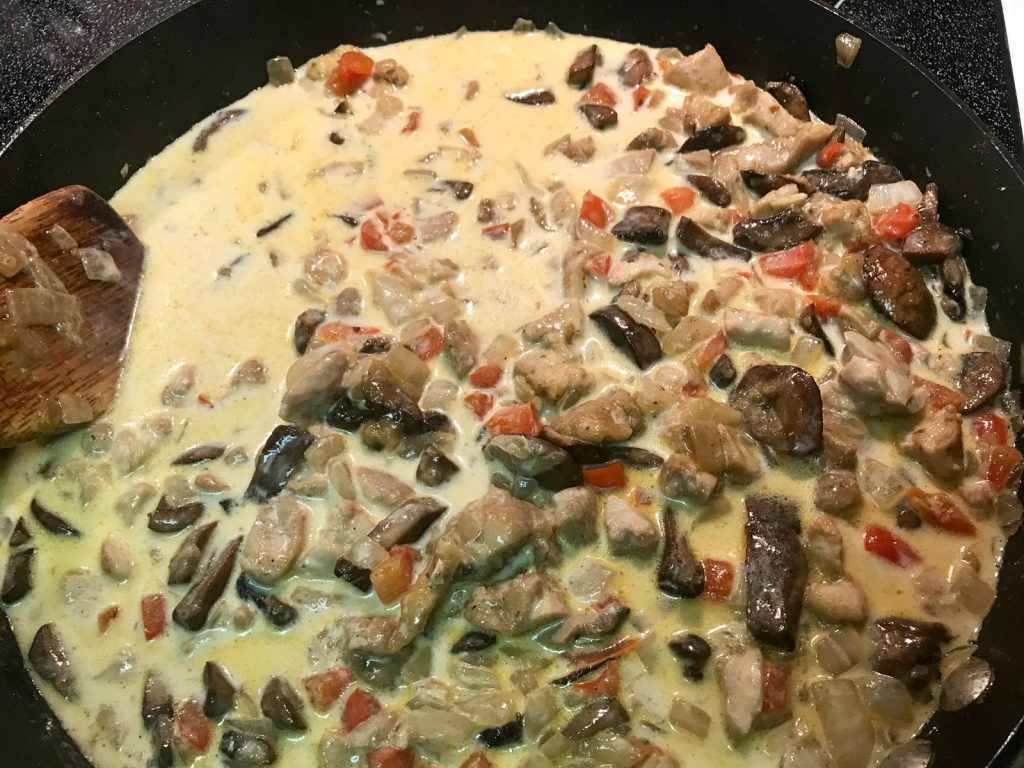
Chicken with Pancetta Cream and Peas is a Cooking Light Magazine take on Chicken Alfredo. We use leftover turkey breast and mix it in at the end of cooking. This is another great way of incorporating leftover veggies because you can mix in virtually any cooked veggies (think pasta primavera).

Ground Turkey Sweet Potato Skillet from Primavera Kitchen calls for ground turkey at the beginning of the recipe. We’ve found that skipping that direction and adding pieces of leftover turkey towards the end of cooking is equally tasty.

One final family recipe is for Grandma Baker’s Chicken and Dumpling Soup. Michelle’s grandma’s traditional chicken and dumplings recipe works equally well with turkey and produces dense dumplings that are another great comfort food staple on a cold winter’s night.

What are your favorite ways to use up those holiday leftovers? Leave us a comment below and let us know and if you try out one of our recipes, send a picture or tag us on Instagram. Maybe we’ll post up ham recipes after Christmas or Easter!

Recipe of the Month: Easy Short Ribs with Mushroom Risotto

When most people think about camping, they dream about roasting hotdogs and making s’mores over the campfire. When we go on our extended trips, that would get old really fast! We only eat hotdogs two or three times during our entire summer trip. Since I love to cook, I’m always trying to get creative without spending lots of time in the kitchen. Plus, in the 100º+ temperatures of Arizona, where we are right now, I don’t want to heat up the RV. Crockpots are great, because they do most of the work and I can leave it outside all day while we’re off playing. Of course, be aware of your surroundings, you don’t want to get the attention of the local wildlife and lose your dinner!

Easy Short Ribs with Mushroom Risotto

Serves 4-6

Ingredients:

For the crockpot:

  • 2 pounds of short ribs
  • ½ t salt
  • ½ t pepper
  • 1 T olive oil
  • 1 C dry red wine (or water)
  • 1 t garlic powder
  • 1 t onion powder
  • 1 T Worcestershire sauce
  • 2 pounds sliced mushrooms
  • 1 large sweet onion, sliced (optional)
  • 4 C beef broth

For the risotto:

  • 1 ½ C of arborio rice (the kind of rice matters, don’t use anything else!)
  • 1 t olive oil
  • 1 t minced garlic
  • 6 C of cooking liquid (topped off with water if there is not enough)
  • ½ C half and half
  • 1 C parmesan cheese, plus more for finishing
  • 2 T fresh chives

Instructions:

  1. Sprinkle the short ribs with salt and pepper. Heat oil in an iron skillet over medium high heat. Sear the short ribs for about 60 seconds on each side to get a nice crust on them. You might need to do this in batches. Place each piece of meat in the crock pot as they are finished. When all of the ribs are done, add wine or water to the pan and scrape up the browned bits. Pour this over the meat in the crockpot. You may skip this step if you’re lazy or don’t want to get another pan dirty. Just cover meat with salt and pepper and add wine or water directly to the crockpot.
  2. In the crockpot, add garlic powder, onion powder and Worcestershire sauce to meat. Top with the mushrooms. You could also add some sliced onion if you like. Add broth to cover meat. You may need to top off with some additional water to make sure the meat is fully submerged (the mushrooms and onion do not need to be covered).
  3. Put the crockpot on low and forget about it for 6-8 hours.

At dinner time:

  1. About 45 minutes before dinner, heat a large saucepan over medium heat with the olive oil and add the garlic. As soon as you smell the garlic, add the rice. Toast the rice for a few minutes until you can start to smell it also.
  2. Meanwhile, remove the mushrooms and onions from the crockpot and put them in a bowl. Put the short ribs in another bowl. As you continue through the next steps, make sure to drain the liquid from both bowls back into the cooking liquid.
  3. Add one cup of the cooking liquid to the rice and stir with a rubber spatula. When the liquid is mostly absorbed, it is time to add another cup. Make sure you keep track of how much liquid is added. The liquid should be at a gentle simmer throughout this process, do not try to rush this step. Keep stirring frequently so that nothing sticks to the bottom.
  4. Using a fork or tongs, pull the short ribs apart into small bite-sized pieces, saving back one full piece for each person you are serving.
  5. Once you are down to adding the final cup of liquid (number 6) taste the rice to check for doneness. It should have a little “bite” to it (al dente). If you would like it softer, add more liquid ½ cup at a time until you get it where you want it. Adjust seasoning, if necessary.
  6. To finish the rice, add the half and half and cheese and simmer for just a few more minutes. At the same time, add the mushrooms and onions into the risotto. Make sure that any liquid is drained from them or they will make the risotto too wet at this point. Once everything is ready, gently stir in the torn short rib pieces.
  7. To serve, spoon the risotto onto a plate and top with one full piece of meat. Sprinkle with parmesan and chives. We love to serve this with sauteed sugar snap peas or asparagus.

Our Favorite Recipes from the Camino: Tarta de la Abuela Borracho (Drunken Grandma’s Cake) Gluten-Free!

UPDATE: Check out our new how-to video to make Tarta de la Abuela Borracho here: https://youtu.be/gbQQPMR_Nf4

While walking across Spain and Portugal during the summers of 2017 and 2019, we were offered Tarta de la Abuela many times. It was always the same basic recipe, but with small variations such as vanilla, caramel, or even banana custard. We also ran into several abuelas (and more often abuelos) who would enjoy a little nip almost any time of the day, so we thought why not incorporate it into this delicious cake.

A Tarta de la Abuela that we were served in Pontevedra.

This cake is really a breeze to make and here in the States is often called an icebox cake. They’re not very common anymore, but I don’t know why. Let’s try to bring them back! If you want to simplify the recipe, you could always use instant pudding but grandma would not approve, plus the custard is actually really easy to make.

Everything you need for a pan of delicious cake.

Start by warming four cups of milk in a saucepan along with a stick of cinnamon. Before it starts boiling, remove the pan from the heat. Cover and let it stand until slightly cooled. If it is too hot when added to eggs in the next step, they will cook (not good). Remove the cinnamon stick and put 1 c of milk into a bowl.

In a small bowl, mix four egg yolks, a quarter cup of corn starch, and one cup of sugar. It will be a thick paste.

Begin combining the milk little by little, stirring constantly, with the egg mixture. Return to stove and heat, stirring frequently until the mixture is thickened and somewhat reduced. Keep the heat low so that the custard does not burn to the bottom of the pan. This custard should be thick.

Once the custard has your desired texture, remove from heat and allow to cool slightly then add a half cup of Orujo Tostada. Orujo is a traditional liqueur made from distilled grapes after they have been pressed for winemaking. The result is Spanish white lightening. It is often flavored and served as a digestive after dinner. The most popular flavors are an herbal and a coffee flavor, but one store we visited had more than twenty flavors available! You probably won’t be able to get Orujo in the U.S. so substitute caramel vodka or even butterscotch schnapps.

To make the ganache layer, heat a half cup of cream and four tablespoons of butter in another saucepan until it starts to steam a little. Remove from heat and add one cup of chocolate chips. Stir until thoroughly melted and combined.

At assemble the cake, begin by soaking several cookies in the bowl of milk and transfer to a loaf pan. Don’t soak them too long or they will break apart.

Who doesn’t love to dip cookies in milk?

Cover the cookies with a layer of half of the custard. Put another layer of milk-soaked cookies. Top with half of the chocolate ganache. Repeat with cookies, the remainder of the custard, and the fourth layer of cookies.

And finally, add the last layer of chocolate custard. Cover with plastic wrap and refrigerate for at least 2 hours or overnight. By allowing the cake to sit, the cookies will absorb some of the liquid from the custard and become soft and cake-like. The photos in this post are of a half recipe so the layers are a little thinner.

The smaller the pan, the thicker the final layers will be.

Tarta de la Abuela Borracho (Drunken Grandma’s Cake)

  • 4 cups milk
  • 1 cinnamon stick
  • 2-3 packages of gluten free graham crackers (or shortbread style cookies)
  • 1 cup sugar
  • 1/4 cup cornstarch
  • 4 egg yolks
  • 1/2 cup caramel liqueur
  • 1 cup dark chocolate chips
  • 4 T butter
  • 1/2 cup cream or half and half

Warm the milk in a saucepan with the cinnamon. Before it starts boiling remove from the heat. Cover and let it stand until slightly cooled. If it is too hot when added to eggs, they will cook (not good).

Remove the cinnamon stick and put 1 c of milk into a bowl.

Mix the egg yolks, the corn starch and the sugar in a bowl. It will be a thick paste.

Start adding the milk little by little mixing constantly with the rest of the ingredients. Return to stove and heat, stirring frequently until the mixture is thickened and somewhat reduced. Keep the heat low so that the custard does not burn to the bottom of the pan. This custard should be thick.

Once the custard has your desired texture, remove from heat and allow to cool slightly then add the liqueur.

Heat cream and butter in another saucepan until it starts to steam a little. Remove from heat and add chocolate chips. Stir until thoroughly melted and combined.

To assemble the cake:

Begin by soaking several cookies in the bowl of milk and transfer to a loaf pan. Don’t soak them too long or they will break apart.

Cover the cookies with a layer of half of the custard.

Put another layer of milk-soaked cookies.

Top with half of chocolate ganache.

Repeat with cookies, remainder of the custard, and a four layer of cookies.

And finally, add the last layer of chocolate custard. Cover with cling film and refrigerate for at least 2 hours or overnight.

Recipe of the Month – Tarta de Santiago

While walking along the Camino de Santiago, there is always plenty of food to choose from, but one of my favorite things is to ask for “especialidad de la casa” or specialty of the house. Whether it is garlic soup, barnacles, home-made cheese, tuna ragu, or octopus, they were always fresh, usually delicious, and definitely a taste of the local culture. One of our favorite local specialties was Tarta de Santiago, an almond cake commonly found in Galicia, but popular across Spain. With only six simple ingredients, the cake is actually quite easy to make and delicious for any occasion. If you are going to walk the Camino, many local stores will sell metal knight’s cross stencils to use for decorating the cake, but a quick google search for the cross of St. James will give you plenty of options to print out. I printed mine on card stock to make it easier to lift off the cake once it was covered in powdered sugar.

After working through several recipes and a couple of different methods, this cake is most like the ones we preferred while doing our taste-test research in Spain. This cake is naturally gluten-free but we did find some that were commercially baked that did contain wheat flour. After some experimentation, here is my recipe for Tarta de Santiago.

Prepare a 9-inch cake pan by cutting. piece of parchment paper to fit the bottom of the pan. Butter the bottom and sides of the pan and place the paper in the pan. Buttering the bottom keeps the paper from moving when you pour the batter in.

In a small bowl, separate 5 large eggs. Use a cereal bowl and then pour the whites into a large bowl so that if a yolk breaks you don’t ruin the entire batch of whites.

Beat the egg yolks with one cup of powdered sugar until they lighten in color and stream off the beaters in thick ribbons.

Zest a lemon and then mince the lemon west until it is very fine. I don’t like biting into a piece of zest when I’m eating the cake. Mix the zest and one teaspoon of pure almond extract into the egg yolk mixture.

Add two cups of finely ground almond flour into the egg mixture by hand. Try to find almond flour that is pale white in color. Many brands are ground before the skins are removed and have brown flecks in them. This will not affect the flavor, but the cake isn’t as pretty in the end. This mixture will be very thick

In another bowl, beat the egg whites with half a teaspoon of salt and a quarter cup of powdered sugar until stiff peaks form.

Take a quarter of the egg whites and mix into the yolk mixture to begin to lighten it. Add another quarter and continue to gently mix together. Finally, add the last half of the eggs whites and mix gently until fully incorporated. Don’t over mix at this point or the cake will be less light. Some recipes skip the step and the whole eggs are added at the beginning. These versions of the cake will be more dense and heavier. We did taste some like this in Spain but they weren’t as good, in my opinion.

Pour the batter into the prepared pan and bake at 350º for 30 minutes. Check the cake and if the center seems too wet, bake for another 5-10 minutes but don’t wait for it to be dry in the center. Also, I would not recommend putting the cake tester directly in the center because you will see the hole since the powdered sugar will not cover it.

Let the finished cake rest in the pan until it is cool and then use a thin knife to cut around the edge to help the cake release. If you are not serving it immediately, wrap it in plastic wrap so that it doesn’t dry out. Gluten-free baked goods are notorious for becoming more dense and dry as they sit, so do not refrigerate it either. I baked this cake the night before we were serving it and it was still perfect the next evening and leftovers on the third day were just as good.

Right before serving, place the cross on the cake and dust with powdered sugar poured into a sieve. Carefully lift off the cross using the tip of a knife to leave the imprint behind.

Tarta de Santiago

  • 5 large eggs
  • 1 1/4 c powdered sugar, divided, plus more for dusting the finished cake
  • 1 lemon, zested
  • 1 t almond extract
  • 2 cups finely ground almond flour
  • 1/2 t salt

Separate the eggs into two large bowls. Using a mixer, combine the yolks and 1 cup of sugar until pale in color and thick ribbons form. Beat in the finely minced lemon zest and almond extract. Stir in the almond flour until well combined. The mixture will be very thick.

In the other bowl, beat the egg whites with the salt and 1/4 cup of sugar until stiff peaks form. Work a quarter of the egg white mixture into the yolk mixture. Continue adding the white a bit at a time until fully incorporated, being careful not to overmix and deflate the whites.

Pour into a 9-inch cake pan that has been buttered and lined with parchment paper. Bake at 350º for 30-40 minutes, being careful to not dry out the cake. It should still be moist in the center. Fully cool before removing from the pan.

Before serving, place a cut-out of the cross of St. James on the cake and dust with powdered sugar. Remove the stencil with the tip of a knife.


Serve the cake with cafe con leché, orujo, or your favorite glass of Spanish wine and enjoy this taste of Northern Spain and the Camino! We hope you’ve enjoyed our journey so far across Spain and now up the coast of Portugal. If you haven’t already, make sure to hit the subscribe button and check us out on Instagram and YouTube.

Recipe of the Month – Basque Chicken with Roasted Potatoes

Today we are sleeping in as we prepare to begin walking our Camino, leaving from Leon, Spain, tomorrow morning. I don’t know what we will find to eat today in Leon, but if we can’t find anything inspiring we know of a fine little Mexican restaurant called King Kong near the Cathedral.

On our 2017 Camino, the first real meal that we ate on the Way was a Pilgrim’s dinner in a small restaurant in Saint-Jean-Pied-de-Port the night before we started walking. We didn’t know it at the time, but the meal was the classic Poulet a la Basque or Basque Chicken. It was so tender, piquant, salty, and oh-so-good that I had to figure out the recipe. On my birthday later that year, Michelle bought me Yosmar Martinez’s Tastes of the Camino Cookbook. The first recipe is for Basque Chicken. Her recipe is not exactly like the one we had in SJPdP, but it gave me a jumping off point. So with Yosmar’s forgiveness for “borrowing” parts of her recipe, here is my version of Basque chicken. This version will serve 2-3 people.

Begin by seasoning one and a half pounds of boneless skinless chicken thighs with salt and pepper and browning it in a pan with olive oil. It does not need to be cooked through. Set the chicken aside.

Add sliced onion, red and yellow pepper, four cloves of minced garlic, and a cup of petite diced tomatoes to the pan and cook until everything is softened, about ten minutes.

Add half a cup of dry white wine and cover to simmer on low for thirty minutes. Taste the sauce and season with additional salt and pepper if needed but be careful to not make the dish salty due to the garnish later. Also, a small amount of sugar may be added if the tomatoes are particularly acidic. Add the chicken back in and continue to simmer on low for an additional 20 minutes or until the chicken is cooked through and slightly falling apart.

During the simmer, prepare the potatoes. Preheat the oven to 400º and cut fingerling potatoes in halves or quarters depending on size. Toss them in some olive oil and salt and place them in a roasting pan or cookie sheet. Roast for fifteen minutes, tossing several times to make sure they get browned evenly.

Meanwhile, for the garnish, cut four ounces of Serrano ham (I used Prosciutto) into thin strips and cook over medium-high heat in a skillet. There is no need to add oil as the ham will render some fat quickly. Cook until the strips begin to brown and get crispy. Roughly chop some flat leaf parsley for additional garnish. Don’t skip this, the green brightens the final dish and lightens the flavor too.

Spoon the sauce into a large serving bowl and place the chicken on top. Garnish with the ham strips and parsley. Serve the potatoes on the side. Don’t forget the white wine!

Basque Chicken with Roasted Potatoes

  • 1-1/2 pounds of boneless skinless chicken thighs
  • 4 T olive oil, divided
  • 1 large onion sliced
  • 4 cloves of minced garlic
  • 1 red and 1 yellow bell pepper, sliced
  • 1 c petite diced tomatoes
  • 1/2 c dry white wine
  • 4 oz Serrano ham
  • 2 sprigs flat leaf parsley
  • 1 pound of fingerling potatoes
  • optional sugar
  • salt and pepper to taste

Begin by seasoning the chicken thighs with salt and pepper and browning it in a pan with half of the olive oil. It does not need to be cooked through. Set the chicken aside.

Add onion, red and yellow pepper, minced garlic, and diced tomatoes to the pan and cook until everything is softened, about ten minutes.

Add wine and cover to simmer on low for thirty minutes. Taste the sauce and season with additional salt and pepper if needed but be careful to not make the dish salty due to the garnish later. Also, a small amount of sugar may be added if the tomatoes are particularly acidic. Add the chicken back in and continue to simmer on low for an additional 20 minutes or until the chicken is cooked through and slightly falling apart.

During the simmer, prepare the potatoes. Preheat the oven to 400º and cut potatoes in halves or quarters depending on size. Toss them in the remaining olive oil and salt and place them in a roasting pan or cookie sheet. Roast for 15 minutes, tossing several times to make sure they get browned evenly.

Meanwhile, for the garnish, cut the ham (I used Prosciutto) into thin strips and cook over medium-high heat in a skillet. There is no need to add oil as the ham will render some fat quickly. Cook until the strips begin to brown and get crispy. Roughly chop some flat leaf parsley for additional garnish.

Spoon the sauce into a large serving bowl and place the chicken on top. Garnish with the ham strips and parsley. Serve the potatoes on the side.

On a side note…

We hope you enjoy following us along our journey across Spain and Portugal in the coming weeks. Hit subscribe for up to date blog posts, and make sure that you check out our Instagram feed for real-time, up to the minute posts along the Way. Our goal is to post on Instagram daily, and YouTube and blog at least once a week. Thanks for coming on this adventure with us! Our July recipe will be for Tarta de Santiago, an almond cake that is popular across Spain but especially in Galicia. Buen Camino!

Recipe of the Month – Taco Pizza (with gluten-free option)

We love pizza! I will put almost anything on a pizza: BBQ chicken, ham and pineapple, caramelized apples and oatmeal, or seafood. But one of our favorite pizza toppings is taco and if you’ve never had a taco pizza you are missing out. Other than the crust, there is nothing in this recipe that would include gluten, but always check your store-bought seasonings and sauces to be sure, some may have gluten hidden in the ingredient list.

Start with the pizza crust. If you don’t have gluten issues, use your favorite store bought crust or make your own. After lots of research, for the best gluten-free pizza crust, we have discovered two options. We love the Bob’s Red Mill pizza crust mix that you can buy here but if you want a real treat, try this recipe from MeaningfulEats.com. It is quick and easy to make and works well with any gluten-free flour blend. Do what you need to get your crust ready and start to brown a pound of ground beef in a skillet.

Drain the hamburger and add a packet of taco seasoning (warning: some brands do contain wheat as a thickener) and a quarter cup of water. Mix let most of the water evaporate out. Set aside to cool.

Pre-bake the crust to get it mostly done. Raise the oven temperature to 480º. In a bowl, combine a can of refried beans, a half a can of crushed tomatoes, and one cup of taco sauce. Add one teaspoon each of garlic powder, oregano, and marjoram. If the sauce seems to think to spread, add a little more tomato or taco sauce.

Spread the bean mixture on the pre-baked crust. Any sauce that is left over (you should have about a cup) makes a great dip for tortilla chips!

Top the sauce with one cup of shredded mozzarella cheese, the taco meat, and another cup of cheddar or Mexican blend cheese.

Bake in the oven for 10 to 15 minutes until the cheese is melted and bubbly (mine got a little overdone, oops).

Top with shredded lettuce, diced tomatoes, and any other taco toppings that you enjoy. The most important topping is crushed taco Doritos. Slice and enjoy

Taco Pizza

  • Pizza dough (gluten free mix, your favorite recipe, or store bought)
  • 1 pound ground beef
  • 1 packet of taco seasoning
  • 1 can of refried beans
  • 1 cup of crushed tomatoes or tomato sauce
  • 1 cup of taco sauce
  • 1 tsp each garlic powder, oregano, and marjoram
  • 1 cup of shredded mozzarella cheese
  • 1 cup of shredded cheddar or Mexican blend cheese
  • shredded lettuce
  • diced tomatoes
  • sour cream
  • Taco Doritos
  • Other taco toppings that you enjoy

Prepare the pizza crust as needed and prebake it according to directions. It should be almost done.

Brown the ground beef in a skillet. Add the taco seasoning and about 1/2 cup of water. Cook until thickened. Set aside to cool.

Mix the beans, tomato sauce, and taco sauce together in a bowl. Add the seasonings and combine.

Spread the sauce on the crust. Top with mozzarella cheese, taco meat, and finish with the cheddar cheese.

Bake at 480º for about 10 to 12 minutes or until the cheese is bubbly or the desired amount of brown. Top with lettuce, tomatoes, and crushed Doritos.

Does it pizza? What would like to see on a pizza as an unusual topping? Maybe we’ll create a special pizza just for you! Leave a comment below to let us know. Also, make sure you subscribe for email notifications each time we post a new blog. If you want to follow our upcoming Camino, check out Cruisin with the Colemans on Instagram and YouTube!

Recipe of the Month – Cajun Chicken Pie

We’ve been seeing a lot about Mardi Gras in the last week and it really gave me a taste for some New Orleans inspired food. We were already planning to make a chicken pot pie this week, so I figured that with a few tweaks it could really warm up the cold weather we’ve been having and take us back to the Big Easy.

Start by heating one tablespoon of butter and one tablespoon of olive oil in a large skillet. Place about a pound of boneless skinless chicken thighs in the pan and sprinkle with salt and half a teaspoon of poultry seasoning. Cook until browned on both sides and there is no pink. Set aside on a plate.

Meanwhile, chop a large onion, red pepper, two stalks of celery, and half a pound of mushrooms. Someone else in the house finished off the celery, so none for us this time around in the pot pie!

Put the vegetables in the pan and cook until they are softened and reduced in volume. Allow all of the liquids to cook off and scrape up any browned bits.

Dice the chicken into small bite sized pieces and add it to the veggies.

Add three tablespoons of flour (or two tablespoons of gluten-free flour blend) and one and a half teaspoons of Tony Chachere’s Creole Seasoning. Stir in and allow the flour to cook for a minute.

Add one cup each of chicken broth and half and half. Bring to a boil and allow the gravy to thicken. Taste and adjust seasonings if needed. Be careful about adding more Tony’s, it has a lot of salt and it’s easy to overdo it. If you want more spice, add some hot sauce or cayenne pepper.

Pour the whole mixture into a two quart casserole dish. Before you scroll any further, I must say… don’t judge.

Top the filling with a pie crust. There are several options here. I usually make a fresh crust and my favorite recipe is in this post for Praline Pumpkin Pie. Tonight I was trying to get things done a little quicker and used a premade crust. You can use a rollout refrigerator crust but I’ve never found a gluten-free one. Wholly Wholesome makes a really good crust that you can find in the freezer section. Pop the shell out of the pie pan and place it on top of the filling. I dropped ours and it shattered. In that case, piece it back together on top of the filling (I told you already, no judgment)! Once the crust thaws, roll the edges down and crimp them

If you’re eating it now, bake in a 400º oven for thirty minutes. You can also refrigerate it overnight to cook tomorrow. Set the pie out to return to room temperature for at least thirty minutes and bake at 350º for one hour.

We’re eating ours tonight for dinner, check out our Instagram page to see the final results around 7 PM.

Deep Dish Cajun Chicken Pie

  • 1 large onion
  • 8 oz mushrooms
  • 2 stalks celery
  • 1 red sweet pepper
  • 1 T butter
  • 1 T olive oil
  • 3 T flour (or 2 T gluten-free flour blend)
  • 1 pound boneless skinless chicken thighs
  • 1/2 t poultry seasoning
  • 1 1/2 t Tony Chachere’s Creole Seasoning
  • 1 c chicken broth
  • 1 c half and half

Heat butter and oil in a large skillet. Add the chicken and sprinkle with salt and the poultry seasoning. Cook until browned on both sides and no longer pink in the center. Place aside on a plate. While the chicken is cooking, dice the vegetables.

In the same skillet, cook the vegetables until they are soft and reduced in volume, cooking of all of the liquid. Meanwhile, dice the chicken into bite-sized pieces.

Add the chicken to the vegetables along with the Creole seasoning and flour. Mix together and cook for one more minute. Add the milk and broth and bring to a boil. Allow the mixture to thicken and adjust seasonings if necessary. Pour the filling into a 2 quart casserole dish and cover with a pie crust.

Bake at 400º for 30 minutes. The pie will hold well overnight. Let it come to room temperature and bake at 350º for one hour.

Recipe of the Month – Mexican Chicken Soup

Yep, you read that correctly, the recipe of the week is becoming the recipe of the month so that we can focus on bringing you more content in other areas, such as Camino planning and recaps of some of our best previous adventures.

With all of the cold weather we have been having lately, I’ve been making lots of soup. It not only warms the stomach but also the house! I love this recipe but it’s not ours, we have to thank Laurie (one of Michelle’s colleagues) who found the recipe on Cooks Country. On a side note and a fun fact we learned that Laurie has diligently subscribed to Cooking Light magazine since its inception 40 years ago and was one of their first subscribers! The soup has just enough kick to warm you up on multiple fronts. Of course, you could adjust the spicy heat up or down depending on your preferences.

Begin by bringing six cups of chicken broth to a simmer in a large pot and add about a pound and a half of chicken thighs to poach for 15 minutes.

In a food processor, combine half of a large onion, a can of diced tomatoes (or Ro-tel tomatoes with you like things on the spicy side), half (or more) of a seeded jalapeno pepper, four cloves of garlic, one canned chipotle chili and a tablespoon of the adobo sauce it’s packed in, and a teaspoon each of salt, pepper, and cilantro. Pulse the whole thing until it is smooth and well pureed. If I had any tortilla chips in the house this is probably as far as I would have gone because it looked and tasted like a smooth salsa at this point.

Remove the chicken from the pot and set aside to cool. Pour the broth into a container to skim the fat off the top.

In the same pot, heat a tablespoon of oil and add the “salsa” to the pot. Let it simmer for five minutes or so to cook the “green-ness” out of it and allow the flavors to combine.

Skim the fat off the broth and add it back into the pot along with two cups of frozen corn and a can of rinsed and drained tri-blend beans (or kidney, pinto, or black beans). Allow the soup to come to a boil and then reduce the heat. Simmer for 15 minutes. Meanwhile, run a knife through the chicken to cut it into bite-sized pieces. Take the pot off the heat and add the chicken and two tablespoons of lime juice. Taste and adjust seasonings if needed (I added a little more salt).

Top the soup with diced avocado, slices of fresh or crispy tortilla, or a little cojita or queso fresco. We served it with pao de queijo, which are amazing gluten-free cheese rolls.

Mexican Cheese Soup

  • 6 c chicken broth
  • 1 1/2 pounds chicken thighs
  • 1/2 of a large onion
  • 1 t each salt, pepper, and cilantro
  • 1 can of diced tomatoes (get the kind with chilis or jalapeno if you like)
  • 1/2 jalapeno pepper, seeded
  • 4 cloves garlic
  • 1 canned chipotle pepper plus 1 T adobo sauce it’s packed in
  • 1 T oil
  • 2 c frozen corn
  • 1 can beans, any variety, drained and rinsed
  • 2 T lime juice
  • assorted toppings such as diced avocado, Mexican cheese, or tortilla strips

Bring chicken broth to a boil and add chicken. Simmer for 15 minutes until the chicken is done and there is no pink remaining.

In a food processor, combine onion, spices, tomatoes, garlic, and peppers and pulse until smooth.

Remove chicken from pot and set aside to cool. Pour broth into another container to skim fat once cooled. In the same pot, heat the oil and add the tomato mixture. Simmer for 15 minutes over medium heat to combine flavors.

After skimming fat from broth, add back to the pot along with the corn and beans. Bring to a simmer and cook for 15 minutes. Shred the chicken and add to the pot at the end of cooking along with the lime juice. Adjust seasonings if needed.

Let us know if you try this recipe or any other recipe we have posted! Tag us on Facebook or Instagram with the hashtag #cruisinwiththecolemans! We’d love to hear from you!

Recipe of the Week – Polenta Lasagna

When living a gluten-free lifestyle, whether by choice or necessity, there are many foods that you assume you may never be able to eat again. While restaurants have become more knowledgeable about gluten-free options over the last five years, it is still common to be offered a salad or a burger with no bun as the only option on a “gluten-friendly” menu. Most grocery stores have progressively stocked a variety of manufacturers but the choices are limited. You have to go to a specialty or high-end stores if you want choices.

Some foods are a real rarity in the gluten-free marketplace. Lasagne noodles are one of them. Gluten-free noodles range from “you can’t tell the difference” to “cardboard or sticks” and aside from penne, spaghetti, and elbows, there are virtually no other pasta shapes readily available so we adapt and improvise.

This polenta lasagne came out of one such improvisation. If you don’t know polenta, it is the Italian version of ground cornmeal, fancy grits, if you will. You can find it in several different spots in the store. There is often a fancy imported variety in the Italian aisle that runs about $10 a pound, but if you look in the aisle with breakfast grains like oatmeal you can find both grits and polenta for under $4 a pound. There two different types, a fine white corn or hominy meal often marketed as grits and coarser yellow corn meal which is more commonly marketed as polenta. There is a slight difference in flavor but they are basically interchangeable (as long as you’re not cooking for food snobs). When you chill cooked polenta (or grits) it turns into a solid cake-like mass that can be cut into slices and used in a variety of ways (try it on the grill with some olive oil, salt, pepper, and parmesan). We love Bob’s Red Mill brand.

For the lasagna, cook the grits at least an hour before you plan to assemble the lasagna but the night before is even better. In a saucepan, heat two and a half cups of half and half and two and a half cups of chicken broth to a simmer. Turn down the heat and add half a teaspoon of salt and slowly whisk in one and a quarter cups of polenta. The polenta is likely to lump together, so make sure that the liquid is moving when you add it and keep stirring with the whisk until it is fully incorporated. Cook on low for about fifteen minutes until the liquid is fully absorbed and the polenta is smooth and creamy. Stir frequently to keep it from sticking to the bottom and scorching. Remove from the heat, add half a cup of grated parmesan cheese, and stir well to incorporate. Let the polenta cool slightly while you prepare the pan.

Cut a piece of parchment paper about four inches longer than your 9×9 brownie pan. Fold the edges over so the paper will lay in the bottom of the pan and crease the corners to make a liner. Pour the still hot polenta into the pan and use a spatula to spread it evenly. Cover with plastic wrap pressed down onto the surface of the polenta, otherwise, it will get a rubbery skin on the top, and place in the refrigerator to cool for at least one hour, but overnight is better.

In a sauté pan, brown one pound of Italian sausage with the casings removed. While it is cooking remove the polenta from the pan. Using a long serrated knife, cut the polenta in half, making what are essentially two large lasagna noodles.

In the same pan the polenta cooled in, pour about half a cup of marinara and place one piece of polenta on top.

Add the rest of the marinara sauce to the sausage. Now layer just as you would a traditional lasagna. I don’t use a layer of ricotta because the polenta is already pretty creamy once reheated. Pour half of the meat mixture over polenta and top with a half cup of mozzarella cheese. Top with the second slice of polenta, the rest of the meat mixture and the remaining cup and a half of cheese.

Place the pan on a foil lined cookie sheet because it will bubble over, and place in a 350º oven for one hour. Cut into nine servings and serve with a healthy salad and some Chianti.

Polenta Lasagna

  • 2 1/2 cups half and half
  • 2 1/2 cups chicken broth
  • 1/2 t salt
  • 1 1/4 cup polenta
  • 1/2 c grated parmesan
  • 1 lb Italian sausage, casings removed
  • 1 jar of marinara sauce (or your favorite spaghetti sauce)
  • 2 cups shredded mozzarella cheese

Bring broth and half and half to a simmer. Add salt and whisk in polenta. Cook for 15 minutes, stirring frequently to keep from sticking or scorching. Remove from heat and stir in parmesan cheese.

Line a 9×9 pan with parchment paper and spread polenta all the way into the edges. Cover with plastic wrap and cool overnight or at least one hour in the refrigerator.

Once cooled and very firm, slice polenta into two sheets with a long serrated knife.

Remove casings from sausage and brown in a sauté pan. Pour 1/2 cup of marinara sauce into the same pan the polenta cooled in and add the remaining sauce to the sausage. In the pan, layer one slice of polenta, half the sausage mixture, and 1/2 cup of mozzarella cheese. Top with the second slice of polenta, remaining sauce, and remaining cheese.

Place the pan on a lined cookie sheet and bake at 350º for one hour. Makes 9 servings.

Recipe of the Week – Cruiser’s Platter (Gluten-Free Fried Fish and Shrimp)

One of our goals in the coming year as we travel is to find local specialties and convert them into both gluten-free and when possible, healthier meals. While on the Gulf Coast over Christmas, we got to eat quite a bit of seafood and it was delicious. Almost every restaurant we went to offered a sailor’s platter, captain’s platter, or even an admiral’s platter. The more expensive the restaurant, the higher the rank of the platter!

Unfortunately, finding gluten-free fried fish was not possible in the Fort Myer’s area. If you know of someplace, comment below because we’re going back next year and want to check it out.

After our last fishing misadventure, we decided to try again. Michelle’s requirement was that we spent some of our time fishing and some of our time searching for dolphin and manatee. Captain John at Conway Charters did not disappoint. After meeting him at a local marina, he took us out on his boat to search the canals and creeks for some manatee. With his knowledge, it didn’t take to long and our first goal was checked off with this 6-8 foot long male manatee.

Next goal our list: catch some fish. We didn’t have much luck on this day – the fish just weren’t biting. We did manage to bring in two sheepsheads, and as they say, any day on the water is a good day. We did complete our third goal also, seeing some dolphin on our return to the marina, but enough about that, let’s cook up some fish!

Luckily for me, Captain John filleted the fish we caught. If you’re not lucky enough to have fresh fish, look for a firm fish that has thicker fillets at the store. Cod works well, as would catfish. You will need about a quarter pound per person and about the same amount of peeled, deveined shrimp. You could also look for clams, scallops, or any other seafood that looks good at the store.

Begin by preparing you breading station. In a bowl, combine about one cup of half and half with two teaspoons apple cider vinegar and stir well. The vinegar will curdle the milk and create buttermilk after sitting for about ten minutes. In another bowl, you will need about two cups of cornbread mix such as Krusteaz Honey Cornbread. In the final bowl, combine 1 cup of gluten-free flour blend with 2 teaspoons of Tony Chachere’s Creole Seasoning. If you don’t like things too spicy you could use Old Bay instead. If you want some extra kick, add a little hot sauce to the buttermilk. Make sure that the seafood is mostly dry. I put it in the fridge uncovered for about thirty minutes while I was getting everything else ready to go.

Left to right: Cornmeal mix, buttermilk, seasoned flour, seafood

Pour about 3-4 inches of canola or peanut oil into a deep pot and heat over high heat until the oil reaches 265º. You want to keep the oil between 265º-300º while you are cooking. If the oil is too cool the breading will soak up too much oil and get soggy; too hot and things will burn before they cook through. Continuously monitor the oil temperature and adjust the heat accordingly.

Toss several pieces of fish into the flour mixture to coat and set on the edges of the bowl with your right hand (this is your “dry hand” and should only go into the two flour bowls). Using your left hand (the “wet hand” that should only go into the buttermilk bowl), drag the fish one piece at a time through the buttermilk and set them into the cornmeal bowl. Using your right hand, bury the pieces of fish under the cornmeal.

I know, I’m using the wrong hand in the buttermilk in the photo above. Trust me, you will make less of a mess if you keep one hand dry and the other wet, but it can be difficult in the heat of the moment! Carefully place pieces of fish into the hot oil by holding them just into the oil and releasing so that you don’t splash oil. The oil should bubble but not pot. If at any point the oil is smoking, it is too hot. If you get a lot of popping, the fish is too wet.

Once you have about 5-6 pieces of fish in the pot, begin the process again with the next batch. The fish should cook 5-6 minutes until it reaches your desired color. Remove the fish from the oil and place onto a cooling rack placed over a cookie sheet so the excess oil can drain off. Check your oil temperature and continue until you run out of seafood.

BONUS: take the remain cornmeal mixture and add the remaining milk to it along with 1/4 cup of finely diced onion. Stir together and add more half and half until you get a thick spoonable batter. Drop teaspoons of batter into the oil to make hushpuppies!

Once all of the seafood is cooked prepared, make your dipping sauces. For tartar sauce, combine 1 cup of mayo with 2 tablespoons of pickle relish and a 1/2 teaspoon of lemon juice. For the shrimp, I like a sweet chili sauce using 1/2 cup of sweet and sour sauce combined with a tablespoon of hot chili paste (from the Thai aisle at the store). For traditional cocktail sauce, use 1/2 cup of chili sauce (usually near the seafood) combined with 1-2 teaspoons of ground horseradish from the condiment aisle. Be careful with store bought cocktail sauces, some have soy sauce added and are not gluten-free!

We almost never eat fried food, but it is a nice treat from time to time and I was surprised at how little oil was actually absorbed into the food. I used a whole bottle of oil to cook and when I was done and poured the cooled oil back into the bottle to throw away (never reuse oil that you’ve cooked fish in) there was only about an inch missing from the bottle, and part of that was on the bottom of the cookie sheet that I had used as a drip pan.

We served our Cruiser’s Platter with coleslaw and a glass of Pine Island Breeze. What’s your favorite seafood treat or side dish? Leave us a comment below and let us know!

Cruiser’s Platter (Gluten-free Fried Shrimp and Fish) with Hushpuppies and dipping suaces

For the seafood:

  • 1/4 pound per person of assorted seafood such as cod, peeled shrimp, scallops, etc.
  • 1 c half and half
  • 2 t apple cider vinegar
  • 1 box of Krusteaz Gluten-free Honey Cornbread mix
  • 1 c Gluten-free Flour blend
  • 2 t Tony Chachere’s Creole seasoning (or similar)
  • canola or peanut oil
  • 1/4 c finely diced onion

For the dipping sauces

  • 1/2 c mayo
  • 2 T sweet pickle relish
  • 1/2 t lemon juice
  • 1/2 c sweet and sour sauce
  • 1 T hot chili paste
  • 1/2 c chili sauce
  • 1-2 t ground horseradish

Lay out the seafood on plates and refrigerate without covering so that it dries out a bit.

Begin by combining half and half with vinegar to let it curdle. Prepare the remaining breading stations by pouring cornmeal mix in one bowl and combining flour and seasoning in another. Meanwhile heat oil to 365º.

Dip pieces of seafood into flour, shake off, drag through buttermilk, and cover with cornmeal. Carefully lower each piece into the oil without splashing. Cook 5-6 pieces at a time for about 5 minutes or until the desired color has been reached.

Combine remaining cornmeal mix with onion and remaining buttermilk. Add more half and half if needed to create a spoonable batter. Drop by the teaspoonful into the oil to make hushpuppies.

For tartar sauce, combine 1 cup of mayo with 2 tablespoons of pickle relish and a 1/2 teaspoon of lemon juice. For the sweet chili sauce, combine sweet and sour sauce with hot chili paste. For traditional cocktail sauce, add ground horseradish to the chili sauce.

★ 25 years guiding ★ 48 U.S. states ★ 10 countries ★ 3,000+ Camino miles