Recipe of the Week – Taco Rice Salad

Taco Rice Salad has all the favor of tacos or nachos without the calories of chips or wraps. We enjoy it as a quick dinner or even leftover for lunch. It reminds us a little of the popular bowls at places like Hothead or Chipotle.
Start out mincing some garlic and tossing it a skillet with a pound of ground beef over medium high heat until browned. When it’s almost done add 1 cup of frozen corn kernels to thaw them out. If you are using fresh corn add it to the salad later. In a separate pot, make the yellow rice mix according to instructions. We use Zatarain’s Yellow Rice and Laura’s Lean Beef.
IMG_8020.JPG
Drain out the fat and add 3 cups of cooked yellow rice, 1 t each ground cumin and chili powder, and 1/4 t each salt and pepper (you may want to omit the salt, some of the rice mixes are pretty high in sodium). Let the whole mixture cool slightly.

On each plate, place about 1 1/2 cups of chopped romaine lettuce, 1/2 cup of chopped tomato, 1/4 cup of drained black beans, and a sprinkling of chopped red onion (also the corn if you’re using fresh).
IMG_4370.JPG
To make dressing combine 2/3 cup each of Greek yogurt and salsa with 1 t chili powder and 1/2 t ground cumin in a bowl.  We like Pace Salsa and Fage 2% Greek Yogurt.
IMG_3306
Spoon beef mixture over lettuce and top with Sargento shredded cheddar cheese and dressing. Serves 4-6 hungry people.
IMG_4238
Here’s the original recipe from myrecipes.com and here is my modified version:

Taco Rice Salad

Salad:

To prepare salad, heat a large nonstick skillet over medium-high heat. Add beef and garlic, and cook until browned, stirring to crumble. Add frozen corn (if using). Drain; return beef mixture to pan. Stir in rice, spices, and salt and pepper.  Cool slightly.

Layer lettuce, tomato, fresh corn( if using), onion, and beans on plates.

To prepare dressing, combine Greek yogurt, salsa, 1 teaspoon chili powder, and 1/2 teaspoon cumin, stirring with a whisk.
Top with 3/4 cup rice mixture, 1/3 cup of dressing, and about 1 1/2 tablespoons cheese.

 
Let us know what you think of this make at home version of your favorite restaurant bowl.

Mackinaw City/Mackinac Island

Two places where we have never seen so many fudge stores! As a matter of fact, the residents of Mackinac Island are called “fudgies.” Yes, fudgies! But let’s not get ahead of ourselves here. We started with a day in Mackinaw City which is a small little town. In our opinion, the draw of this town is the Mackinac Bridge with views of both Lake Michigan and Lake Huron and the ferry to Mackinac Island. For us, there isn’t a lot to do in the city, and I don’t know how, but we managed to leave without even sampling a piece of fudge.

We stayed at a fantastic campground called Mackinaw Mill Creek Campground which has been run by the Rogala since 1964. This campground was the largest one we have ever stayed at, but it felt surprisingly small; it was also the one of cleanest and nicest campground with plenty of staff around to take care of business. Mill Creek has campsites for all types of people – on the beach, on the lake, in the woods, primitive, full hook up, and cabins. There were easily over 700 campsites. They had playgrounds, a pool, a beach, mini-golf (though it could have used a serious face lift), and a huge camp store. The best part for the kids was an old time fire truck, re-named the fun truck, which drove kids around most of the evening. We had a lake front campsite, made friends with fellow Apex owners, and enjoyed a couple nights around the campfire by the lake visiting with them. I seriously love camping on the lake, it is so relaxing just listening to the water.

On our first full day we decided to walk in to Mackinaw City from our campsite. The town was 4 miles away and I believe we walked about 7 miles that day.  We planned to walk on the bike trail but it was a haven for mosquitoes so we had a nice walk on the shoulder of the road, really it was nice because we could see the water for much of the walk. We spent the day wandering in to gift shops, smelling the fudge, visiting the pier, and watching the sailboats come in. Then we took a free shuttle back to the campground which was fantastic, thanks to Star Line Ferry!

The next day we rode our bikes in to town and took the Star Line Ferry to Mackinac Island. This island is one of a kind with no motorized vehicles on the island (except for a fire truck and an ambulance). You can get around the island on your bicycle or a horse drawn carriage. I was told there are 600 horses that reside on the island in the summer and there are 492 permanent residents on the island.

You can stay busy with one day on the island as there are gift shops, fudge shops, a state park, you can have afternoon tea at the Grand Hotel, wander through the historic fort, and of course, make the 8.2 mile trek on your bike around the island. I have to pause here and tell you that I will not do this island justice in my blog post. I can only tell you it is gorgeous. It is a step back in time and will mesmerize your soul. The buildings, homes, and hotels are in pristine condition and all belong on a post card. I could easily see spending a quiet, romantic weekend on the island.

We decided to start our visit by riding our bikes around the island. It is an easy ride if you only consider the terrain. However, they rent bikes to anyone and everyone. They rent tandems, mountain bikes, small bikes, and regular bikes. No biking experience required. Every single visitor wants to rent a bike and ride it around the island – which is a big challenge. The perimeter loop is set up like a road with a yellow dashed line down the middle. The problem is that tourists think since there are no cars they can ride where ever they want on the road, even 5 people wide, with no regard for oncoming bike traffic. They also randomly stop on the road without warning. Needless to say I had two very close calls and I was done with biking the island ever again. I don’t need that kind of stress on my bicycle.
Once we put our bikes up we enjoyed a fantastic lunch outside at the Pink Pony overlooking the marina. This was the highlight of our day as we watched the sailboats come in. The Chicago Yacht Club Race to Mackinac was going on and sailboats were coming in all day long. This is a 333 mile distance race from Navy Pier in Chicago to Mackinac Island. About 300 boats participate with more than 3,000 sailors. Needless to say, we left the island before the parties began that evening. 😉 After lunch we once again wandered the gift shops and smelled the fudge before we left the island. All I can tell you is if I don’t see anymore gift shops or fudge shops on this trip, I will be just fine.

We are heading to the Upper Peninsula next to see the fifth Great Lake to complete our tour of all five of the Great Lakes! We are excited to see Pictured Rock National Lakeshore again, it is a true natural wonder!

Recipe of the Week – Easy Chicken and Potato "Kabobs"

I love to cook, that is not a surprise to anyone who knows me (Brian).  I don’t love to spend a lot of time cooking usually (though I do believe that making a wonderful, intricate recipe can also be very cathartic in the right time and place).  This recipe from the Baking Beauties at Faithfully Gluten Free is simply my all time favorite marinade.  I call it dump marinade because it has a little bit of everything in, you can dump in any protein you want, and it will come out amazing.  Kabobs are a challenge to me.  It is difficult to get everything done together without burning the more delicate items, hence the second dump of this recipe, where I just throw it all on the grill and forget the skewer!
First the marinade: Put into a gallon resealable bag put 1/4 t dried rosemary (I didn’t carry rosemary in the RV this time so substituted dried oregano and it worked just fine), 1/2 t each of dried parsley, garlic powder, and black pepper, 1 t stone ground mustard, 1 T each balsamic vinegar, soy sauce, and Worcestershire sauce, and 2 T olive oil.  WOW that’s a lot of ingredients!  Now throw in about a pound of your favorite protein.  We love this with chicken thighs (in the pictures) but beef works well too (or country style pork ribs, chops, or an old tire, seriously this marinade tastes that good!).  A note on gluten free: soy sauce is one of those items with hidden gluten in it, always make sure to check labels of sauces and condiments to ensure they are safe if you or someone you are cooking for can’t have gluten.IMG_5847
Let the meat marinade for at least two hours.  I put the meat in the marinade the night before but we ended up eating out the next day so I just threw the whole thing in the freezer.  A week later, I took the bag out one evening and cooked it up the next day, it was still perfect!
Even the smallest potatoes take forever to cook on a grill.  Here’s a great tip stolen from the Baking Beauties: cook them in the microwave first!  I put them in and hit the potato button, they always come out a little under done, but then the time on the grill with the other raw veggies, and they are perfect! (Too many explantation points in this post, but I really love this recipe!)
We always add onions and mushrooms at minimum when we cook this meal but bell pepper, asparagus, zucchini, and summer squash are also great additions.  Cut your veggies into largish bite sized pieces.  The less dense the vegetables are, the bigger the pieces should be so they hold up.  Here’s another tip for the mushrooms: if you cut it in half and find lots of dark fins (especially common in portobello), scoop them out with a spoon or knife because they are bitter and turn mushy when cooked.
IMG_1062
If you are assembling kabobs, layer meat, potatoes, and veggies (obviously not the asparagus, but if you get one on a skewer, please put a picture in the comments, haha) onto a wooden or metal skewers. Don’t forget that wooden skewers should always be soaked in water for 30 minutes first to keep them from catching on fire.  I like the metal ones because they help to cook the food from the inside a little too.
I don’t like to take the time to thread skewers most of the time, so I toss all the veggies together, drizzle with some oil and salt and pepper and toss ’em on the grill.
IMG_0845
If you use foil, poke a few holes so the juices run out – you want crispy browned edges, not a soggy mess.

Once the veggies get going, put the meat on the grill and cook to your desired degree of doneness.
IMG_3977
YUM!! BTW, thats a little bit of ranch dip on the side. It’s amazing on the potatoes!
IMG_0456

Easy Chicken (or Steak) “Kabobs”

For the marinade:

  • 1/4 t dried rosemary (or other dried herb such as oregano or basil)
  • 1/2 t dried parsley
  • 1/2 t garlic powder
  • 1/2 t ground pepper
  • 1 t stone ground or dijon mustard
  • 1 T balsamic vinegar
  • 1 T soy sauce or tamari sauce
  • 1 T Worcestershire sauce
  • 2 T olive oil

For the grill:

  • 1 lb chicken thighs or marinating beef
  • 1 lb of small potatoes (red or Yukon)
  • Optional bell peppers, onion, mushrooms, etc.

Mix all of the marinade ingredients into a resealable plastic bag and smoosh them around to make sure everything is mixed. Add the meat and refrigerate for at least 2 hours or overnight.
Soak wooden skewers in water to keep them from catching on fire.
Cook the potatoes in the microwave until almost completely done. Cut other veggies into similar sized pieces.
Thread all of the ingredients onto skewers and discard used marinade or…
Place veggies in a bowl and drizzle with oil, salt, and pepper. DO NOT put used marinade onto the veggies, as tempting as they may be. No one wants a side of salmonella with their dinner!
Place kabobs onto a medium high grill and turn every few minutes until done or…
Place veggies on grill and toss occasionally to keep searing fresh sides without burning. Place meat along side and turn after about 3-5 minutes.
Serve immediately with a cold beer and enjoy!

Why We Love Traverse City, Michigan


The first time we visited Traverse City we came for the wine but we have kept coming back for the fun! There is so much to do here in the summer (which is the only time of the year we have been here so far). From the Traverse City Cherry Festival, the Traverse City Film Festival, the TART and Leelanau bike trails, lake activities in Traverse Bay, the wineries, breweries, and distilleries, and all of your other normal tourist activities. This is our third time visiting the area and we always find something new to do.
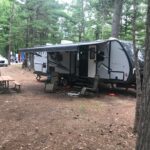
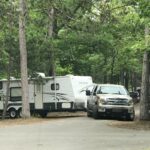
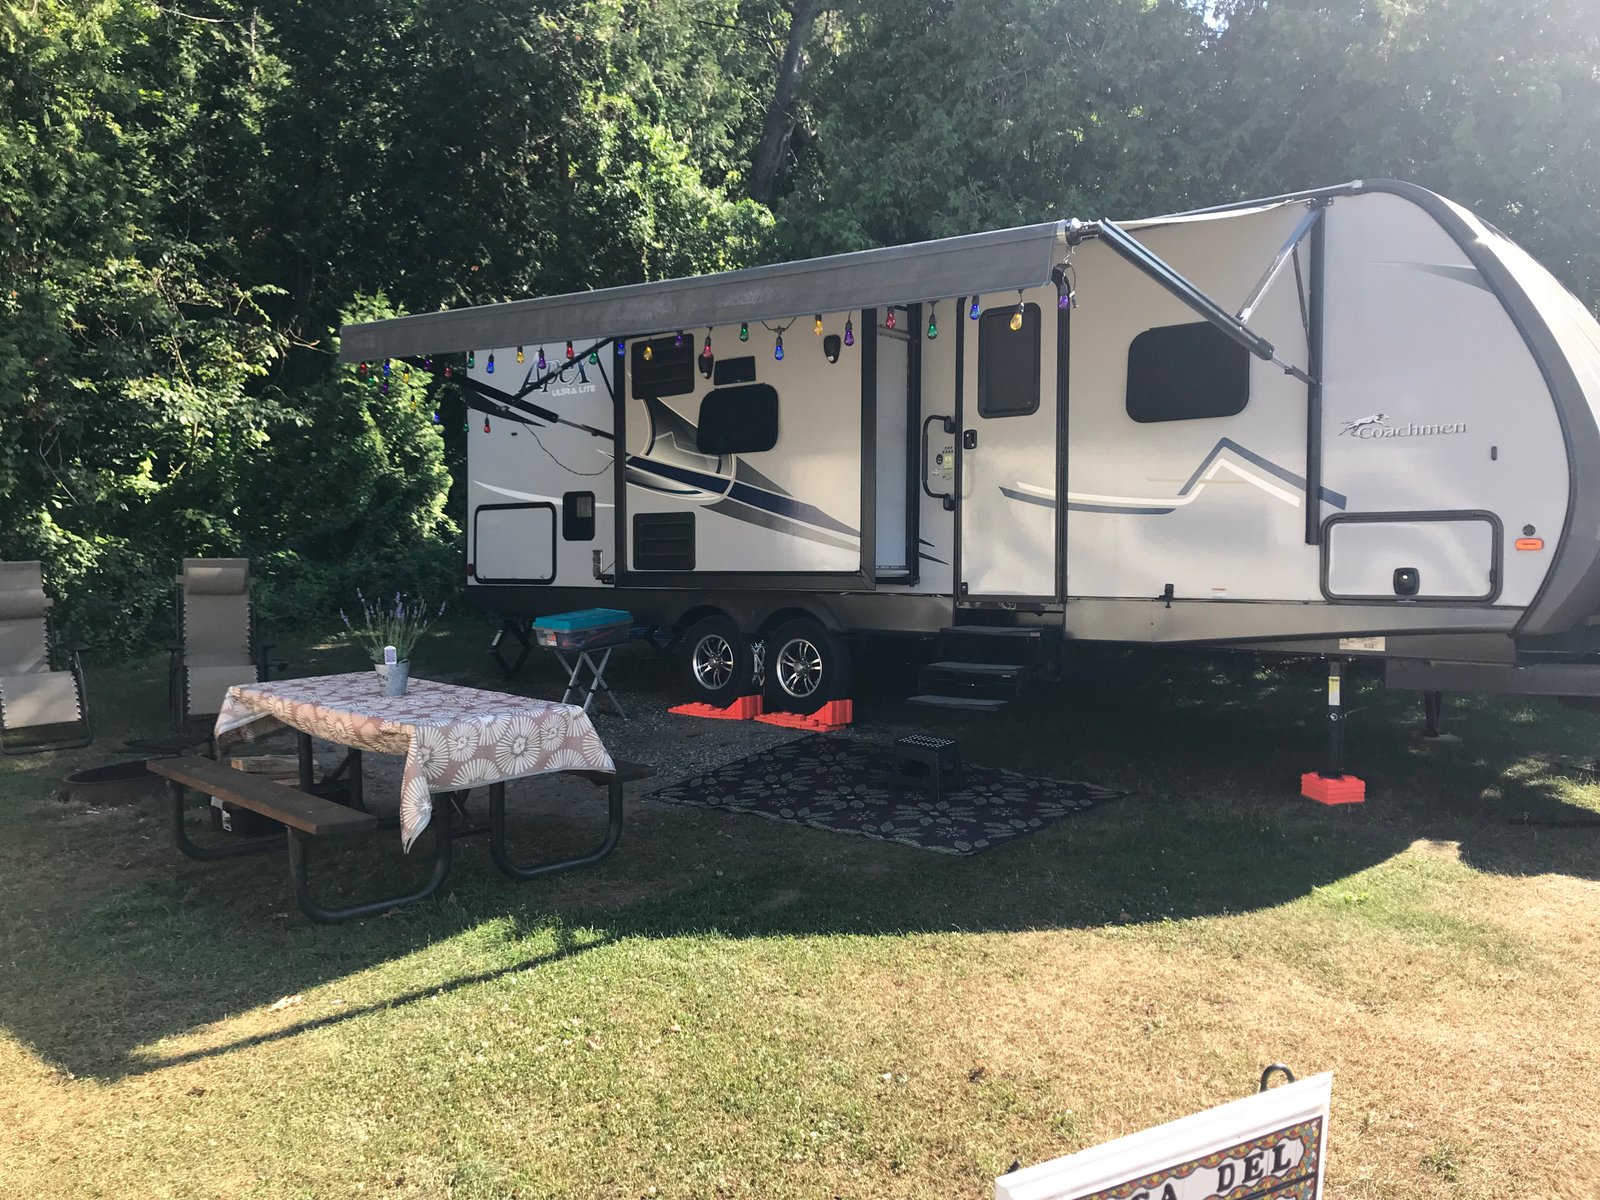
Every time we visit we stay at Traverse City State Park. We have camped in our tent the first two times and the third time has been with our new rig. Check out our blog post about parking the rig if you are looking for a laugh.
The first time we came we stumbled in during the cherry festival – what fun it was to taste everything cherry flavored! The second time we researched a bit better and learned we were coming during the film festival. Fortunately we researched early and scored tickets to two different films! This time we are too late for the cherry fest and too early for the film fest but that is fine with us because there was still plenty to do!
I (Michelle) wasn’t feeling too good at the beginning of the week, I was thoroughly exhausted from our son’s wedding festivities that were the week before. But that’s ok because we meandered around the state park, walked across the street to the beach, and walked two-tenths of a mile to play mini golf at 
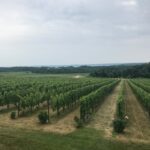
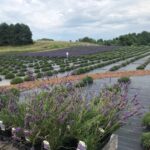
Pirates Cove Adventure Golf (where you can also zip-line, climb the challenge course, ride go-carts, and play bumper boats). We visited a few wineries on Old Mission Peninsula. We have a few favorites on Old Mission including Chateau Grand Traverse and Brys Estate Vineyard. But seriously, they have wine for every palette.
After I was feeling better we decided it was time to get some real exercise in; what you will learn about us is that we are very active. We love to walk, hike, and bike anywhere! It was Saturday morning and the farmers market was going on in downtown Traverse City so we decided to lace up our shoes and head out. It’s 4 miles just to get downtown and we love a day that involves a long walk for exercise and fun things to see and do when we get there. We ended up walking 10 miles on Saturday! We could have spent the entire day there between the farmers market, downtown shops, food trucks, wine/spirits tasting, and the beach.
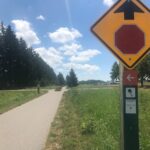
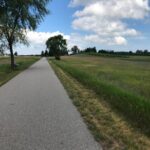
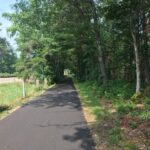
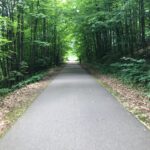
On Sunday we were itching to bike because it had been two weeks since we had gotten any real cycling in. From our campground Suttons Bay on the Leelanau peninsula is 21 miles. The Leelanau trail is 17 miles so you are on the TART trail for the 4 miles. We weren’t too confident in our abilities to ride there and back because we haven’t been biking a lot lately and it was going to be a hot day. Therefore, we opted to use their bike-n-ride program. We parked our truck at a bus stop, rode 17 miles to Suttons Bay, wandered around, and when we were ready to leave we put our bikes on the bus and we rode back to our truck. This made for a gorgeous day of riding and enjoying the quaint little town of Suttons Bay!
One of the new activities we have learned about on this trip is that you can “Kabrew” – don’t know what that is? Neither did we! It’s kayaking from brewery to brewery! Check out The River Outfitters to see more about this activity. Of course you can always do a bike and wine tour – check out Grand Traverse Bike Tours for information. The last time we were here we did our own bike and wine tour on the Old Mission Peninsula. Unfortunately it was about 90 degrees that day so we only hit 3 wineries and we drank a lot more water than wine. But it is still an amazing day when you are biking on Old Mission Peninsula because you spend most of the day with the water on in view.
If you want to just play in the water, there are many water activities on Traverse Bay. However, be mindful of your expectations. This is Michigan. This water is a part of Lake Michigan. It is not Florida. The water will be chilly and sometimes downright cold even when the air temperature is 90 degrees. On Monday, we rented jet skis and parasailed from TC Watersports. We have kayaked in the past and you can rent a boat, go out on a sailboat cruise, rent a stand up paddleboard, or just hang out on their beautiful Michigan beaches. The water is so clean and clear. It will certainly cool you off on a hot summer day!
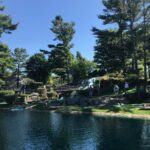
I would be remise if I didn’t mention one more place we love to visit when we are here and that is the Grand Traverse Village. On the grounds of this “village,” you can hike, bike, shop, visit the arboretum, taste wine, get a great meal, or are you ready for this? You can take a guided historic tour of as this village used to be the Traverse City State Hospital. Check out their website for cool photos of the old hospital! One more thing, before you leave leave the village, go to Left Foot Charley and enjoy a glass of Reisling. Left Foot Charley has great wine, good stories, and a very cool building!
When you go to Traverse City, you can use this as your hub to visit so many other cool places. For example, Sleeping Dunes National Lakeshore is a short 40 minute drive west. You can head north to the quant towns of Charlevoix, Petoskey, and Harbor Springs. We are heading to Petoskey to camp for a few days. So until next time Traverse City – we love this town! Have you done something else in the area? Leave us a comment and tell us about it!
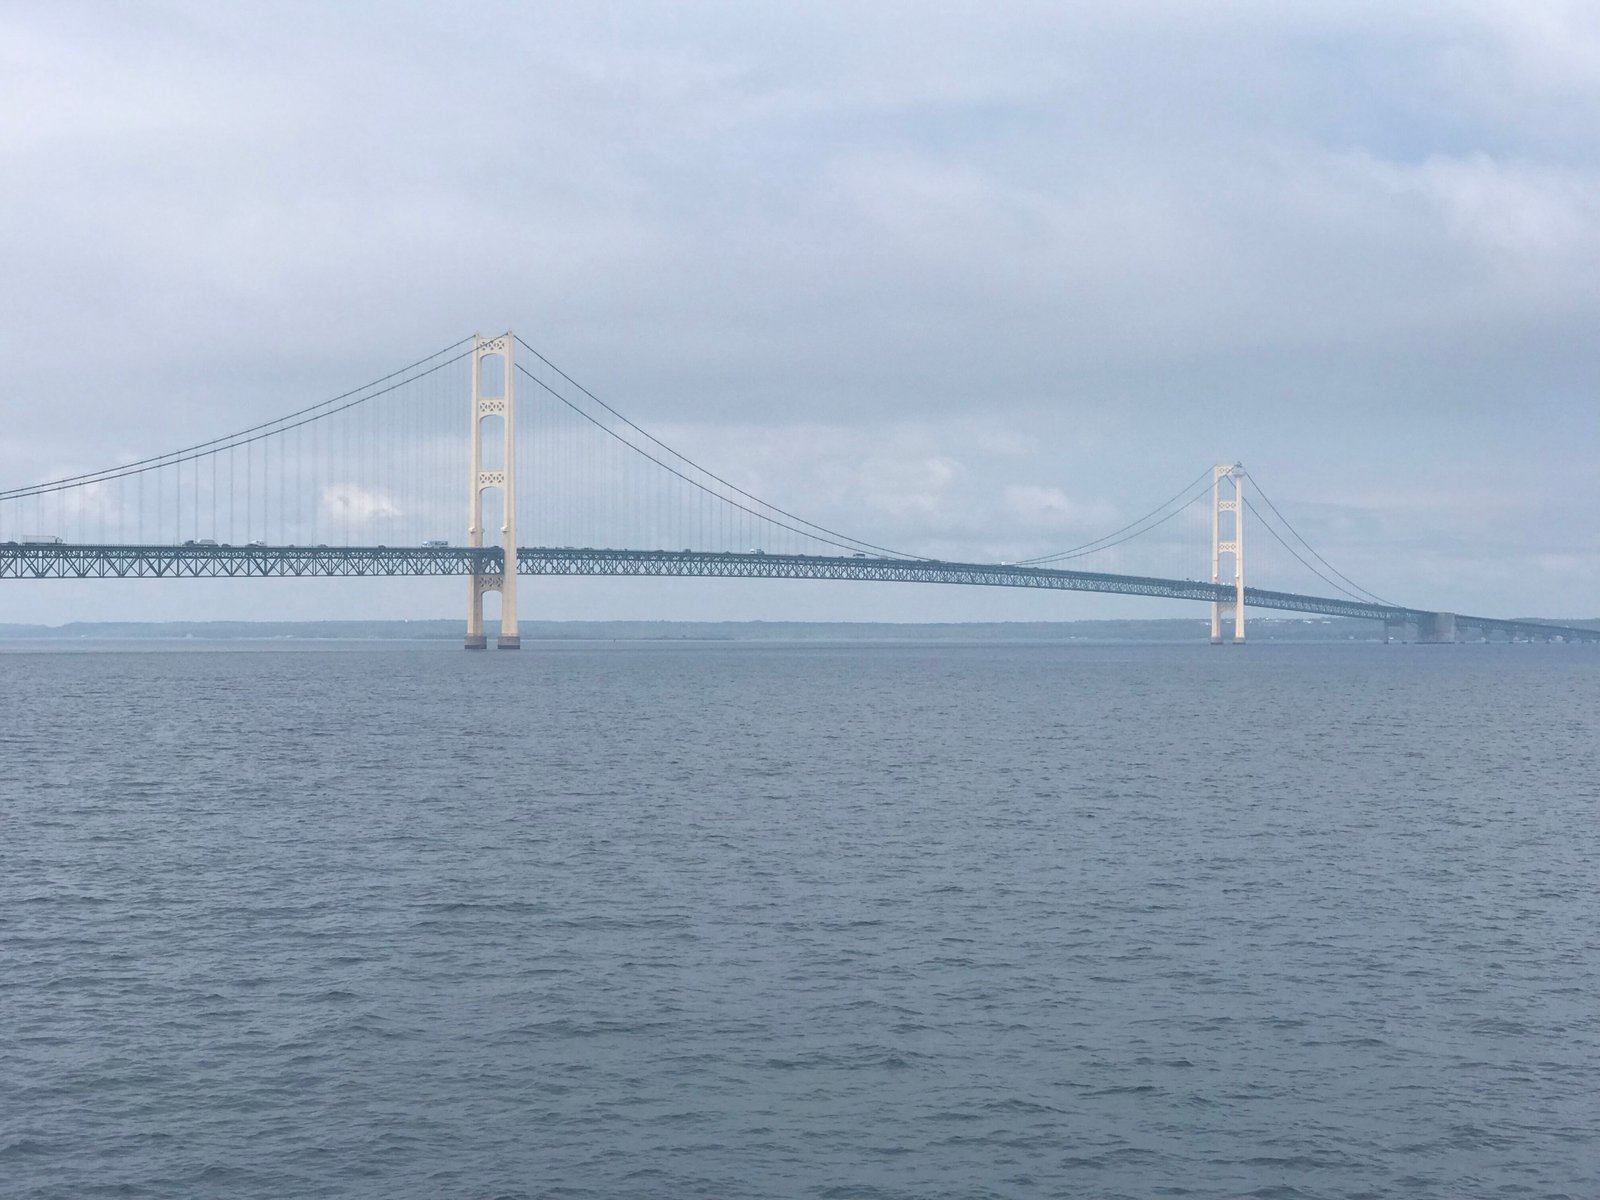
Bonus Recipe – Michigan Cherry Chocolate Gluten Free Cookies

Anyone who has been to Traverse City knows that you can’t leave town without some cherries. We made a stop at the Cherry Republic and picked up some of their dark chocolate covered cherries and we felt inspired so here is the most amazing cookie we have ever tasted!

Cherry Chocolate Chip Cookies

  • 1 C plus 2 T King Arthur Gluten Free baking mix
  • 1/2 C butter, softened
  • 6 T Whey Low sugar substitute
  • 6 T Whey Low Gold brown sugar substitute
  • 1 egg
  • 1/2 t salt
  • 1/2 t baking soda
  • 1 t Kraken dark spiced rum (because I didn’t bring vanilla)
  • 1 cup of Cherry Republic dark chocolate covered cherries, cut into halves

Preheat oven to 375°
Cream together butter and sugars then beat in the egg, salt, baking soda, and rum until creamy.
Add the flour and cherries and blend until incorporated.
Spoon onto a cookie sheet and bake for 10 minutes or lightly golden. The recipe should make 24 cookies.
Try not to eat the entire tray because these take chocolate chip cookies to a whole new level!

Parking the RV (sometimes it isn't easy)

IMG_5813
This space looks roomy enough, and seriously once you are in the site it is very roomy! But do you see those trees on the right side of the image? We almost had the small one permanently imprinted on the bumper of CC. If you don’t know, the name of our rig is Casa del Camino or CC which means “Road House” or “House of the Journey” and a perfect name for our rig. We will blog about how CC got her name later this fall.
This week we have been at Traverse City State Park. We love this park! The location is wonderful if you want to walk across the street and play in Traverse Bay. If you want to bike, the TART Trail is right behind the campground. If you want to take a long walk, there is plenty to walk to including mini golf and zip-lining. But that is another blog post, look for it later this week.
Back to parking CC. We are not experts by any means. We purchased CC in August 2017 and have backed her in to a site at least 25 times plus every time we park her in the storage lot. We are newbies. But we have back up assist on the truck and Brian is pretty darned talented. However, we have plenty to blog about over the next year about our biggest mishaps like the time we almost dumped CC in to the lake and the time we almost let her roll down the hill. We are experts at mishaps that is for sure.
We do have a system for the process of backing up. It begins with me (Michelle) getting out of the truck with my cell phone and calling Brian on the phone. We have learned calling on the phone is better than hand signals that he may or may not see or yelling at each other so the whole campground can hear us. Then there are the cats who love to lurk out of the windows while we tried giving directions while yelling, “watch out for Lola” or “Pepe is going to jump out of the window!”
I assess the site situation and if it looks complicated I have Brian join me for the assessment. Sometimes I look at the site and have no clue how we will get in to it so the brainstorm helps us both. The complicated part of my job is watching both sides of the trailer and in a sharp turn watching both sides of the truck. Here is a case in point as we watched another couple back in!
IMG_4224
What you need to notice is how narrow the road is at this park. It is literally no wider than our 8 foot trailer. Our trailer is only 30′ long but with the truck and the fact that we are new at this, sometimes it is overwhelming. On days like this one, I can’t believe that we both want a bigger rig. For our retirement RV we want a class A and will tow a car. That will be interesting. 🙂
We have watched a lot of people get very creative as they parked their rigs in this state park. We have also watched a lot of bystanders help and in here it was welcomed by the driver. What’s deceptive is that the sites are large enough but the road is narrow, the sites are close together, and trees are plentiful.
On this particular day my biggest problems were: (1) We had been driving for 7 hours and we were both crabby and hungry which is never a good combination when you need to calmly communicate with your partner. (2) I was behind the rig and there was a small tree that neither one of us could see behind the truck and when Brian made the sharp turn I told him to make, that small tree almost took out our back truck bumper. Thankfully he saw it at the last minute. (3) When I felt things were good in the back I walked around to the front to watch Brian brush the front bumper with another tree. Thankfully it was a small brush and didn’t leave a mark. (4) Finally, there were the bystander helpers. Yes, we needed them. Yes, they empathized because they both had the same troubles. But when you don’t know who to listen to, sometimes helpers can be stressful.
I talked to two other wives after this backing up ordeal and the consensus among us was that backing up is always hard and there is always an argument. The Communication professional in me hates that idea so we will continue to improve our communication and our system. It is all about learning and growing – and not denting the rig. Thankfully we did not end up with a dent this time around.


Recipe of the Week – Pasta with Roasted Cauliflower, Tomatoes, and Pepperoni

Before you turn your nose up on this one, keep on reading.  It doesn’t sound like its going to work, but it is actually really good and quite easy to make over the campfire itself, at home in the oven, or even on the grill.
IMG_8975
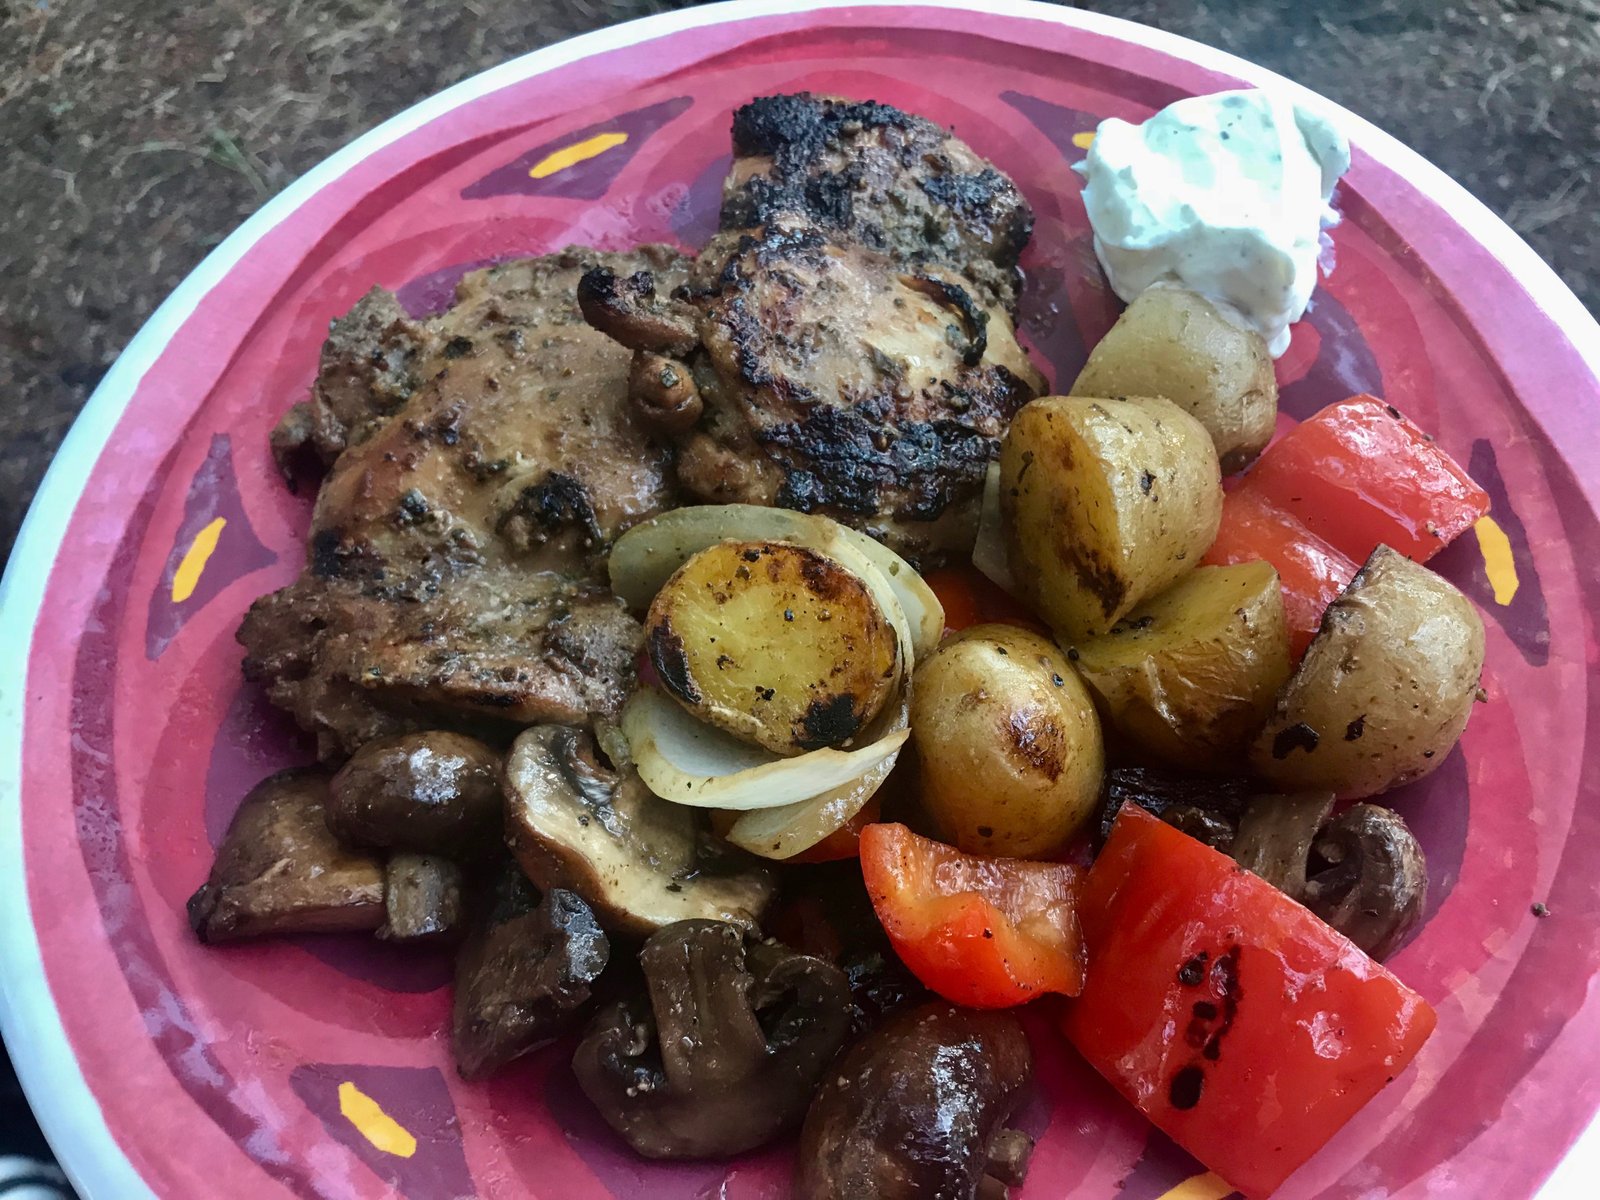
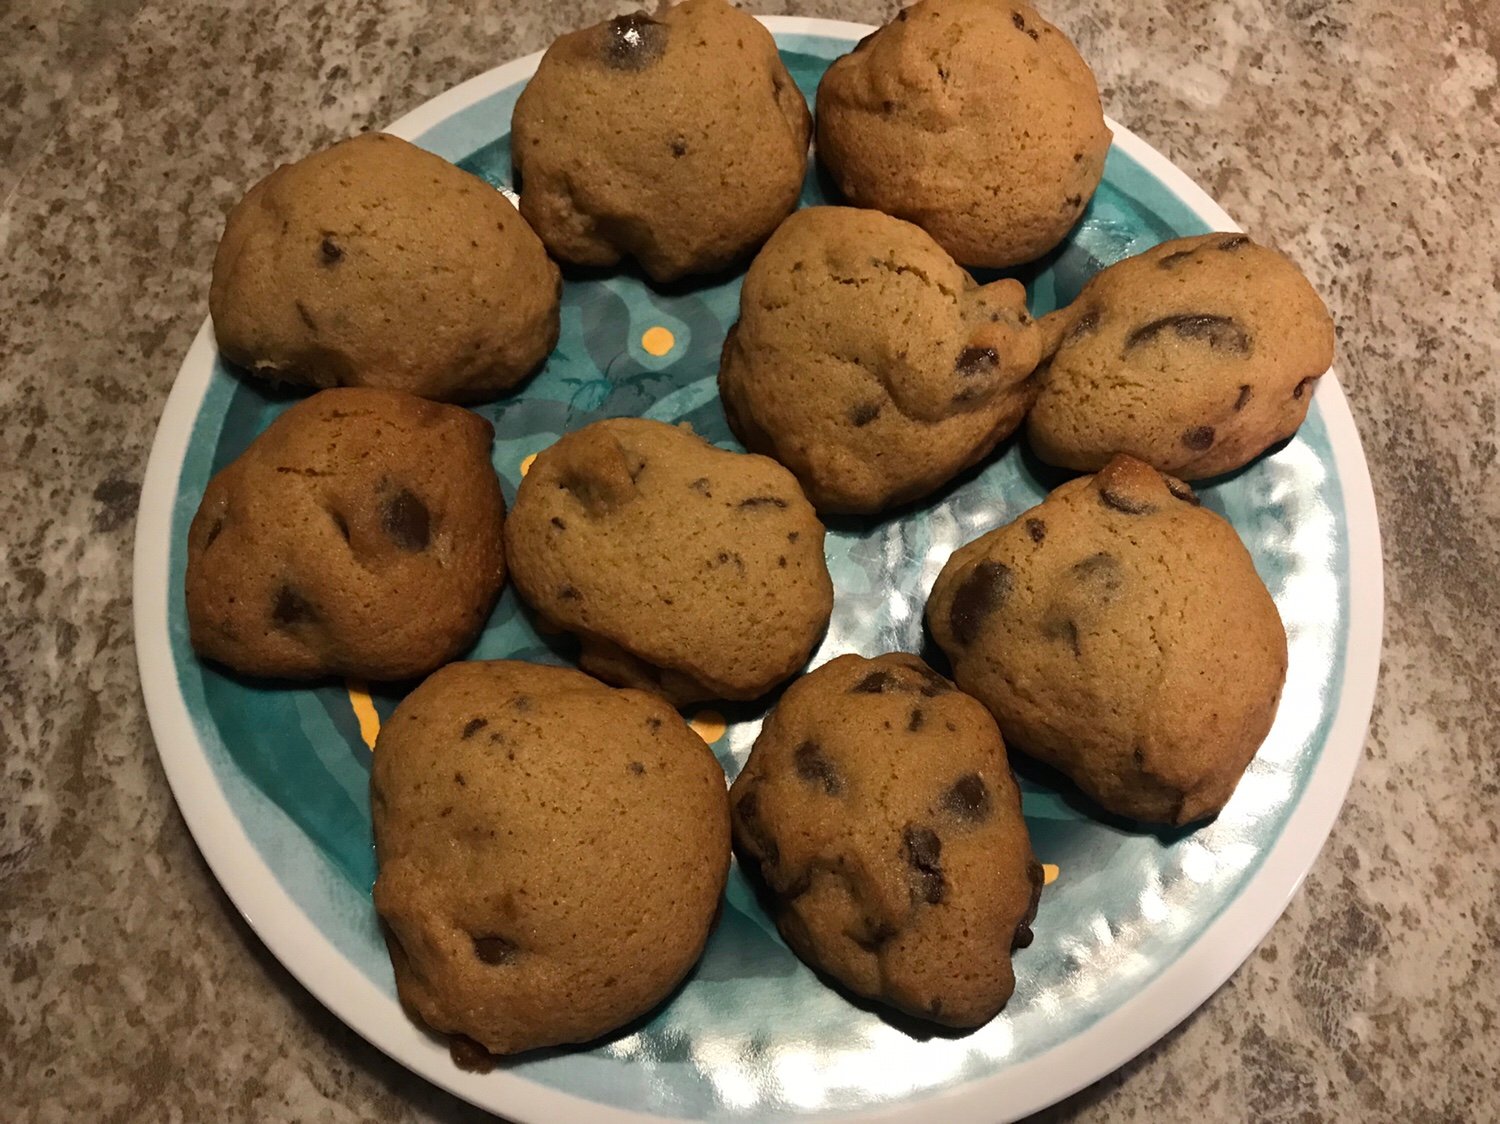
The original recipe comes from the January 2013 issue of Women’s Day and you can find it here.
If you’ve been reading my recipes so far, you know that I don’t do a great job of following the recipe exactly, and this one is no exception so read carefully for my modifications. As always, I’ve cut the recipe in half during preperation since only two of us are eating and we don’t want leftovers.  All of the quantities listed are the full amounts.
Start off by cooking 12 oz of your favorite short pasta.  Shells or rotini would work best.  We use gluten free pasta when we cook because Michelle is celiac.  There is some debate about adding oil to your cooking water.  Generally you SHOULD NOT do it but this recipe is an exception.  When you pour the pasta out of the pan, the oil floating  on the top of the water will coat the pasta which will help keep it from sticking together while it waits to be added to the grill.  This is the same reason you should not do it normally, it will keep the sauce from sticking to the pasta!
While the pasta is cooking, cut up a smallish head of cauliflower into bite size flowerettes. If they are too big it will take longer to cook and you run the risk of burning the outsides.  Also cut up a pint of grape tomatoes into halves. Throw it all onto a grill pan (or piece of heavy duty foil). Next give it all a drizzle of olive oil, salt (not too much), pepper, and garlic pepper.  Finally top it with sliced pepperoni. Do not mix it up at this point.
IMG_7102
By now your pasta should be done cooking. Drain it and put it into your serving bowl.  If you didn’t add oil to the water, add a little now and mix it all together. Take everything outside to the grill.
IMG_7141
On a medium grill, let things get good and hot and once you see that the edges of the cauliflower are browning and the tomatoes are giving up some juice, start to mix it up a bit.  Now you just have to play it by ear.  You want the cauliflower to get nice and browned and the tomatoes to get a good blister.  I like it when the pepperoni get a little crunchy too, plus they will give up more oil which will lube up the veggies.IMG_6729
Once everything is to your desired degree of doneness, pour it on top of the pasta and mix it all together. Sprinkle with some parmesan cheese and fresh parsley or green onions and dinner is ready!IMG_7141 2
So my modification on ingredients was just the addition of the garlic powder and parmesan cheese.  You could also add lots of other veggies if you want. I think zucchini, asparagus, or mushrooms would all make a great addition.  If your not a pepperoni fan, smoked sausage, grilled chicken, or even shrimp could be nice.
Here’s my version, check out the link at the top if you want to cook the whole thing in the oven at home.

Pasta with Grilled Cauliflower, Tomatoes, and Pepperoni

  • 1 small head of cauliflower, cut into bite size pieces
  • 2 T olive oil, divided
  • Salt, pepper, and garlic powder to taste
  • 12 oz small pasta such as rotini or shells
  • 1 pint of grape tomatoes
  • 6 oz pepperoni
  • 2 T parmesan cheese
  • chopped parsley or green onions for garnish fish (optional)

Cook the pasta with a little oil in the pot.  While the pasta is cooking, layer the cauliflower and halved tomatoes on a grill pan or piece of heavy duty foil (on a cookie sheet to carry out to the grill).  Drizzle the remaining oil and sprinkle with salt, pepper, and garlic powder.  Cover with pepperoni.
Drain the pasta and take everything out to the grill.  Grill the veggies for about 3-5 minutes before stirring to mix the pepperoni in.  Let the cauliflower brown and tomatoes blister.
Mix the veggie mixture into the pasta and sprinkle with parmesan cheese and garnish.
Let us know what you think of this recipe by leaving a comment!

Recipe of the Week – Ground Turkey Sweet Potato Skillet

IMG_6579
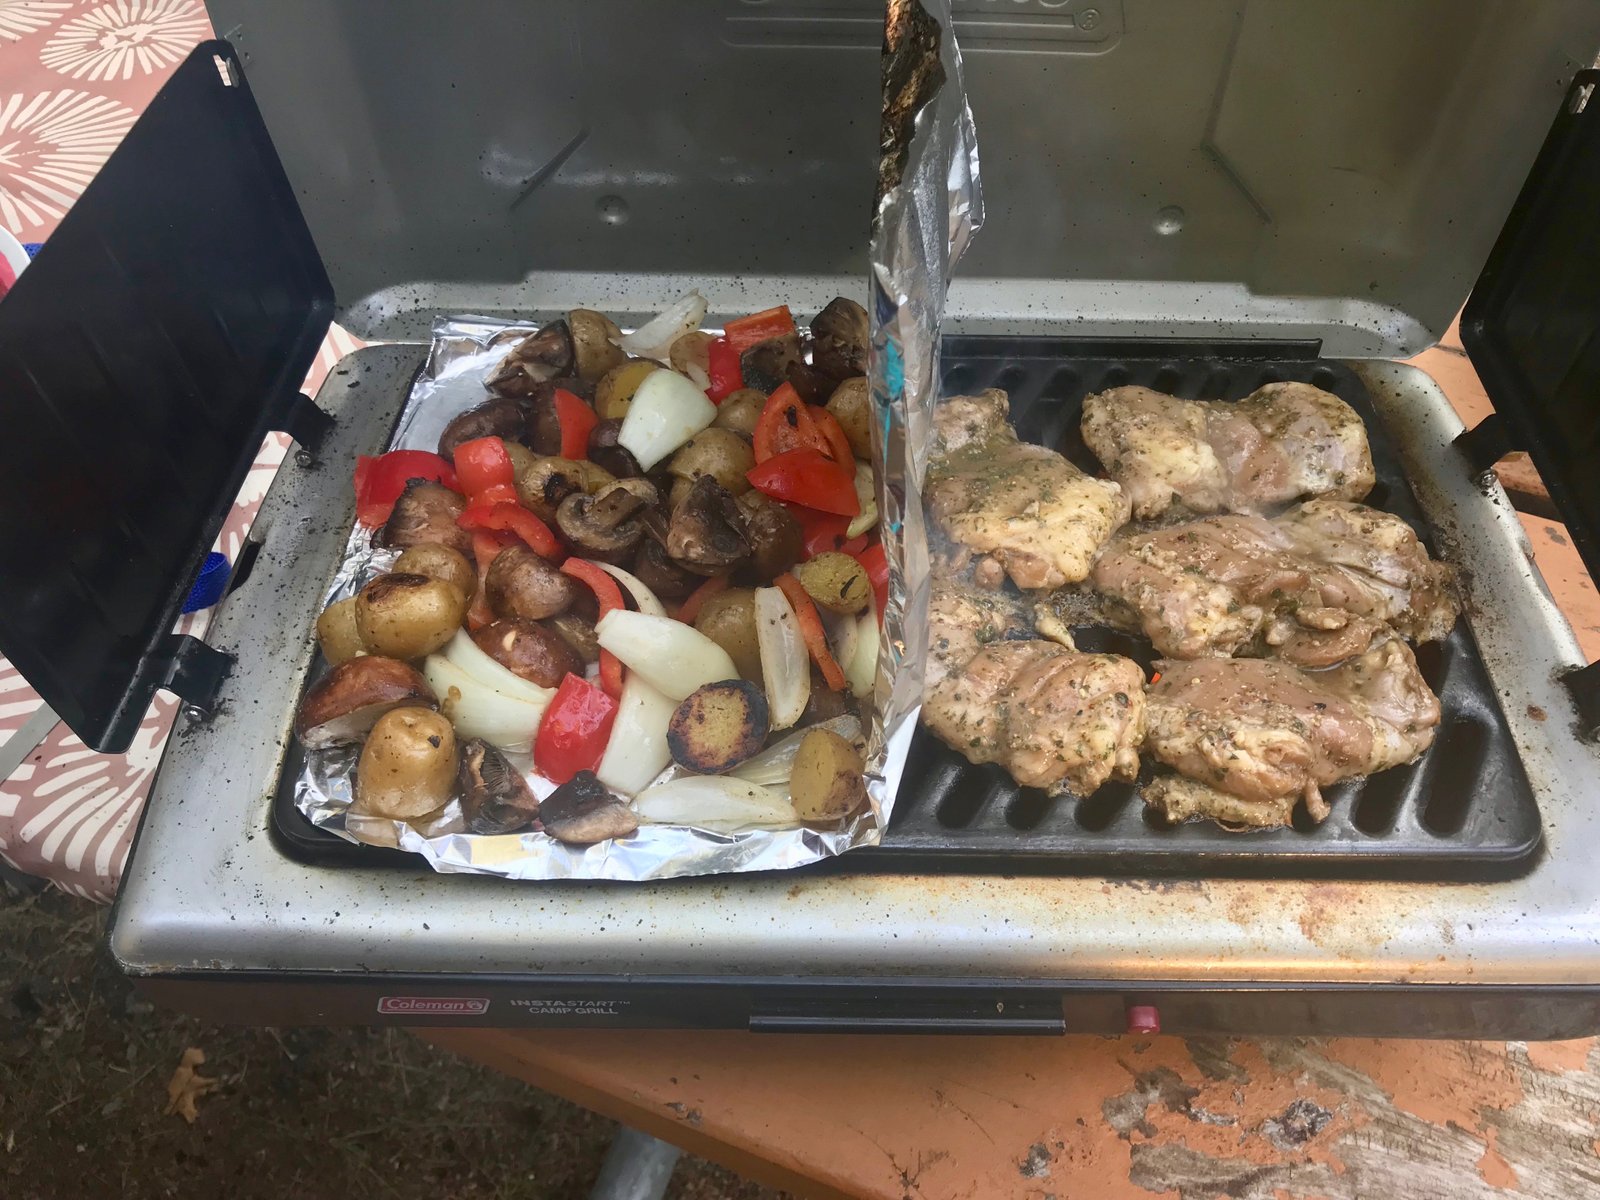
This week we’re making a quick one pot dish that can be made on the stove or over the fire that came from the Primavera Kitchen.  Not only is it gluten free, but also healthy and super tasty!
 

In a pot or iron skillet (especially if working over a campfire) heat 2 T of olive oil and brown 1 lb of ground turkey and a 1 clove of minced garlic.  I used 90% lean turkey, if you’re using a fattier ground, reduce the oil a little.
IMG_6577
Once most of the liquid is cooked out and the turkey starts to brown, add 1/2 c each of onion and bell pepper (we love the veggies, so I just use a whole onion and pepper since they add almost no calories).  Cook until soft and the onions start to brown a little.  It’s important to make sure that the liquid evaporates from the turkey before adding the pepper.  Sautéing peppers in liquid will make the skins bitter.
IMG_6578
Next add 1 1/2 cups of diced sweet potato (that’s about 1 whole decent sized potato), salt and pepper to taste, and a pinch of red pepper flakes (for some reason I don’t have any in the RV so a added a splash of Crystal Hot Sauce, which is my favorite).  Stir it all in and put the lid on it.  Make sure that you give it a stir once and a while and monitor the heat.  If it seems dry add a little water.  Cook about ten minutes until the sweet potatoes are soft.
Finally give it a sprinkle of mozzarella cheese and put the lid back on to give it a melt. At home I toss it under the broiler for a minute to give the cheese come color.
If you wanted to vary the recipe a little, you could always use ground beef or pork. Substitute Yukon gold or red potatoes, or even butternut or acorn squash.  A nice summer variation would be to throw in some zucchini or summer squash for the last few minutes of cooking (just make sure that things don’t get too wet and mushy).
IMG_6579
Don’t forget the beverage pairing! We like Atwater Vineyards Dry Rosé of Cabernet Franc.  Rosés go great with turkey at Thanksgiving dinner and they’re especially nice on a hot summer evening when you want something with a little more bite than a white wine.
If you make this recipe, snap a picture and tag #CruisinWithTheColemans on Instagram or post to the comments.

Ground Turkey Sweet Potato Skillet

  • 2 tbsp extra-virgin olive oil
  • 1 lbs extra-lean ground turkey
  • 1 tsp garlic clove, minced
  • ½ cup onions, diced
  • ½ cup bell pepper, diced
  • 1 ½ cups sweet potato, diced
  • Salt and freshly ground black pepper
  • A pinch of red chili flakes
  • ½ cup shredded mozzarella cheese

Directions:

  1. In an iron cast skillet, heat olive oil over medium-high heat.
  2. Add ground turkey and garlic. Stir occasionally and cook for about 7 minutes.
  3. Add onions and peppers and cook until onions are soft.
  4. Add the sweet potato, chili pepper, salt, and pepper.
  5. Cover the skillet and cook until they are tender. Don’t forget to stir occasionally. If necessary, add a little bit of water to cook the sweet potato.
  6. While the sweet potato is cooking, preheat the broiler.
  7. When the sweet potato is tender, add shredded mozzarella cheese and bring the skillet to the oven to melt the cheese* (see note below).
  8. When the cheese melts, remove from the oven, and serve.
* You can just put the lid on the skillet for 5 minutes. The cheese will melt.
 

A Week in Watkins Glen


It has been a perfect week of waterfalls, wine, kayaking, camping, and a boat cruise. Watkins Glen has a lot to offer a variety of people. Though we didn’t partake, this week we could have also enjoyed Six Hours at the Glen, the Watkins Glen Grand Prix. We didn’t know this would be going on this week and it certainly impacted the noise level and traffic in the entire town.
We stayed at Clute Park and Campground for a few reasons: (1) we wanted to be at the center of town to be able to bike, hike, and kayak from our campground without driving, (2) we wanted to be within walking distance of the lake, and (3) we wanted full hook-ups since we would have our trailer here for a full week. For those reasons, we loved the location of our campground.
But with all of the pros, we gave up much of what we love when we camp at a state/national park. We gave up privacy as they pack people in this campground tight! Our neighbors to our left were literally eating breakfast right under our window, our neighbors behind us shared an electric/water spicket with us, and then there was a baseball field less than 20 feet from our rig. We were packed in for real! We also gave up trees, this campground is like one giant parking lot. But Seneca Lake is directly across the street so there is that, and we hiked, biked, kayaked, walked to our dinner cruise, and played in the lake all without moving the truck. It’s what we wanted so we can’t complain (too much).
IMG_2107
If you love waterfalls, you must visit the Finger Lakes. Watkins Glen State Park has 19 waterfalls alone. But you have to be ready for people – lots and lots of people! We tolerated the people (and the over 800 steps!) to see these gorgeous waterfalls but we were more than thrilled to hike the next day at Robert H. Treman State Park because there were a lot less people on the trail. This state park has 12 waterfalls and you can actually play in the water here. We climbed almost as many steps, enjoyed less people, got to play in the water to cool off, and just had a much better experience. The coolest feature of the park (and were you find most of the people) is their “swimming pool” which just looked like something out of the 1920’s. People sitting on rock walls, diving in to the deep waters next to a waterfall, and just enjoying this nature-made gem.  We highly recommend Robert H. Treman State Park!

The last gem of the week was a hidden trail with 5 waterfalls on the North Country Trail in the Excelsior Glen. We had heard about this area before but couldn’t find the falls. Fortunately, our kayak guide Paul of Seneca Lake Kayak pointed us in the right direction and we enjoyed this hike on our last morning in Watkins Glen.
IMG_2114
We had a fantastic time in the Glen. It was hot this week but the gorges, waterfalls, and a beautiful lake kept us cool!
 

Recipe of the Week – Taco Dip

This week Michelle and I are getting ready for our oldest son Calvin and his fiancée Carla’s wedding and the recipe is one that we got from Carla (who I believe got it from her mom).  This Taco Dip is pretty much like a traditional seven layer dip often served at parties, but we liked it so much we made it for dinner.  The recipe given here would easily serve 6 people as a meal and many more as part of a party table of other munchies. In the pictures, you are seeing the recipe halved so we didn’t have too much left over.
IMG_6539
Start out by browning a pound of ground beef and add a packet of your favorite taco seasoning.  (Remember in the picture, this is inly 1/2 pound.  I actually browned the entire pound and put half in the freezer for another meal later.) . Let the meat cool while you start the layers.
IMG_6540
In a bowl or baking dish (we used a Tupperware container and made two), spread 1 can of refried beans.  If you use the low fat variety, they are difficult to spread so it works better if you warm them up a little first.
IMG_6541-1
Mix together one 8 oz block of cream cheese with 1/3 a jar of salsa (as spicy or mild as you like it) and spread it on top of the beans.
IMG_6542-1
Sprinkle the cooled ground beef over the cream cheese mixture.
IMG_6543-1
Top the ground beef with shredded cheese.  We used a triple cheddar blend (we are in New York after all) but a Mexi-blend, taco cheese, Monterey jack, or pepper-jack would work well also.  Now you get the chance to throw the garden at it.  I added chopped green onion, but chopped tomatoes, red onions, shredded lettuce, cubed avocado, or sliced olives would all be good depending on your personal tastes.
IMG_6545
We served the dip with a Cabernet Sauvignon-Cabernet Franc blend from JR Dill Winery and tortilla chips. The bowl in the picture is 1/4 of the recipe.
I was trying to come up with a variation and here’s what I think would be really good: Substitute Italian seasoning for the taco seasoning in the ground beef and then layer with smashed white beans, cream cheese mixed with marinara, shredded provolone and fontina.  Serve with pita chips or toasted bread.  Call it lasagna dip?
Here’s the breakdown of the recipe:

Taco Dip

  • 1 lb ground beef
  • 1 packet taco seasoning
  • 1 can refried beans (regular full fat variety works best)
  • 8 oz cream cheese
  • 1/3 jar of salsa
  • 1 cup shredded cheddar cheese (or blend to taste)
  • Variety of toppings to taste: green onions, tomatoes, onion, olives, avocado, shredded lettuce to top

Layer one – beans
Layer two – cream cheese and salsa mixture
Layer three – ground beef taco meat
Layer four – shredded cheese
Top as you wish.
Let us know if you try either the dip or the variation and tell us what you think!

★ 25 years guiding ★ 48 U.S. states ★ 10 countries ★ 3,000+ Camino miles