As we prepare our next RV trip we continue to mourn the loss of our sweet little Lola. She was only 4 years old and seemed to be battling cancer her entire short life. Pepe and Lola are rescues that we fell in love with 4 years ago (this week actually) from one of our no-kill shelters in the area. You can find more amazing cats just like them at SICSA and we look forward to adopting from them again. Right now, we are still in shock and mourning while Pepe wanders around the house trying to find his best bud. Pepe is certainly more clingy, sitting on our laps at every possible moment. We will press on because we know that Lola is no longer in pain. For that, we are grateful.
To honor our sweet girl, let’s talk about how much fun it is to RV with cats! Imagine the joy and wonder you feel when you experience new places, now imagine that same joy and wonder through the eyes of a cat. Everything can be exciting for a cat, their noses are always twitching with new smells and their eyes are always flickering with the new sights.

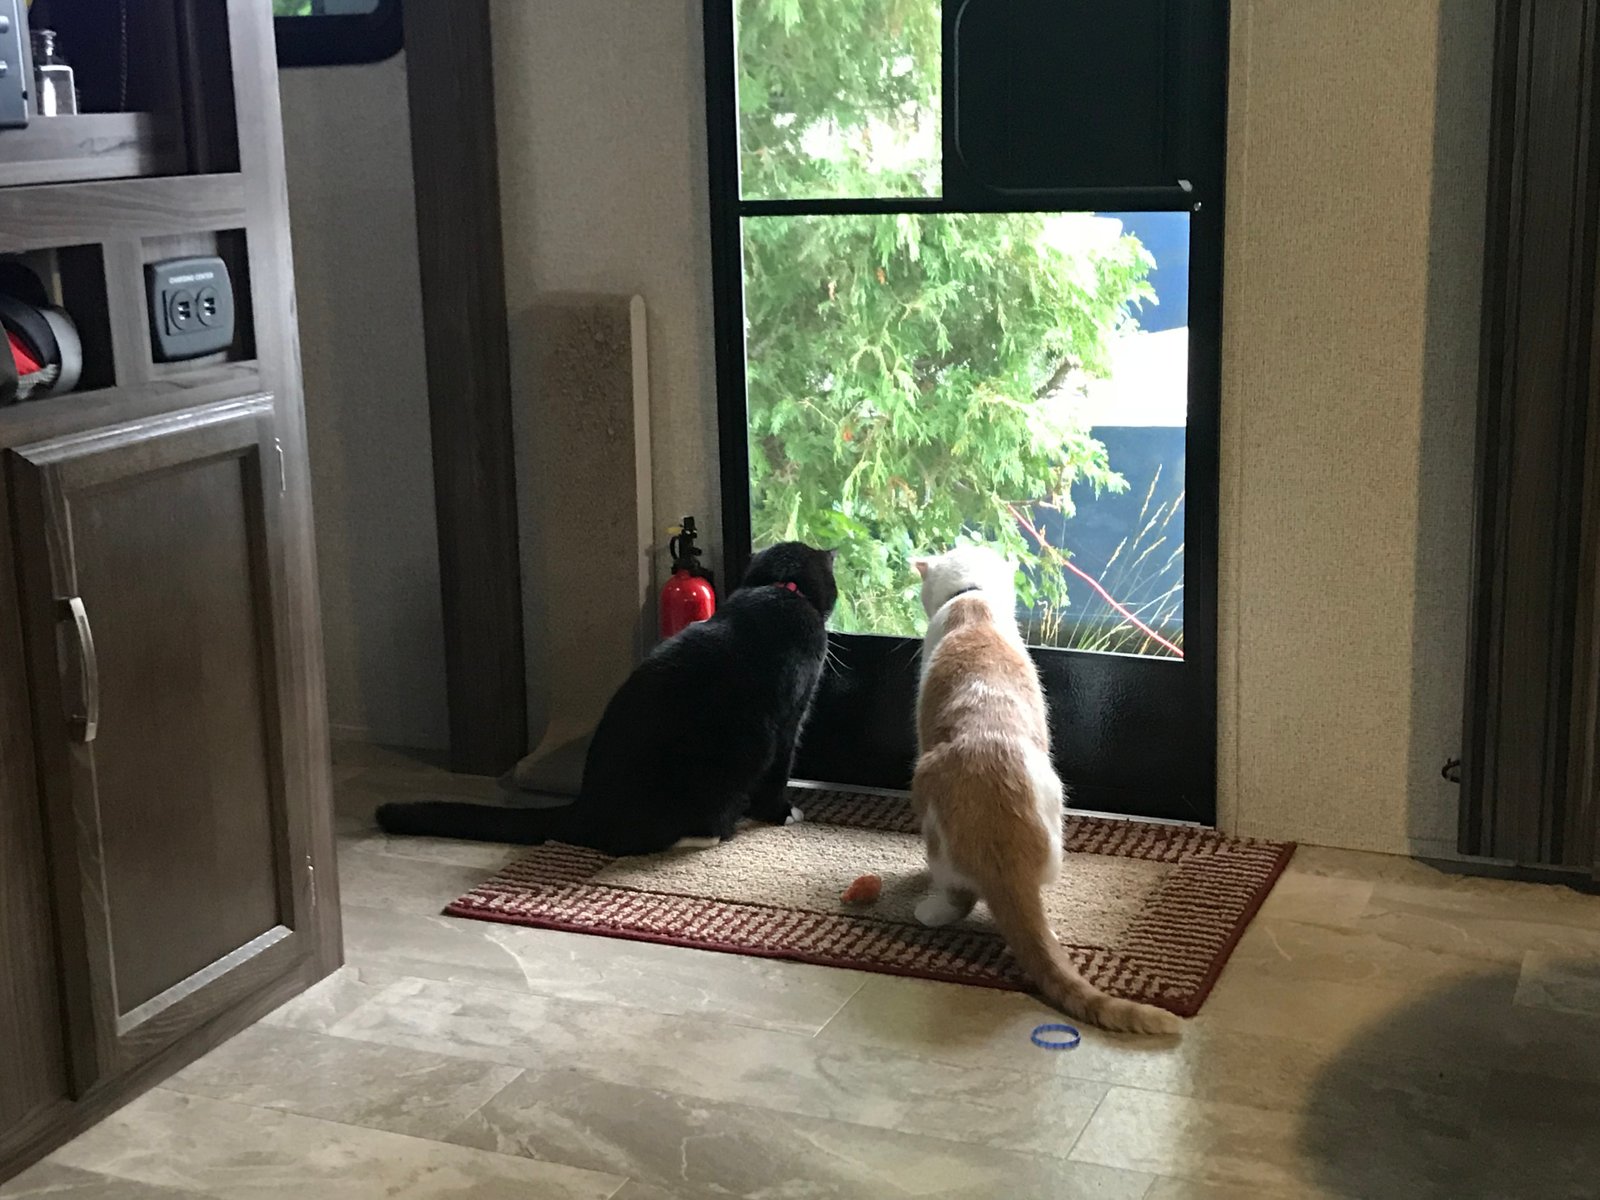
Don’t get me wrong, it can be quite scary for these little ones. Look at Pepe’s backside in the photo above, he is obviously on alert. There was probably a fly outside swooping with great speed right outside the door. Haha. Let’s looks at a few tips for making traveling with cats easier for you and our furry friends.
#1 – Toys, Toys, and more Toys!
It is important to have a few of their favorite toys in the rig that you can rotate so the cats don’t get bored. Our cats love the laser, the feather on a stick, a mouse, a small bear, and their shoelace. The feather, shoelace, and laser never get old! The mouse and bear show up in random places and get moved enough that we know they love them. I have seen Pepe sleeping with the bear – so sweet! We love Jackson Galaxy toys, you can find them at any Petsmart.

#2 – Scratch Pads
Our cats have their front claws so it is critical to have scratch pads around the rig. Lola loves the one below, as you can tell. She especially loves it when it has catnip on it. We also have a scratch pad behind our chairs, one that hangs on a wall with command strips, and as you will see soon, a tower with scratchers on it. They get their relief to claw and your furniture will be saved. On a side note, if you are RV’ing full-time with cats, it is imperative that you are able to trim their nails. We play with and massage our cat’s paws all of the time so it is natural for us to touch and trim their nails. They don’t mind the trim at all but we set the stage for success early on. Talk to your vet so you can help your cats with the nail trim.

#3 – Hiding nooks
Cats have to have places to escape (don’t we all need that?). They need to be able to hide from each other, their guardians, and those pesky bugs. Lola loved this spot in our towels, she also loved the pantry. We tried creating places for the cats but they found their own hiding nooks. For example, we put cat doors on our under the bed storage, but the cats were never fans of that space. As long as they have somewhere to hide, you will be fine.

#4 – Places to Sit/Watch
If our cats are not on our laps or hiding, they are watching out the window or watching over our shoulder. We tried putting a bird feeder on our rig, but we learned the cats are already in sensory overload. There are plenty of birds and bugs flying around, they didn’t need the feeder too and the birds were not fans of being that close to the cats. Really, as long as they can see out the window, they are completely happy! We try to keep one window shade open overnight that the cats can see out of because the action really happens overnight! As long as humans can’t see in, we leave various shades open. If we don’t leave a shade open, we find that the cats spend more time climbing all over us while we are trying to sleep. It’s really for our ability to sleep without interruption.

#5 – Litter Box Space
This was tough at first – where to put the litter box?? Oh, the challenges! We read every blog we could find about the litter box dilemma and we didn’t like where anyone was keeping their litter box. From the shower, to under the dining table, to under the bed, we were not excited. We didn’t want clay in the shower, we didn’t want the smell (or thought of it) under the dining table, and we didn’t want to hear the litter box scratching while we slept. So we were stuck with what to do?? Oh, and it’s not just about the smell and noise, it’s about (1) ease of cleaning and (2) we don’t want to step on the litter they leave behind when they exit the box.
Then a big lightbulb popped on! The outdoor kitchen on our Apex did not impress us as a needed space. The grilled had to be moved to a picnic table just to use it and we don’t need an outdoor fridge. So there it was – convert the outdoor kitchen into a litter box space and bonus storage while we travel. They enter from the bathroom and clean off their paws before they come back in the rig. There is still some litter that comes back inside, but it is minimal. The best part – we go outside to clean the box and so no mess inside! This is one issue everyone has to be content with because cats need a good space to use the bathroom and you need to be happy with the location, smell, and ability to clean the box often.

#6 – A Tower?
Our sweet Pepe is a high energy cat and even with all of the stimuli around him, this cat was missing one of his favorite activities – running up the stairs. We have plenty of stairs at our home for him to run and he was missing it in the rig. It was Thanksgiving week and we were camping in the Great Smoky Mountains, Pepe had a lot of stimuli, was getting walked, and was still driving us crazy at 3 a.m. with his restlessness. So we went to Petsmart and we found this cat tower. Just like that – we got to sleep through the night! Though it is a bit obtrusive for us, it has been worth it for him. Now there are plenty of scratchers, spots on the tower for both of the cats to sleep, and a place for Pepe to watch us while we use the bathroom. Haha. Note: In the photo below, Lola is chilling on her scratcher on the bottom of the tower. We like to move the scratchers around because it keeps the cats interested. Cats really do get bored easily.

#7 – Walking with Cats
Yep, we do it! We knew when we bought our rig that we would have to teach them to walk on leashes. We were quite nervous because they were already 2 years old but we were determined. And guess what? They thoroughly impressed us with their abilities! They learned pretty quickly how to do it, but the desire took a bit of patience. Here is what we know: (1) don’t drag them, it will not help the learning process, (2) walk where there are no cars or other people, (3) walk by a good tree line, (4) it’s not your exercise, it’s theirs so walk slowly and not too far, (5) start with just wearing the harnesses indoors, then upgrade to the leashes indoors, and then go outside, and finally (6) if it is fun for them, they will walk with ease. We got the harnesses and leashes on Amazon.

#8 – Safe Travel Space
This is absolutely critical – the cats have to enjoy travel days! They cannot ride in a travel trailer or in a fifth wheel. First of all, the rigs are not temperature controlled, and second, you try riding back there. I did and the bounce is beyond scary. My stomach took a while to recover from the adventure. 🙁
We pull our travel trailer with a Ford F150 Supercab. The cats get the entire back seat area. They have a tower so they can see us and see outside. The bottom of the tower has a box to hide in, which Lola claimed as her spot. On the other side of the back seat area (which you can’t see in the picture, sorry) is a hard-sided carrier with the door open and Pepe sleeps in there. On top of the carrier is a clear Rubbermaid tub with recycled paper for an emergency litter box. We learned the hard way – don’t have clay in the litter box in the truck! Day one: we had a clay everywhere, and in turn, had to run to Petsmart for recycled paper litter and vacuum the truck out after a long day of driving. 🙁 The carrier is big enough to serve a dual purpose in case you need to lock up the cats for whatever reason. The Rubbermaid tub fits very snug between the front seat and the back seat that we have in the upright position so it doesn’t move while we are driving.
We don’t have food or water in the truck while we drive, but we don’t drive for more than 6-8 hours in a day. We did at first have food and water in the truck but it was making a mess. Therefore, after some research, we learned that cats can go much longer than we realize without food and water, certainly longer than we drive in a day. However, we always have treats in the glovebox just to make them happy if the day is getting long.
Full disclosure – we do use Hemp Oil to calm our cats. Travel days are stressful for everyone. We have a lot on our minds from did we do everything, how’s the construction, how long will it take, and where are we going. The cats feel our stress and they don’t like the moving from the trailer to the truck and back, they don’t like semi’s that fly by, and they just are not as comfortable as they would like to be. The Hemp Oil takes the edge off and calms them just enough.
Finally, we have also learned they travel better when they wear their harnesses and walk in their leash from the trailer to the truck and vice versa. They also rip fewer of our shirts when they walk vs. clinging to our t-shirt. We hadn’t figured this out yet in the photo below.

Did you learn anything about successfully RV’ing with cats? If yes, please like and share! We want the message to be heard that you can successfully travel with cats and we enjoy seeing our community grow. We will be back in our rig, as a family of 3 this time, in 6 weeks when we head to Florida for Christmas vacation.
I am sure there are more tips, please comment below and give us your best tip on RV’ing with cats! We will be sure to include more tips the next time we talk about RV’ing with cats! For now, we say goodbye to our sweet Lola. She had an amazing 4 years of life. We leave you with this important message – Please spay and neuter your animals! And help control the pet population by finding homes for stray aminals!
RIP Miss Lola Lou 7/21/2014 – 10/31/2018