When we’re home for New Year’s Eve, which isn’t often, we love to serve a buffet of appetizers. Gluten-free crab rangoon, chicken wings, a good charcuterie board like this one from Self Proclaimed Foodie, and shrimp coctail will make any occasion a special event. One of our favorites is an old microwave classic, hot beef dip. The quantities below are a doubled version of the recipe so there is plenty for a crowd. The recipe at the bottom is the regular version.
Begin with a large bottle of dried beef. Dice the meat into small pieces about a quarter inch square and place it into a microwave safe bowl. Cover with water and microwave for about two minutes and let it sit until ready to use.
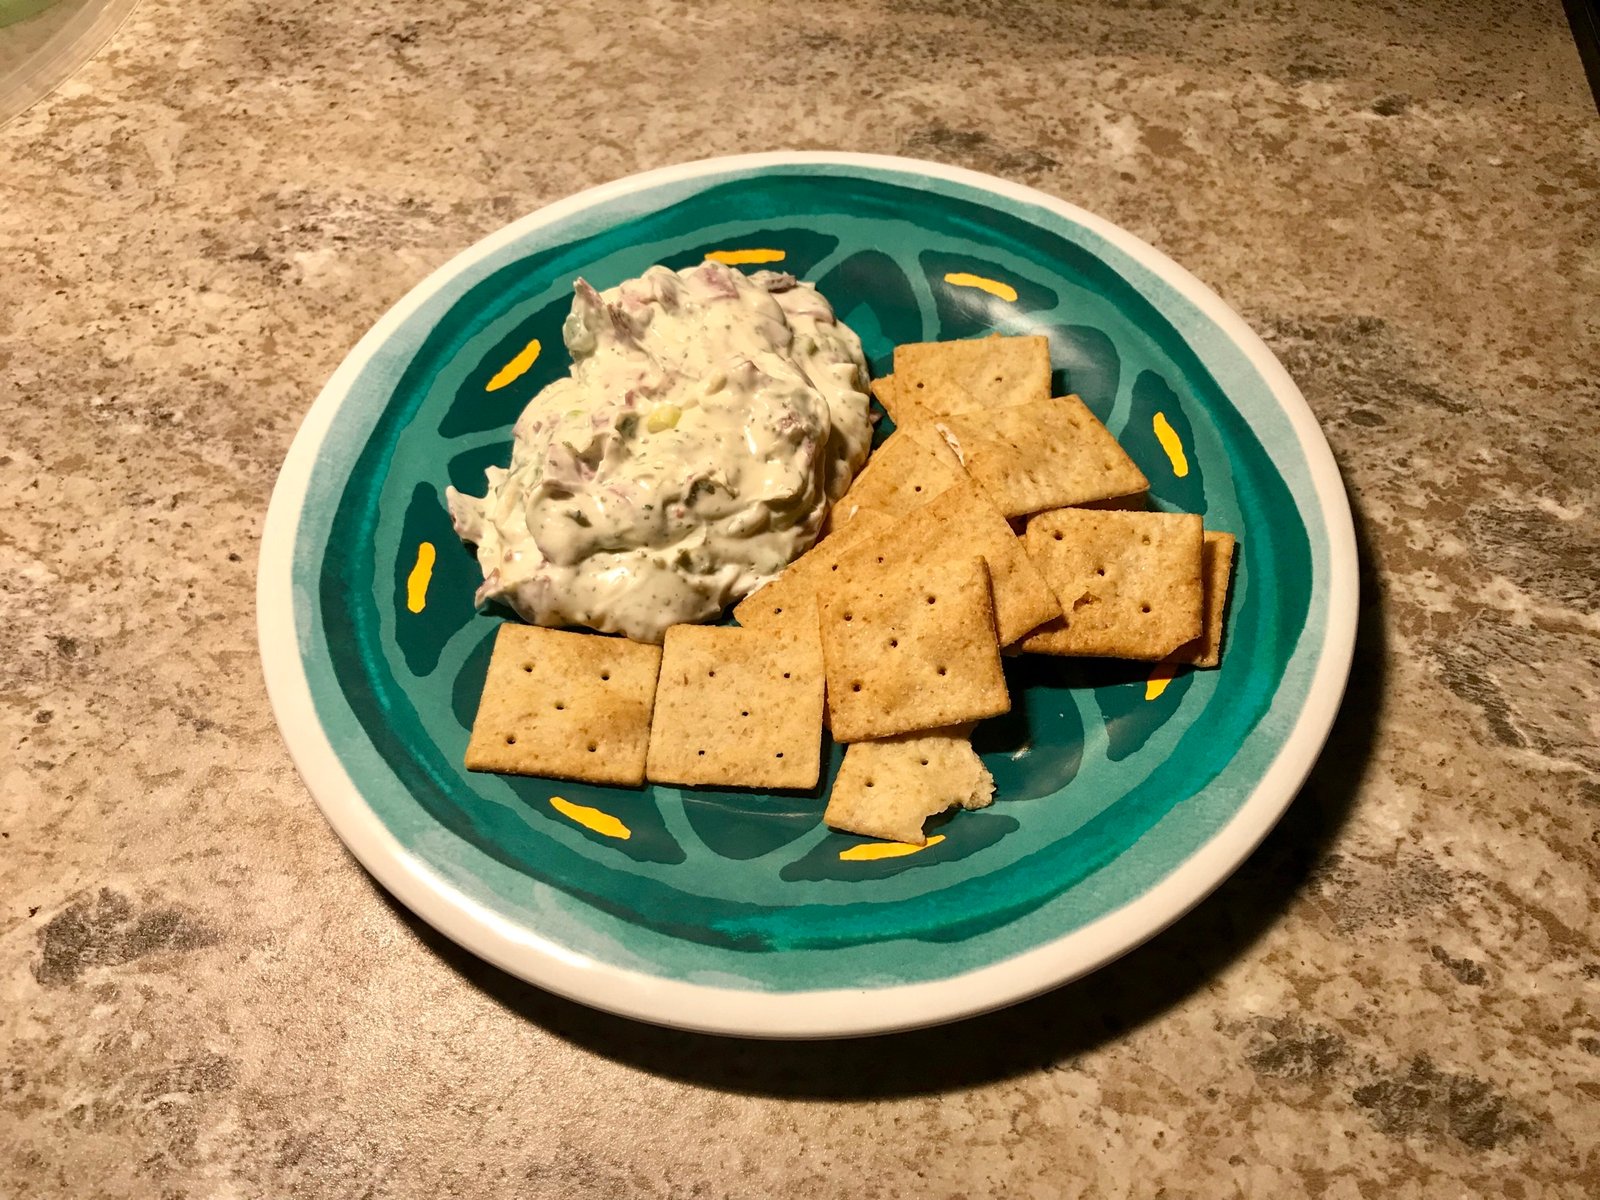
In another microwave safe bowl, combine a half cup each of diced green onion, greek yogurt (or sour cream), and mayonaise. Add one cup of parmesan cheese, two tablespoons of diced parsley, and two 8-ounce blocks of cream cheese (we always use the reduced fat Neufchatel). Mix everything together until well combined and cook in the microwave for about two minutes.
While the cheese mixture is heating, drain the water off of the beef and squeeze off any excess water. Mix the beef into the cheese mixture and cook another one to two minutes until everything is heated through and bubbly. Serve with gluten free crackers.
What are your favorite appetizers to serve for a party or gathering of friends (or maybe just a special treat dinner night)? Leave us a comment below to let us know. Don’t forget to hit subscribe to get notifications sop that you don’t miss a single post!
We’re in Florida! It’s time for two weeks of fun in the sun and Camino training, so I am thinking about gear! Everyone loves to talk about gear and I get it. When you prepare for your 1st Camino you research like crazy because you desperately want to know what to bring, but more importantly, what not to bring. Before I get to the gear, you may want to know how we are training for the Camino in Florida. This is a great question because, yes, you can combine RV’ing, Florida beaches, rum runners, and fun in the sun! Our plan is to start every day (except for some travel days) with a 7-10 mile walk. We have all of the routes planned out based on where we will be so we can easily get our miles knocked out before we start the fun. Follow our Instagram page to see how we will spend our days in Florida. We won’t be carrying gear beyond water, it is a vacation you know, haha. Our plan is to pack our Camino backpacks when we get home from Florida so we can train through the cold Ohio winter months, hiking fewer miles but with fully-weighted down packs.
Before I digress too much with my enthusiasm for our trip, let’s get back to the Camino. I remember when we first start planning our Camino I wanted to bring so many pieces of gear that I thought were “essential” even though we have backpacked enough to know the difference between essential and non-essential. The movie The Way had me feeling the not so practical side of planning for our Camino as I wanted to unload my entire closet into my backpack. But you can’t, and at the end of a long day on the Camino, you will so thankful you didn’t pack too much gear.
There are a lot of opinions about gear on every forum you read, and there will be plenty of people who want to assess what you have in your pack once you are in Spain. Have you checked out the Facebook group, American Pilgrims on the Camino? It is very helpful. Our first night in St. John Pied de Port, France, the hospitalero lifted my packed and told me immediately my bag was too heavy. He was right, it was too heavy but I had seen a lot worse and at the time I had done my best to purge the nonessentials. When you arrive in Roncesvalles you will see tables and tables of gear that people have purged after climbing over the Pyrenees Mountains.
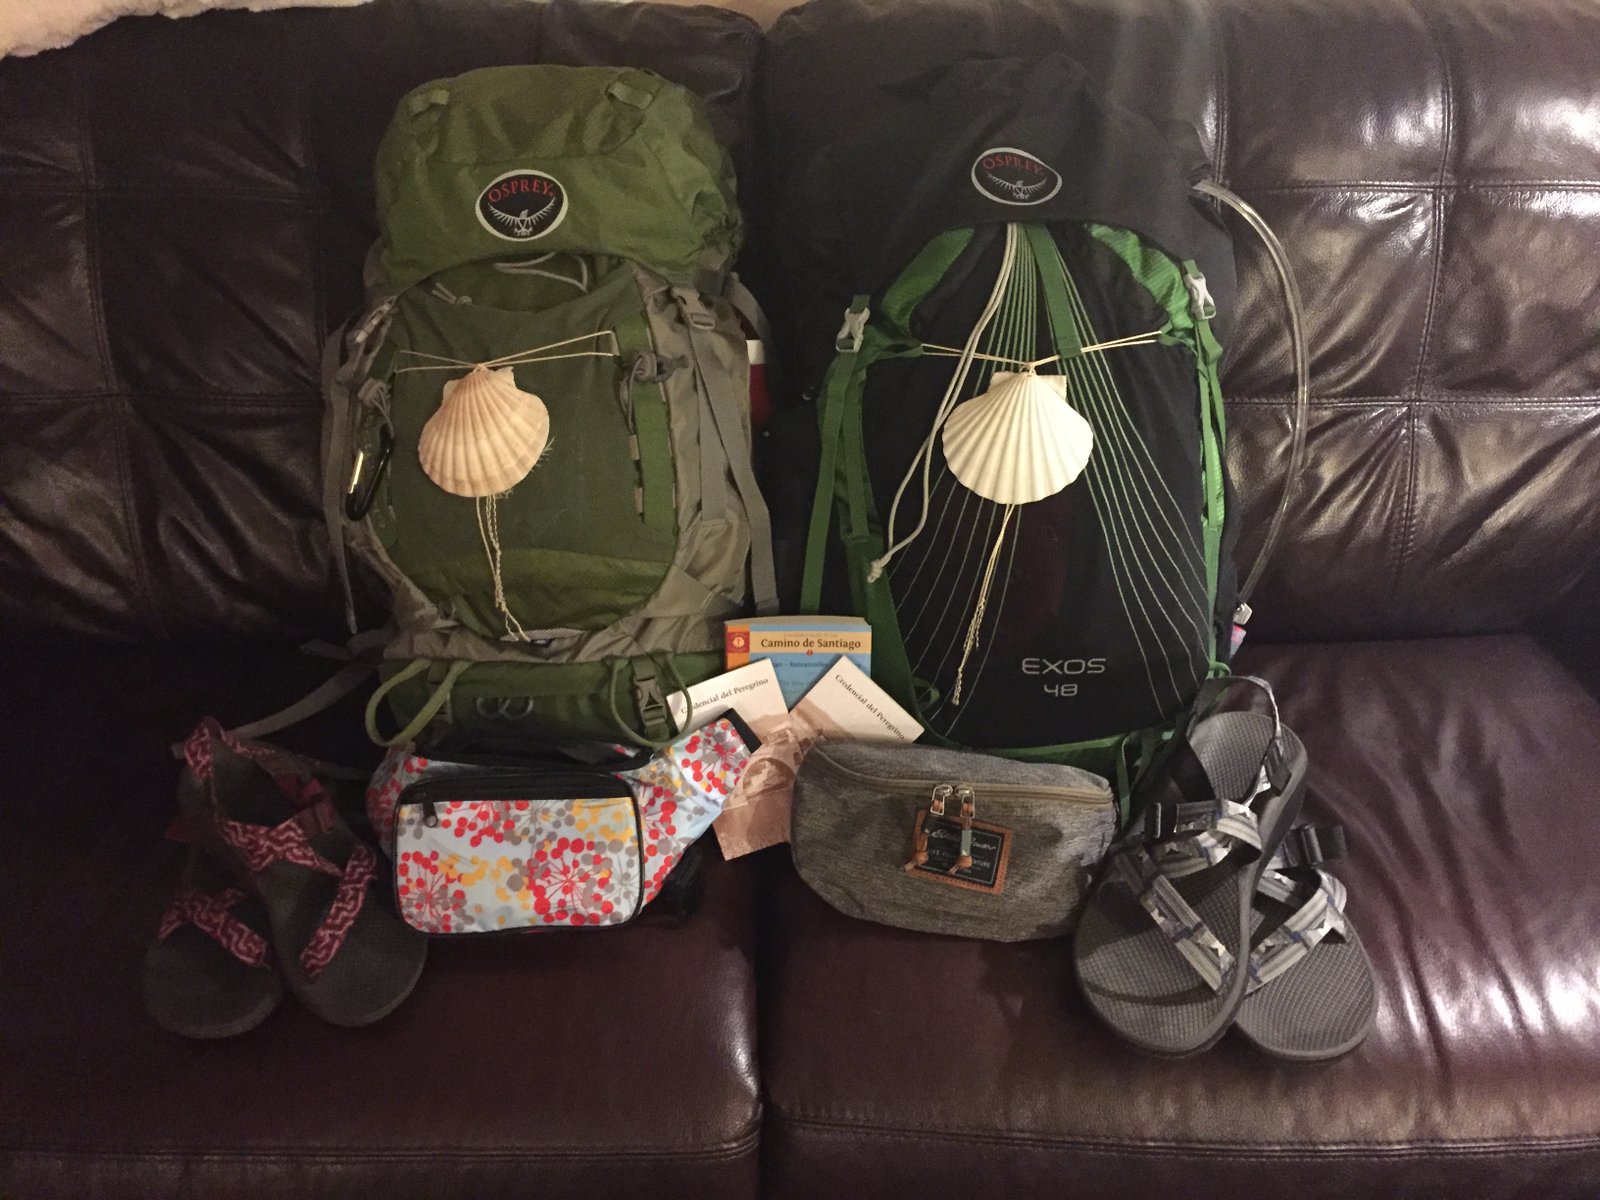
Everything we took, laid out on the table before we packed
With all of that being said, this is our top 10 items to carry on your Camino. It’s not a perfect list. It is your job to create a packing list that works for you. As Brian and I prepare for our 2019 Camino, we will probably talk about gear again. Leave your questions so we know what you want us to talk about next.
(1) Backpack: Your most important piece ifequipment is a backpack. You need to find a backpack that makes you feel like you don’t even know it’s there. We strongly recommend going to an REI near you. REI has a large selection of backpacks, they will fit you to help you find a pack that works with your body shape/size and have a return/exchange policy like none other. Brian was lucky, he was fitted and loved the first backpack he purchased. Brian found the Osprey Exos 48, and surprisingly, you can find this pack in the outdoor stores in St. Jean Pied de Port, France. Me? I am never easy. I tried the same pack in a women’s version, bought it, hiked in it, and it bruised my hip bones. I hated it. REI graciously exchanged this pack for another one. I am still not totally happy with my pack but it made it through our 2017 Camino. I am heading to REI to look at backpacks in January to prepare for our 2019 Camino. Seriously, it is important to get your pack as soon as you can, load it up, hike with it in your neighborhood, and make sure you absolutely love it. You will be carrying it on your back every day, up to 8 hours a day, for as long as you are in Spain. You have to love it.
(2) Clothing. This is the first place people overdo it and I get it, you want to look at feel good. However, I promise you will feel much better if your backpack is lighter. For pants, you need zip-off or roll up hiking pants that are made of polyester and have UV protection to help with the cool mornings/evenings and warmer or hot days. You are looking for lightweight pants that wick moisture and can be used in multiple ways. My absolute favorite pants are from REI, they are the Sahara Roll-Up Pants, they are not available anymore. I just bought a pair of the Kornati Roll-Up Pants, they are almost the same but they have a snap instead of a button. I hate snaps so I may have to get those fixed. One of the things I love about both pairs is they have an adjustable waistband which is important on the Camino when you are mostly hand-washing your clothes. I have this pair of pants for the evening while the pants I wore during the day are being washed. During the day I liked wearing capri length leggings, if I liked my legs more I would wear a shorter length of leggings because we are typically traveling in the heat of the summer. As for Brian, his pants were a pair of zip-off hiking pants and a pair of hiking shorts, both are polyester and looked very similar to mine. Please, whatever you decide, don’t wear jeans, they are too heavy, they don’t wick moisture, and they don’t move well when you are hiking.
As for tops, Brian had 2 button-down tech shirts, a tech t-shirt for bedtime, and a long sleeve tech shirt for cold mornings. Could he have had less? Probably, but he was happy. I had 2 tank tops and a zip-up sweatshirt. They were all made from polyester and very lightweight.
We both had raincoats which are essential on the Camino. You want one that is lightweight and in a bright color so you are easy to see in the fog and rain. We don’t recommend ponchos because when it’s windy they are all over the place. Your backpack should have a cover so when it’s raining put the cover on your pack and put your raincoat on. I promise it’s all you’ll need for rain.
As far as undergarments, we suggest 3 pairs of socks. One for the morning, one to change into in the afternoon, and one for the evening/overnight. Regarding underwear and bras, we believe you should have one to wear and one for wear while washing. Again, they should be made of a polyester material.
Ladies, let me talk to you for just a second… I suggest wearing a panty liner so you feel fresh and clean all day long. Also, I suggest you find your favorite sports bra that you are willing to wear all day long. You don’t want one that feels like it’s pulling on our shoulders. I love the sports bras in this link. It is inexpensive, the most comfortable piece of clothing I own, and wicks sweat very well. In the evening, I like just an everyday bra, certainly nothing I have to pull over my head. I am too tired and like easy by this point in the day. The goal here is to find your comfort level.
Finally, you need a bandana to wick away sweat, dirt, whatever. We carried one on our backpack strap so we had access to it all the time. The goal is to think about what you are wearing all day, what you are wearing while your clothes are drying and when you’re sleeping (should be the same), and what you are adding to your layers when it’s cold. Some people wore hats, but it’s up to you.
(3) Toiletries: This should be easy. You need a toothbrush, toothpaste, brush/comb, maybe a face cleaner if you struggle as I do with oily skin, an all-in-one shampoo/conditioner/soap, and a towel. We absolutely loved this Turkish towel from Amazon. Then there is all the other stuff you feel like you need which complicates the “trying to keep the weight down” issue. I really didn’t carry much more. I had to carry vitamins which I put in individual bags for each day, I got the bags on Amazon. I carried a small roll of toilet paper, which I did need and would take again because many times by mid-afternoon the bars were out of toilet paper. You have to decide what you can live with and what you must have with you.
(4) Bedding: What bedding you need depends on the type of accommodation you will be sleeping in. We stayed in private rooms so we had a bed liner with us in case we needed it but we didn’t. All of our rooms had bedding, sheets, and a pillow. I am so thankful because I would not have wanted any more weight on my back. Those staying in dorm rooms will need a sleeping bag or just a bed liner in the heat of the summer. Many people rolled up clothes for a pillow, I would have had a travel or inflatable pillow.
(5) Fanny Pack: This is so important for everything you need to get to throughout the day so you don’t have to get in your pack. We kept our essentials in our fanny packs which included passport, money, pilgrim credential, phone, charger, and a snack or two. Be sure to put things in a freezer baggie to protect your stuff from rain and sweat.
(6) Two pairs of shoes: Brian and I left for the Camino each with a pair of Merrell hiking shoes and a pair of Chacos. Brian decided by Pamplona that he loved hiking in his Chacos so he mailed his Merrell’s home and bought a pair of flip-flops for the evening. As I have mentioned before, Brian is the easy one. I have foot problems; I have bunions and a hammer toe. It sucks, I will need surgery eventually. Therefore, I wore my Merrell’s in the morning, wore my Chacos mid-day, put my Merrell’s back on for the late afternoon walking, and then back in my Chacos for the evening. I am actually, very seriously, considering bringing a pair of tennis shoes as a 3rd pair for our next Camino. I get blisters and have a lot of foot pain if I am in a pair of shoes too long. I don’t want the extra weight, so I am trimming in other areas, but we have some long days planned for our 2019 Camino and I think this will be a smart decision. Time will tell what I decide.
(7) Basic First Aid: You do not need much here at all, there are plenty of pharmacies along the way. All you need is a small baggie with a few band-aids, needle/thread to deal with blisters, moleskin for blisters, and Advil. Spain sells an anti-inflammatory cream in their pharmacies that is amazing! Bring some home, you will love it! We also had a small exercise ball that we used on the bottoms of our feet at the end of the day, I strongly suggest it. Your feet will be bruised with all of this walking, make sure you are taking care of them.
(8) Hydration system: There are a couple of perspectives here – water bottle vs. water bladder. We chose water bladder and will again on our next Camino. There are some long days on the Camino and you need to make sure you have plenty of water. We knew the hostel/albergue had potable water so we filled up for the day. We never had water issues but we saw a lot of people who did. Between non-potable water or just not having enough, we saw it all. The other thing that will help you stay hydrated is electrolyte tablets. You lose a lot of salt when you are sweating so be prepared.
(9) Cell phone: You will need a cell phone for a variety of reasons – to call ahead to albergues to let them know when you will be arriving, to make reservations if needed, to be able to check maps, and to be able to call home if you wish. Therefore, you need to decide if you are going to get an international plan or unlock your smartphone and get a SIM card once you land in Spain. We opted for the SIM card and were very happy. We didn’t use it much, mostly used wi-fi but we did use the phone to confirm with albergues. Also, make sure you have a European charger. There are a lot of great smartphone apps that would we encourage you have including Google Translate, Google Maps, Wise Pilgrim, and Booking.com.
(10) Charles Schwab Card: Number 10 and the best thing we learned about before our Camino! We are so thankful someone told us about using a Charles Schwab card when on the Camino. Charles Schwab does not charge ATM fees, they rebate ATM fees from other banks, and they don’t have international charges. We transferred money from our checking account to our Charles Schwab throughout our trip and then took money out every week as we need it. Seriously – best advice ever!
If you are still reading this blog, you are serious about what to pack on your Camino and that makes us smile. Please click the “Like” button if this blog helped you at all. The Camino is a magical place. Enjoy your journey.
If you’re following us in Instagram (@cruisinwiththecolemans) you probably already know the we are in Florida right now celebrating Christmas with my parents at Lake Lochloosa. We’re thrilled to get to spend some time with them but we’re even more excited to be heading to the beach later this week.
Before we head out to do some kayaking with (hopefully) manatee and not alligators, I wanted to share one more special holiday recipe – dressing. In the Coleman house, we never stuff the turkey. It’s always roasted with plenty of butter, onion, herbs, and spices, but our dressing is served on the side where the edges can get crispy and I know there is no risk of undercooking. Anyone who is gluten free knows that you can’t run into the grocery store and buy a box of gluten-free dressing mix, so this treat has to be a little more labor intensive than usual, but it’s always made with a secret ingredient, LOVE!
Preheat the oven to 250º. Start out with fourteen slices of bread. We use Kinnikinnick gluten-free bread and for this batch we used half white and half multigrain. Stack the bread up and using a serrated bread knife, cut the pieces into quarter inch cubes and toss them into a large bowl.
Melt a stick of butter and add two teaspoons of poultry seasoning, two teaspoons of parsley, and one teaspoon of garlic powder. Pour the butter mixture over the bread and mix thoroughly to get every piece of bread covered in butter and spices.
Spread the mixture on two cookie sheets so that the bread cubes are not crowded and put them in in the oven. The next step is going to take a while, so I hope you’re not in a hurry. Bake the cubes for one hour, stirring them every 10 to 15 minutes. You want the cubes to dry out but not brown or burn. Think of how Stove-Top looks coming out of the box, and that is your goal. Depending on how fresh the bread is, it may even take an hour and a half.
By the way, at this point , these make excellent croutons for a salad!
Dice two stalks of celery, a medium onion, and two cloves of garlic.
Sauté half of a pound of celery in a skillet and add the vegetables. Cook until the celery and onions are soft.
Add the mixture to the bread cubes in a large bowl. Add two cups of chicken or turkey broth and stir until it is mostly absorbed by the bread. Taste the mixrture to adjust seasoning. Add salt is needed. Stir in two eggs and if the mixture is dry, a little more broth.
Pour the entire mixture into a greased casserole dish and bake at 350º for an hour.
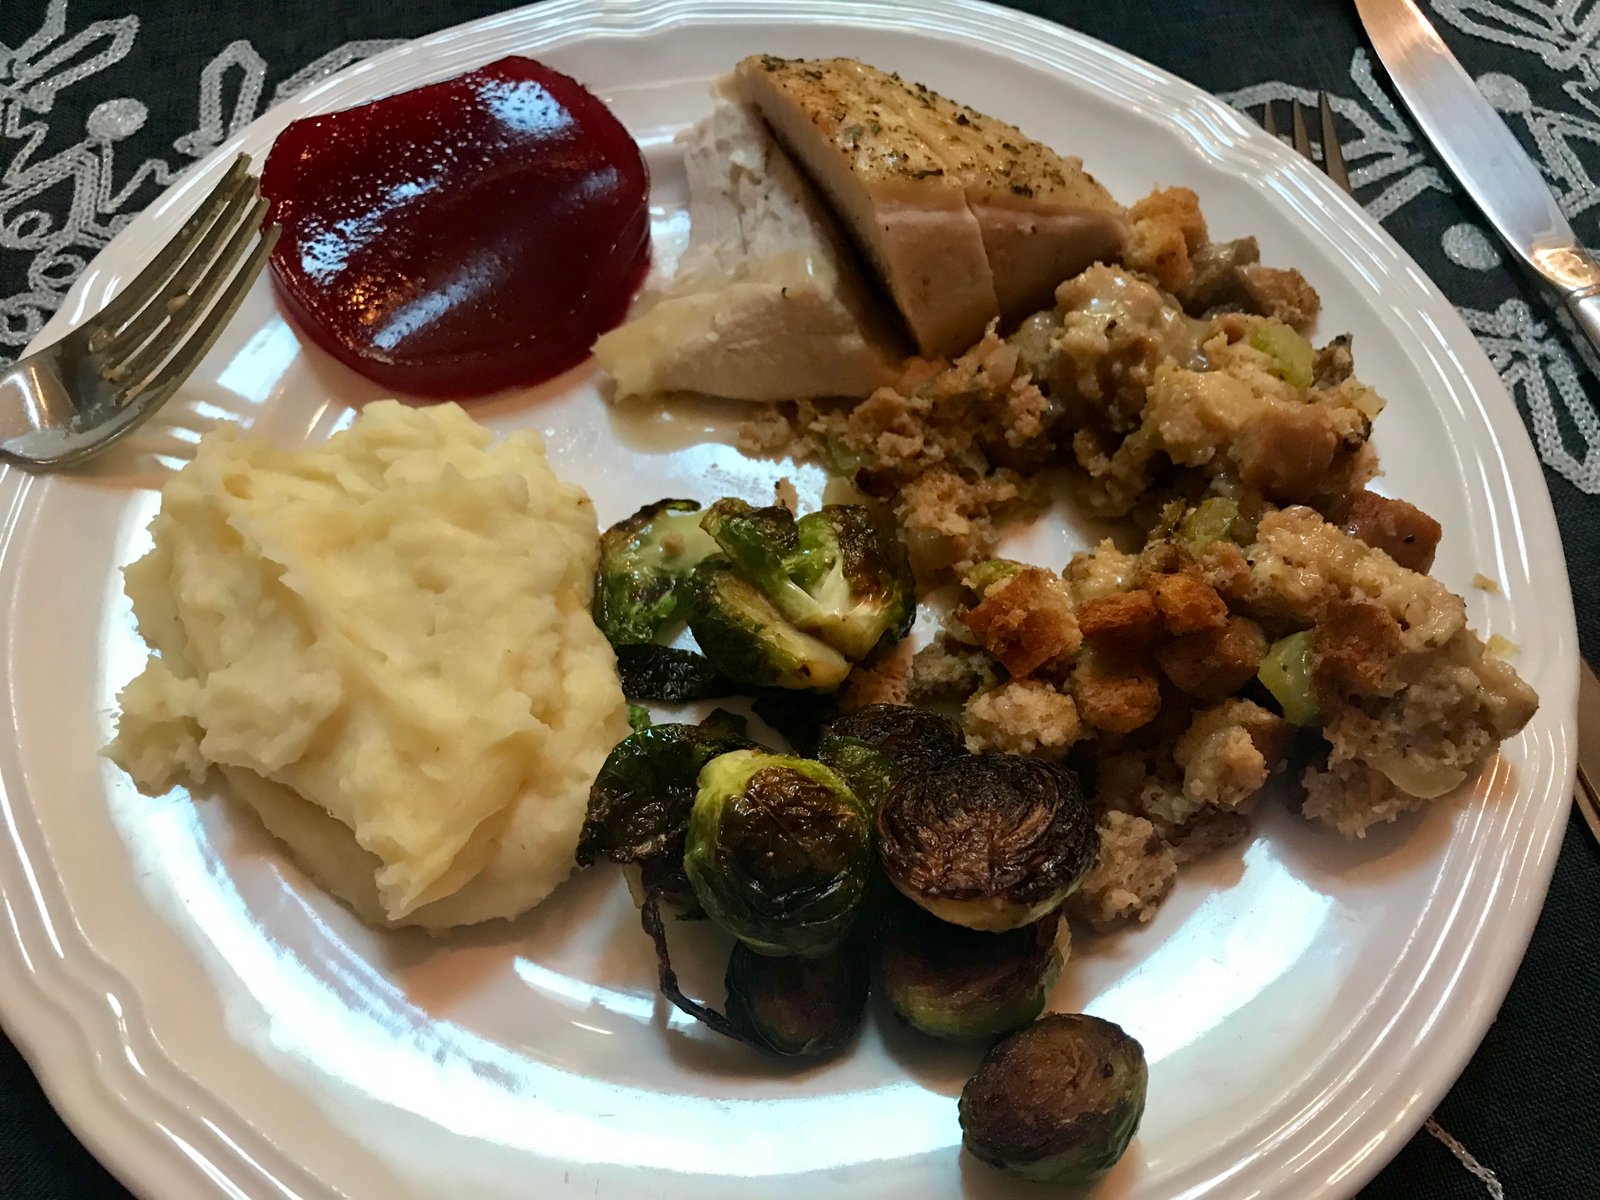
Our Thanksgiving menu included Roasted Turkey, Holiday Mashed Potatoes, Brussel’s Sprouts, Dressing, and of course canned cranberry sauce. For dessert, everyone enjoyed Gluten Free Praline Pumpkin Pie.
Holiday Dressing
14 slices of gluten free bread
1/2 c (1 stick) melted butter
2 t poultry seasing
2 t dried parsley
1 t garlic powder
2 stalks celery
1 medium onion
2 cloves of garlic
1/2 pound breakfast sausage
2-3 cups of turkey or chicken broth
2 eggs
Preheat the oven to 250º. Using a serrated knife, cut the bread into 1/4 inch cubes. Melt the butter and add the poultry seasoning, parsley, and garlic powder. Stir the seasoned butter into the bread cubes and make sure they are well coated. Spread onto 2 cookie sheets and bake for an hour, stirring every 10-15 minutes until the cubes are dry but not browned.
Dice the celery, onion and garlic. Sauté the sausage in a pan and add the vegetables. Cook until soft.
Mix the sausage mixture into the bread crumbs. Add the broth and taste to adjust seasonings. Add salt if needed. Stir in the eggs and add more broth if the mixture seems too dry. Pour into a greased casserole dish and bake at 350º for an hour.
We are so excited to have you here, please click around and check out all our new site has to offer. This is just the beginning of a new journey for the Colemans. If you would have asked us a year ago if we would like to start blogging, we would have said no. We don’t have time, don’t have the energy, and certainly don’t have anything to say. Personally, I am still in shock that Brian is as committed as he is. Haha, don’t tell him I said that. 😉
The first questions we get from people is why? Why are you blogging? What is your purpose for the website? What are your plans for the future with Cruisin’ with the Colemans? I’m so glad you asked. I love talking about the what and why!
Why did we start Cruisin’ with the Colemans? We did it for us. We needed an outlet for our travels. We know the gift we have been given by having the time, ability, and desire to travel. Since we are both teachers we have the time to travel in larger blocks which gives us the ability to go places we wouldn’t be able to go to with only one or two weeks off at a time. Also, as teachers, we both have the desire to research and see so many places in the world. This travel makes us better teachers because we can share what we experience with our students.
“Cruisin’ with the Colemans is our way of living what we learned on our Camino”
The purpose of the website vs. simply a blog is because we have decided that we want to do more than just blogging. We know that want to sell our travel photos, continue giving presentations about our travels, eventually do more travel consulting, and then who knows what else is down our path. We have not defined exactly where we want to go or what we precisely want to do just yet but the journey we are on makes us smile every single day.
The idea for Cruisin’ with the Colemans came after we finished our first Camino in 2017. The day we flew home from Spain, we stopped at an RV store before we even went home. Let me say that again – we had been in Spain for two months and we stopped off at an RV store before we even went home! That is crazy but it’s also how we felt. We purchased the RV we had been researching in our downtime on the Camino a week after we got home. We didn’t want the journey to end. Cruisin’ with the Colemans is our way of living what we learned on our Camino. We learned that you can’t plan everything, you have to accept the challenges in front of you, the journey is important, and to never stop walking.
Thank you for being a part of our journey thus far. Your support does not go unnoticed. We are humbled that you want to read our blog posts, that you subscribe to our blogs, and that you share our blog posts. We will do our best to provide you with reasons to keep coming back.
As we say on the Camino, “Buen Camino” which literally translates as “Good Way.” It is what you say when you leave someone as you wish the well on their journey. We wish you all well on your journey. Until we meet again. You can say Buen Camino to us by giving us a thumbs up and sharing our website. Thank you!
Welcome to the new and improved Cruisin’ with the Colemans website. Here’s a huge shout out to our web designer Elizabeth Kimmel for a fantastic job! Make sure that you click around and explore everything that we have to offer and stay tuned for new features that will be coming soon, including an Etsy store selling prints of some of our favorite travel photos.
As promised before our hiatus, here is my recipe for Gluten Free Praline Pumpkin Pie! When Michelle had to go gluten-free six years ago due to a diagnosis of lifelong heath issues we were concerned many favorite special treats would have to disappear from her diet. Surely we both had to make major adjustments to our cooking, but over the years we have found and developed our own recipes to include most of our favorite menu items into a gluten-free diet. Pie crust is one of those items. I have found two different pie crusts that work well with non-wheat based flour, a pat-in-the-pan crust that involves no rolling and the one that I have here. I have used them both for sweet and savory pies with great success, but this roll out dough is my favorite because it turns out both crispy and flaky. At Thanksgiving dinner this year with some of our neighbors, the ladies asked how I got the crust so flaky and were shocked to discover it was wheat free! With more than a hundred years of pie making experience at the table, I took it as a great compliment!
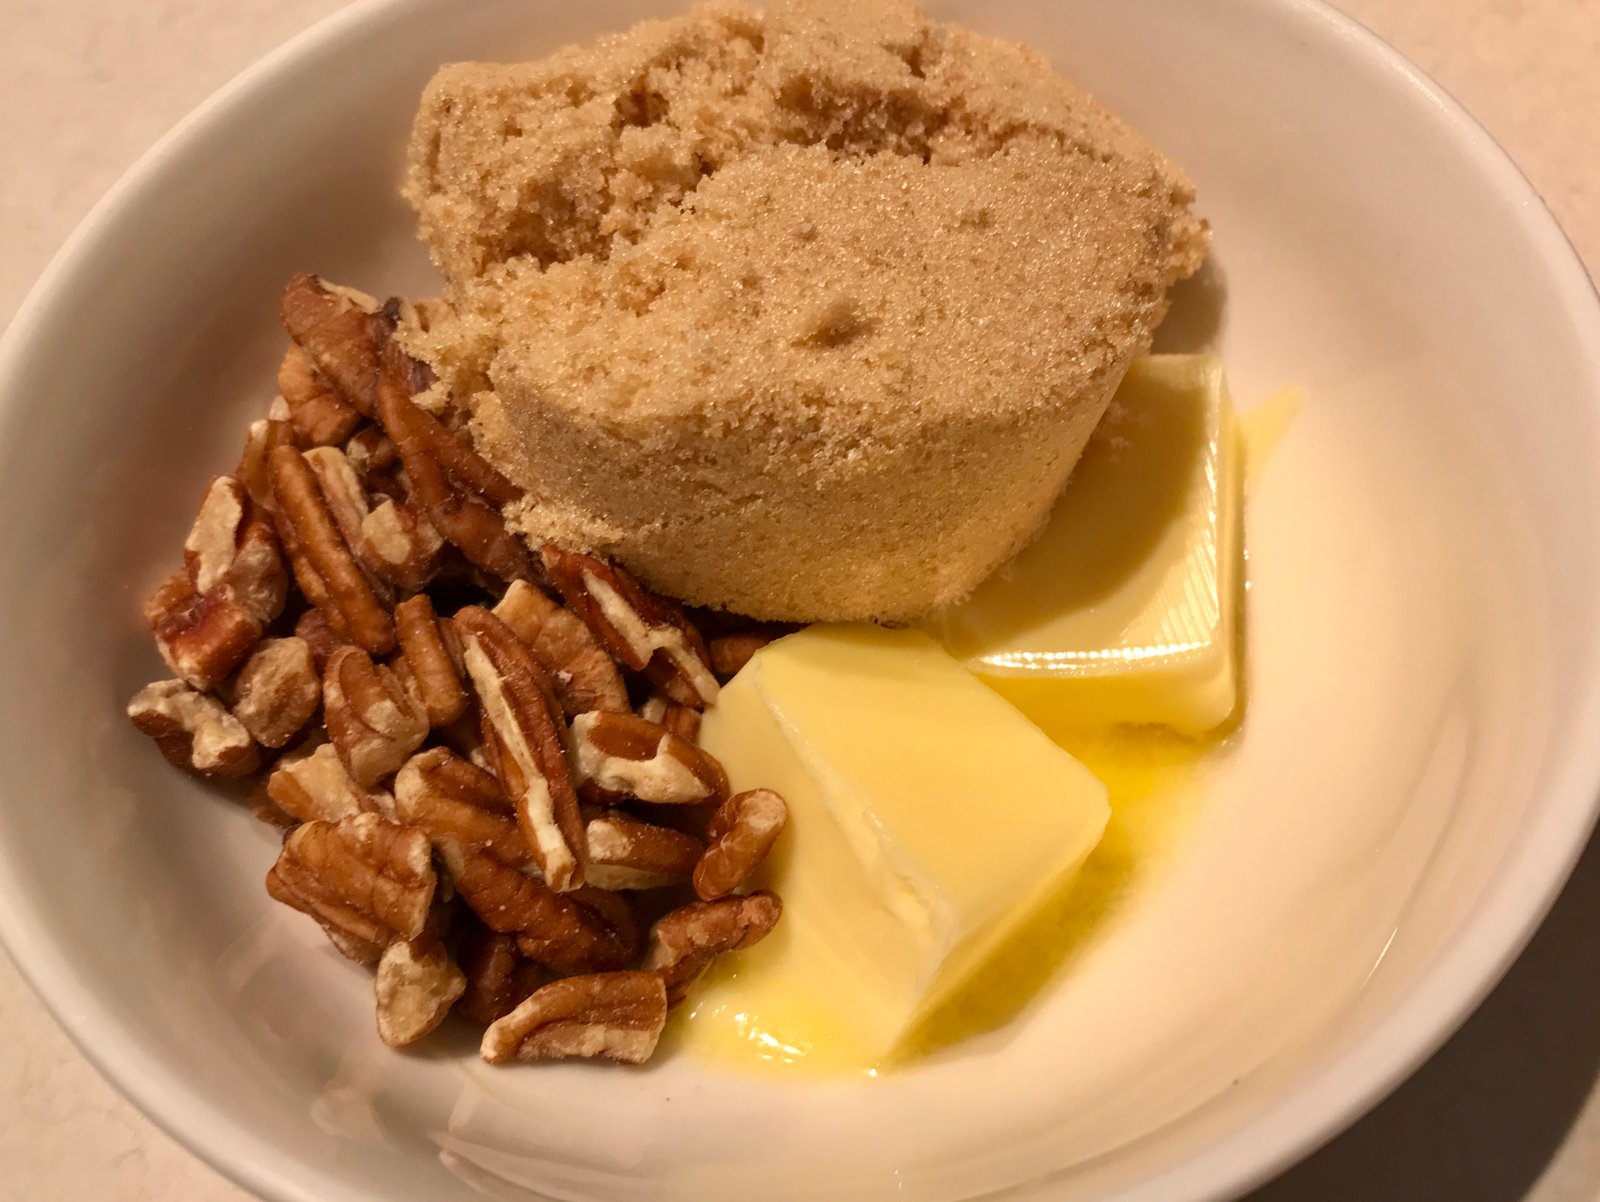
Let’s start with the crust. Cut a stick of butter into eight slices and put in the freezer while you gather the rest of the ingredients. You’ll need all purpose gluten free flour (such as Pamela’s Artisan Blend), salt, white and dark brown sugar, pecans, more butter, pumpkin puree, evaporated milk, an egg, and almost every spice in your rack. Finally get a measuring cup of water and add several ice cubes.
Preheat the oven to 450º. In the bowl of a food processor (I love my Ninja) place one and a quarter cups of all purpose gluten free flour blend, a teaspoon of salt, and two tablespoons of sugar (we always use Whey Low sugar substitute) and give it a quick pulse to mix the ingredients. Add the butter directly from the freezer and pulse eight to ten more times to combine into a crumbly texture with pea-sized pieces of butter remaining.
Add four tablespoons of ice cold water to the processor and mix together. The dough should mostly clump together and but still appear dry. If the humidity is dry, you may need one to two more tablespoons of water. Be careful not to end up with a sticky mess or you will not be able to roll it out.
Pour the mixture onto a large piece of parchment paper and press together into a mound. Using as little additional flour as possible and a rolling pin, roll into a thin round circle about an inch bigger than the top of your pie pan.
Don’t worry if the edges crack like mine, you’ll be able to press them back together once you line the pan. If the dough is a little too wet, a second piece of parchment on top may be helpful. Carefully transfer the dough to a 9-inch pie pan. If things totally fall apart here, don’t panic. I’ve always found that the worse the crust looks, the easier time you will have convincing everyone that it’s totally home-made. Break off any pieces that are overhanging the edge of the pan and use them to fill in any gaps or cracks that you have. Tuck the edges down and crimp around the pan to create as decorative and edge as you wish.
In a small bowl soften two tablespoons of butter and add a third of a cup of brown sugar (such as Whey Low Gold) and about half a cup of chopped pecan pieces.
Mix together with your fingers to create a chunky paste and crumble it into the bottom of the pie pan. Bake for ten minutes until the sugar is bubbly and the crust is set.
You do not want the crust to brown at this point. If the crust gets air bubbles, prick it with a fork. If it begins to slide down into the pan, press it back up with the back of a fork. Once the crust is prebaked, set it aside while you make the filling. Lower the oven to 400º.
Melt one tablespoon of butter in a saute pan and add a 15-oz can of pumpkin puree. This will not only give a toasty flavor to the pie but remove excess liquid from the pumpkin. Let it cook for about ten minutes, stirring occasionally.
Meanwhile, in a large bowl combine a quarter cup of sugar (or Whey Low sugar substitute) a quarter cup of brown sugar (again, Whey Low Gold), two teaspoons of gluten-free all purpose flour blend, one teaspoon of cinnamon, half a teaspoon of ginger, a quarter teaspoon each of salt, nutmeg, and clove, and a dash of allspice. Mix together well to ensure that all of the spices are well combined.
Add one egg and the entire can of evaporated milk and mix thoroughly then stir in the pumpkin. The mixture will be very wet.
Unfortunately this is were things begin to fall apart for me. Because I was cooking several other items at the same time (it was Thanksgiving dinner after all, I forgot to continue taking pictures so you will just have to use your imagination!
Pour the filling into the pie crust. There may be more than you can use, if so, pour the extra into lined muffin cups. Bake the pie for one hour and check that it is set. If the crust is beginning to brown too much, cover the edges with foil to prevent burning. The pie is done when the center is set and no longer jiggles. Don’t worry if the filling cracks in places, you’re going to cover that up with whipped cream anyway, right?
By the way, the secret to the flaky crust? It’s the praline! The caramel layer in the bottom of the crust keeps the pie filling from getting the crust soggy. We hope you enjoy our favorite pumpkin pie, leave a comment below to tell us about your favorite Thankgiving dessert.
Gluten Free Praline Pumpkin Pie
For the crust
1/2 cup butter (1 stick)
1 1/4 cup all ourpose gluten free flour blend
1 t salt
2 T sugar (may omit if making a savory pie)
4 T (or more) ice cold water
For the praline
2 T butter, softened
1/3 c brown sugar
1/2 c chopped pecan pieces
For the filling
1 T butter
1 15-oz can pumpkin puree
1/4 sugar
1/4 brown sugar
2 t gluten free flour blend
1 t cinnamon
1/2 t ginger
1/4 t salt
1/4 t nutmeg
1/4 t clove
dash allspice
1 egg
1 12-oz can evaporated milk
Begin by cutting the butter into 1 T size pieces and and freeze while you gather the remaining ingredients. Pre-heat the oven to 450º.
Combine flour, salt, and sugar in a food processor bowl. Pulse to mix. Add butter and pulse 8-10 times until the butter is mixed but some pea sized pieces remain. Add 4 T ice cold water and pulse again until the dough begins to hold together. You may need to add additional water but be careful that it doesn’t gett too sticky.
Turn the dough out onto a large piece of parchment paper and press together into a flat disk. Useing as little extra flour as possible, roll out the dough with a rolling pin into a circle about 1 inch parger than your pie pan.
Carefully, transfer the crust to a 9-inch pie pan. Press cracks together and pinch the edges to make a decorative crust. Prick the sides of the crust with a fork to keep it from bubbling up. Put the dough in the refridgerator until you are ready to add the praline and bake.
To make the praline, soften the butter and add the brown sugar and pecans. Mix together with your fingers and crumble into the bottom of the pie crust. Bake at 450º for about 10 minutes. Do not the the sides brown and use the back of a fork to press them back up if they start to slouch. When the praline is bubbly, it’s done. Lower the oven to 400º to bake the pie.
Melt another tablespoon of butter in a sauté pan and add the pumpkin. Stir together and simmer over medium heat for 10 minutes.
In a large bowl, combine sugar, flour, and spices and mix thoroughly. Add the egg and evaporated milk and whisk until smooth. Stir in the pumpkin. The mixture will be runny. Pour into the pie crust. If there is extra, pour it into lined muffin tins. Bake the pie for approximately 1 hour until the center is set. If the crust begins to get too brown, cover the edges with foil.
★ 25 years guiding★ 48 U.S. states★ 10 countries★ 3,000+ Camino miles
RV tips, travel inspiration, and updates on the trips we're planning — delivered to your inbox each month.
Questions about this trip?
Send us an inquiry.
Tell us what you'd like to know about this trip and we'll get right back to you.
Know before you go
Activity Level.
Every Cruisin' with the Colemans trip comes with an activity level so you know, before you lace up, roughly how hard the walking will be. Think of it as the overall rhythm of the trip — a few days might push a little past it and a few will feel gentler, but it's an honest read on what your legs are signing up for.
Nobody knows your body better than you do. We're all for a good challenge, but pick a level that matches your current fitness and trail experience and the whole walk gets more fun. Not sure where you land? Reach out — we've walked every one of these ourselves and we're always happy to talk it through.
Grades
EasyEasy0–8 km (0–5 miles)
Gentle, mostly flat days on well-kept, easy-to-follow paths. Ideal if you're new to multi-day walking or simply want a relaxed pace with plenty of time to soak it all in.
Easy – ModerateEasy–Moderate8–16 km (5–10 miles)
A little more distance over mixed ground — mostly maintained trails, quiet lanes, and the occasional gentle climb. A good fit if you're reasonably active and ready for a few longer stretches.
ModerateModerate16–20 km (10–12 miles)
Fuller days on varied, sometimes rugged terrain with regular ups and downs. Great for steady hikers in good shape, or determined first-timers chasing a real sense of accomplishment.
Moderate – StrenuousModerate–Strenuous20–24 km (12–15 miles)
Long days with sustained, often steep climbs and descents on rough trail. You'll want solid fitness; a few exposed spots call for a head for heights, and navigation can get trickier when the weather turns.
StrenuousStrenuous24–28 km (15–17 miles)
Big days on demanding, often remote mountain terrain — serious distance and elevation for experienced, fit hikers. Expect rough footing, the odd exposed or aided section, and higher altitude on some routes.
ExtremeExtreme+28 km (+17 miles)
Our toughest walking, built for very fit, very experienced hikers. Rugged, sometimes remote mountain terrain with scrambling, exposure, and aided sections — plus altitude, weather, and navigation that all add to the challenge.
Where you rest
Accommodations Levels.
Where you sleep is part of the story, so we hand-pick locally run places that welcome you like an old friend. The level shifts a little from trip to trip depending on the route, but the goal never does: a clean, comfortable, genuinely local stay at the end of every walking day.
Most nights you'll land in friendly, independent or family-run hotels, guest houses, and B&Bs chosen for their charm and the little touches that feel like home. Some trips lean a touch more luxurious; others, especially in the remote stretches, mean simpler refuges or huts. Either way, we've picked each one to help you rest up and wake ready for the trail.
Basic – A Place to Rest Your HeadBasic
Mountain huts, refuges, and simple B&Bs. Ensuite rooms aren't a given, and you may share a dorm with fellow walkers — but what you trade in polish you more than gain back in camaraderie and a big, rustic welcome.
Classic – Charming Without the FrillsClassic
Locally owned B&Bs, guest houses, and small inns that feel like a home away from home — usually family-run, cozy or freshly kept, and well placed for the next day's walk. A warm welcome comes as standard.
Comfort – A Little More...ComfortableComfort
Characterful, locally owned hotels and B&Bs with the little extras that make a stay feel special — décor rooted in the region, the occasional spot to unwind, and sometimes a kitchen worth lingering over.
In Style – For Those who Want to Treat ThemselvesIn Style
First-class stays in boutique hotels, vineyards, and country manors — often in the best seats in the house, from hilltop towns to the water's edge, with standout service and, now and then, a truly memorable table.
Mixed – Boutique Hotels to Mountain Huts, all in One TripMixed
One trip, a bit of everything. You might bed down in Classic or Comfort rooms through the towns and villages, then a refuge or other Basic spot up in the mountains where that's all there is — an honest, memorable mix that matches the journey.