UPDATE: Check out our new how-to video to make Tarta de la Abuela Borracho here: https://youtu.be/gbQQPMR_Nf4
While walking across Spain and Portugal during the summers of 2017 and 2019, we were offered Tarta de la Abuela many times. It was always the same basic recipe, but with small variations such as vanilla, caramel, or even banana custard. We also ran into several

This cake is really a breeze to make and here in the States is often called an icebox cake. They’re not very common anymore, but I don’t know why. Let’s try to bring them back! If you want to simplify the recipe, you could always use instant pudding but grandma would not approve, plus the custard is actually really easy to make.

Start by warming four cups of milk in a saucepan along with a stick of cinnamon. Before it starts boiling, remove the pan from the heat. Cover and let it stand until slightly cooled. If it is too hot when added to eggs in the next step, they will cook (not good). Remove the cinnamon stick and put 1 c of milk into a bowl.
In a small bowl, mix four egg yolks, a quarter cup of corn starch, and one cup of sugar. It will be a thick paste.
Begin combining the milk little by little, stirring constantly, with the egg mixture. Return to stove and heat, stirring frequently until the mixture is thickened and somewhat reduced. Keep the heat low so that the custard does not burn to the bottom of the pan. This custard should be thick.

The milk and egg mixture most be monitored closely so that it does not burn on the bottom of the pan. If you burn it, throw it out and start over. 
The egg and sugar mixture.
Once the custard has your desired texture, remove from heat and allow to cool slightly then add a half cup of Orujo Tostada. Orujo is a traditional liqueur made from distilled grapes after they have been pressed for winemaking. The result is Spanish white lightening. It is often flavored and served as a digestive after dinner. The most popular flavors are an herbal and a coffee flavor, but one store we visited had more than twenty flavors available! You probably won’t be able to get Orujo in the U.S. so substitute caramel vodka or even butterscotch schnapps.

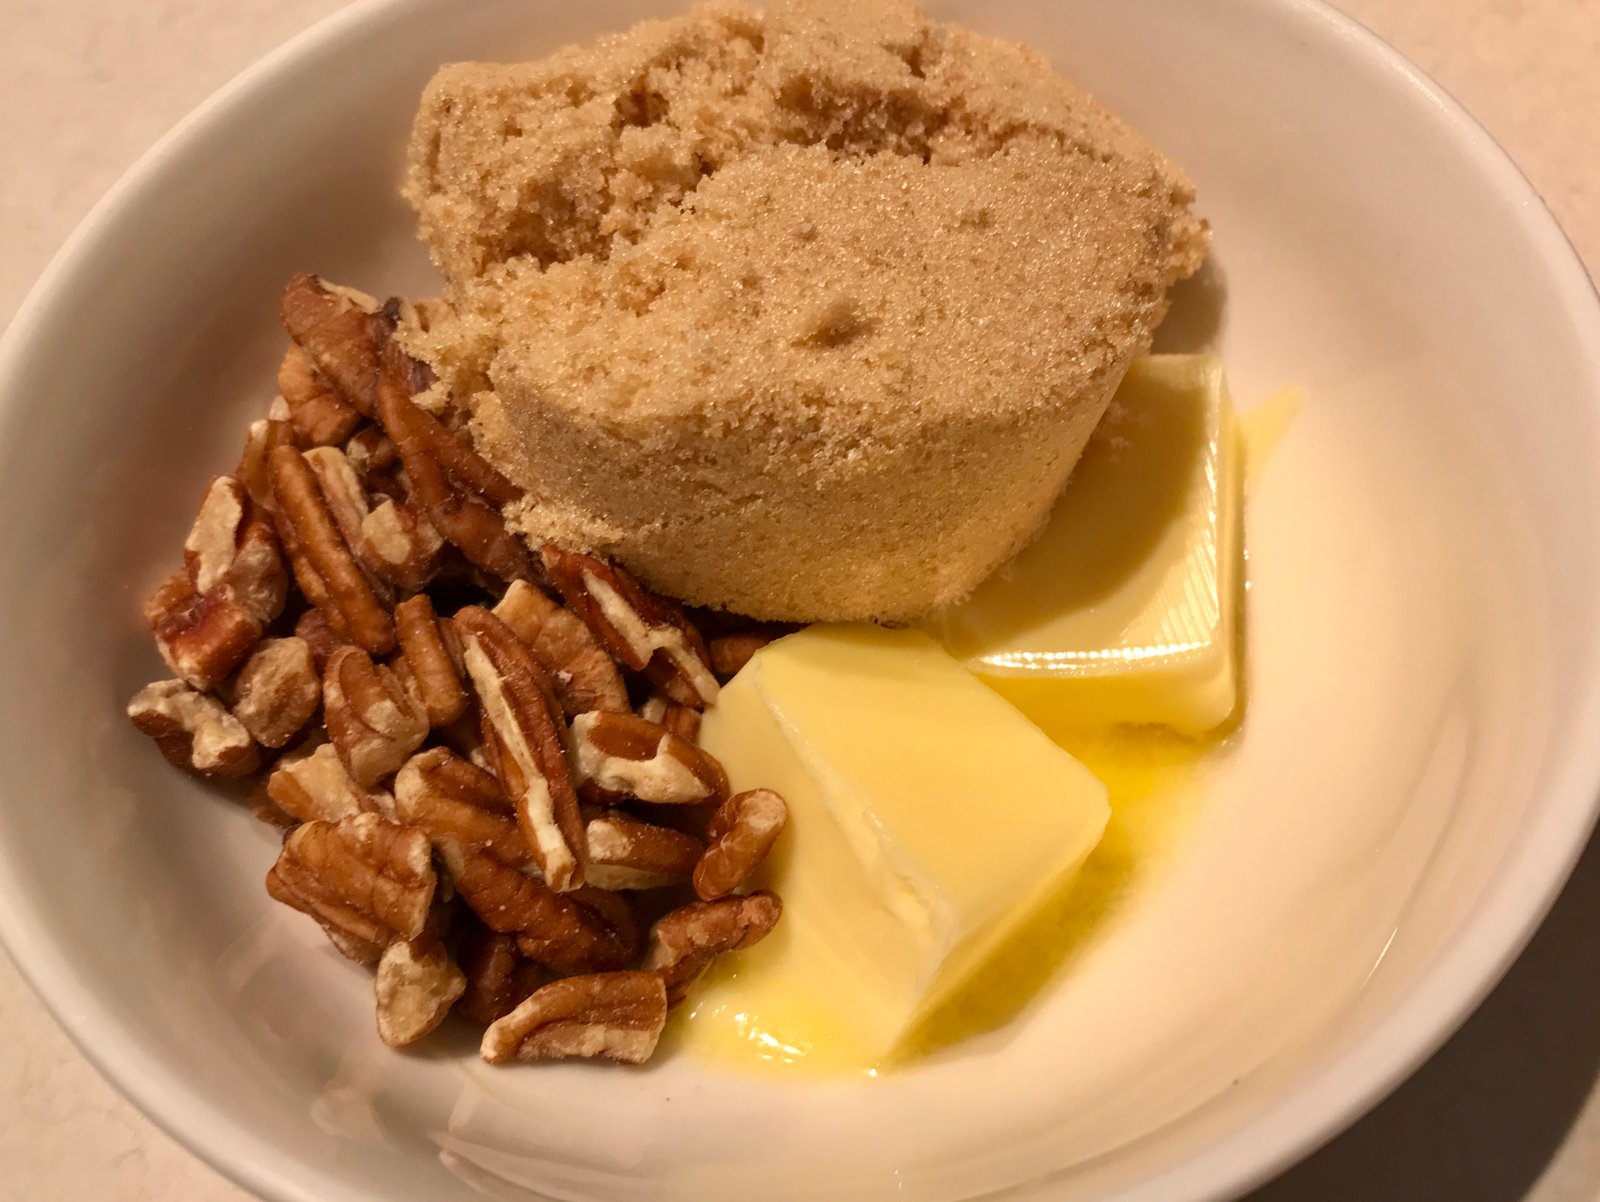
Cream and butter 
Chocolate chips added to make ganache 
Finished ganache
To make the ganache layer, heat a half cup of cream and four tablespoons of butter in another saucepan until it starts to steam a little. Remove from heat and add one
At assemble the cake, begin by soaking several cookies in the bowl of milk and transfer to a loaf pan. Don’t soak them too long or they will break apart.

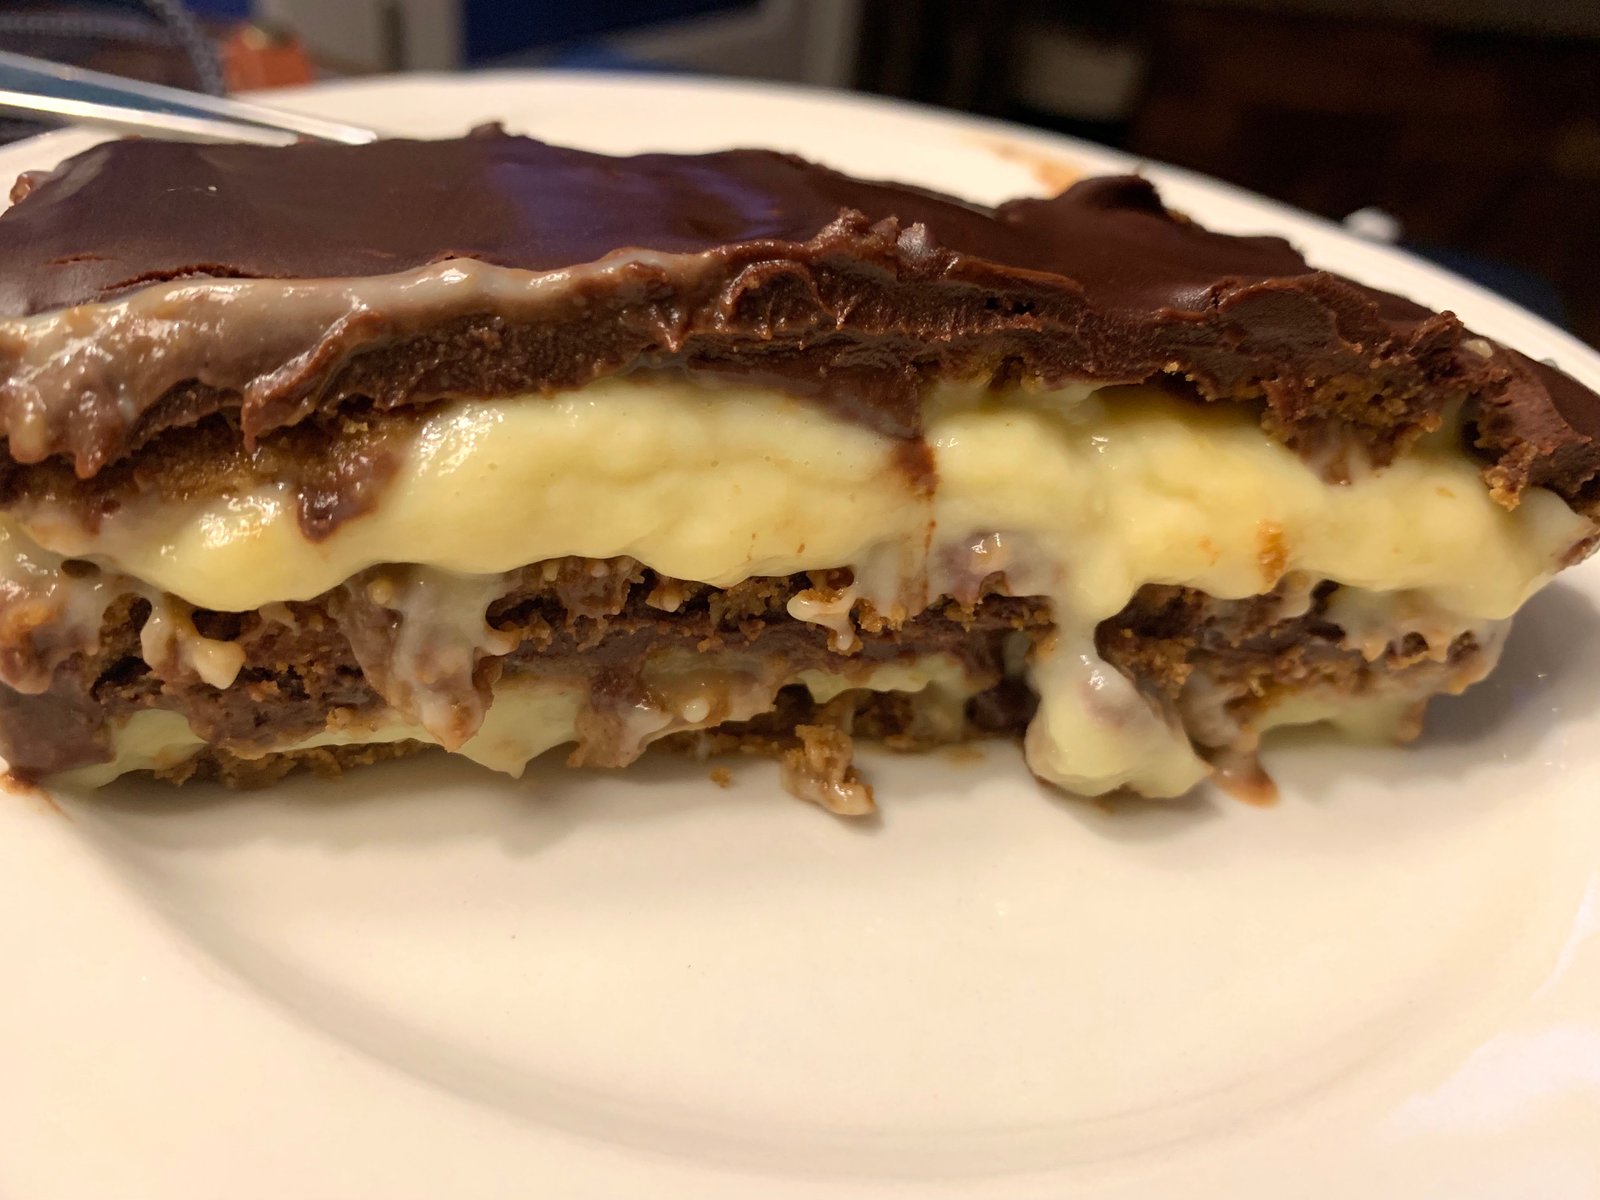
Cover the cookies with a layer of half of the custard. Put another layer of milk-soaked cookies. Top with half of the chocolate ganache. Repeat with cookies, the remainder of the custard, and the fourth layer of cookies.

Layer one 
Add more cookies 
The final layer
And finally, add the last layer of chocolate custard. Cover with plastic wrap and refrigerate for at least 2 hours or overnight. By allowing the cake to sit, the cookies will absorb some of the liquid from the custard and become soft and cake-like. The photos in this post are of a half recipe so the layers are a little thinner.

Tarta de la Abuela Borracho (Drunken Grandma’s Cake)
- 4
cups milk - 1 cinnamon stick
- 2-3 packages of
gluten free graham crackers (or shortbread style cookies) - 1
cup sugar - 1/4 cup cornstarch
- 4 egg yolks
- 1/2 cup caramel liqueur
- 1 cup dark chocolate chips
- 4 T butter
- 1/2 cup cream or half and half
Warm the milk in a saucepan with the cinnamon. Before it starts boiling remove from the heat. Cover and let it stand until slightly cooled. If it is too hot when added to eggs, they will cook (not good).
Remove the cinnamon stick and put 1 c of milk into a bowl.
Mix the egg yolks, the corn starch and the sugar in a bowl. It will be a thick paste.
Start adding the milk little by little mixing constantly with the rest of the ingredients. Return to stove and heat, stirring frequently until the mixture is thickened and somewhat reduced. Keep the heat low so that the custard does not burn to the bottom of the pan. This custard should be thick.
Once the custard has your desired texture, remove from heat and allow to cool slightly then add the liqueur.
Heat cream and butter in another saucepan until it starts to steam a little. Remove from heat and add chocolate chips. Stir until thoroughly melted and combined.
To assemble the cake:
Begin by soaking several cookies in the bowl of milk and transfer to a loaf pan. Don’t soak them too long or they will break apart.
Cover the cookies with a layer of half of the custard.
Put another layer of milk-soaked cookies.
Top with half of chocolate ganache.
Repeat with cookies, remainder of the custard, and a four layer of cookies.
And finally, add the last layer of chocolate custard. Cover with cling film and refrigerate for at least 2 hours or overnight.