Campground Review: Pine Island KOA in Florida

We had no idea what to expect when planning our stay at the Pine Island KOA because we couldn’t find much about it online. We wondered – what is there to do on the island, is there water access, is the campground nice, and are we going to be happy driving to see all that we want to see in the area?

Let’s begin with the fact that the campground is called the “Fort Myers/Pine Island KOA” on the KOA website. This is deceptive because it’s an hour by car to get to Fort Myers, probably a much shorter ride by boat but we didn’t have one of those on hand. That being said, most people would look on a map and realize this basic information. We knew when we decided to stay at this campground that we would need to travel a bit to see the tourist spots but we liked the almost “secluded” feel of this island.

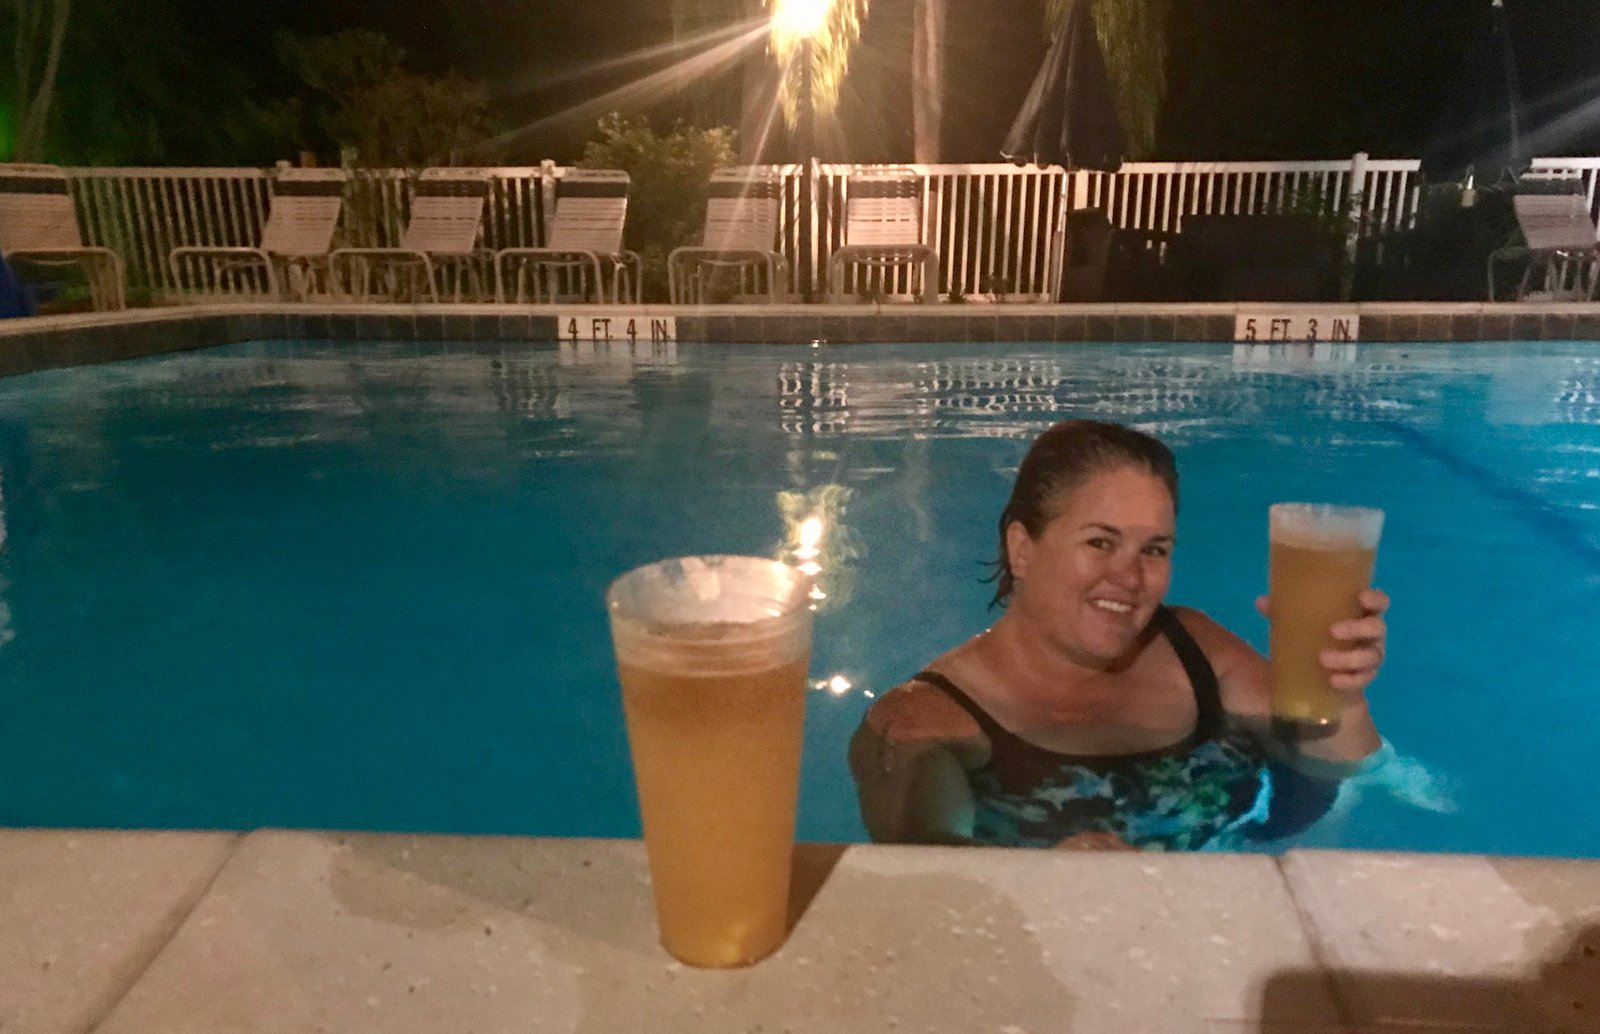
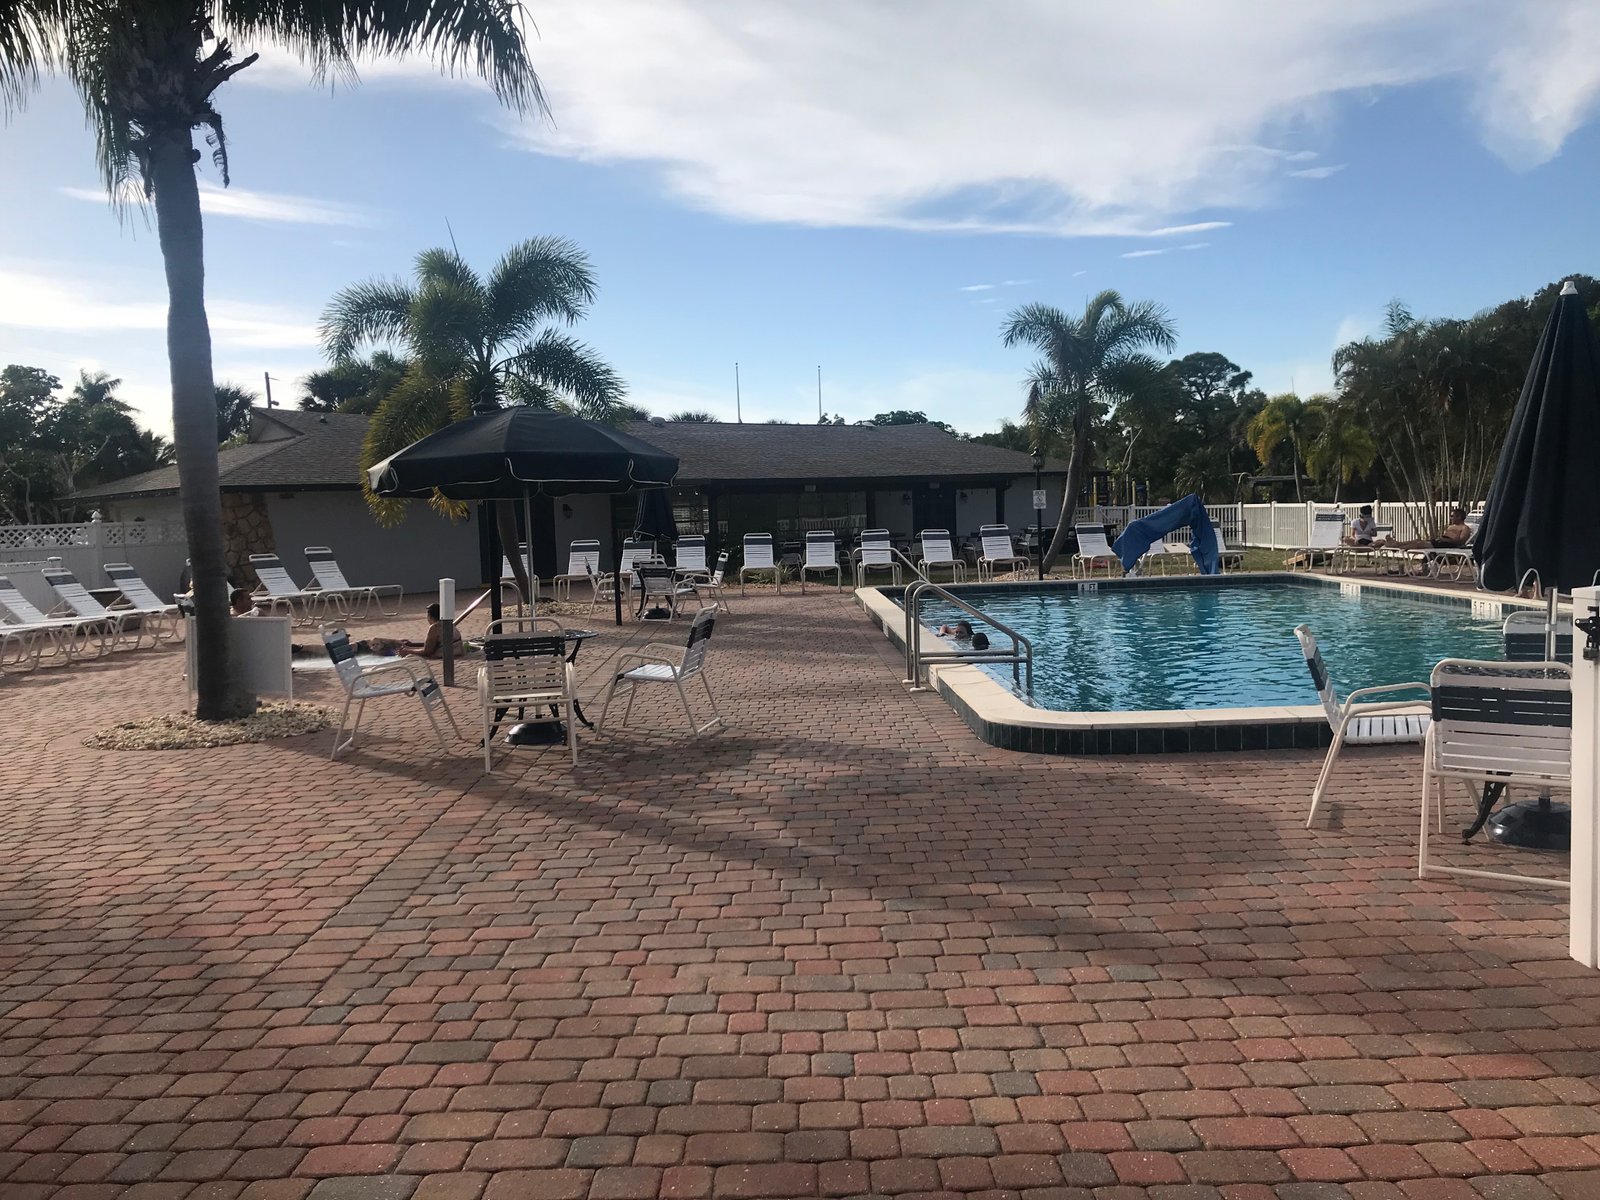
Another big draw for us was that we wanted to stay somewhere that had a pool and a hot tub, because in late December/early January we were hoping for warm days and expecting cool evenings. Let me just say the pool and hot tub were fantastic and hit the spot! We ended just about every day here and could have spent more time here.

I don’t have a photo, but I have to tell you about the laundry room. It is actually worth bragging about because it was clean, had a reading room, and was just off the pool so we could hang out in the pool while our laundry was washing. But the best part was the credit card machine. We have seen a lot of laundry rooms, even a lot of credit card machines, but none like this one. When we put our credit card in, we picked which washer or dryer numbers we were using, and for the dryer we picked how much time we wanted. The best part was that we could download an app on our phone that would notify us when our machine was done and if the machine was stopped or opened. How cool is that? Needless to say we using the laundry room twice while we were there. Great job KOA!

Image taken from KOA.com

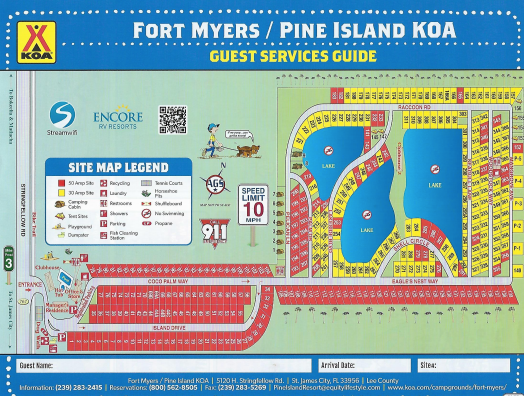
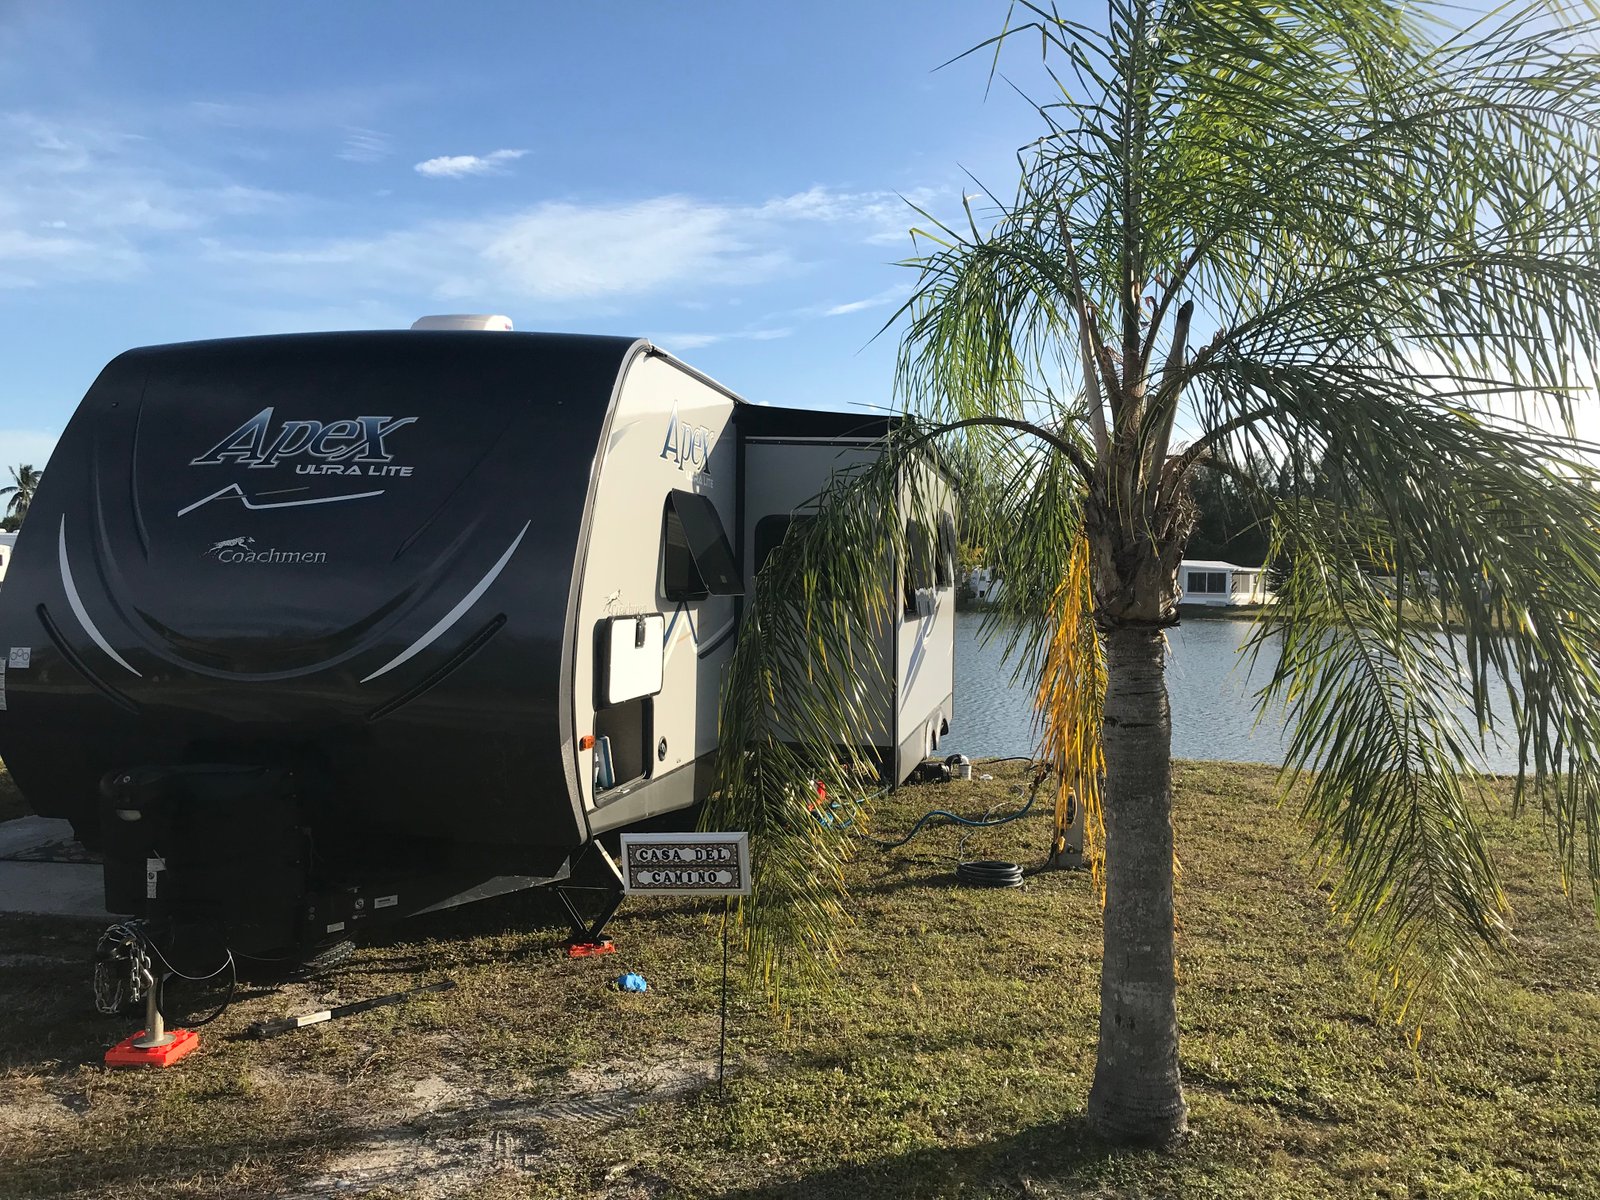
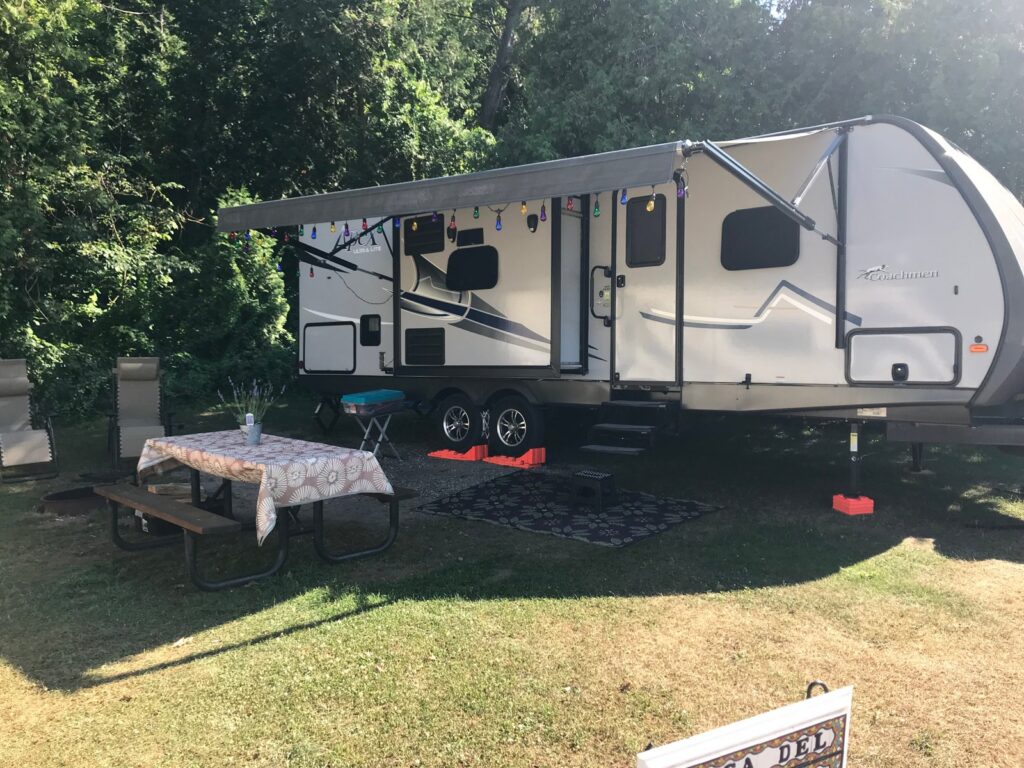
This campground is huge. A lot of KOA campgrounds are big but this one felt a bit crowded, especially up front. We chose to stay on the big lake in the back of the campground because we wanted a lake view vs. a view of RV after RV. We were so happy with our decision to stay on the lake. We enjoyed listening to the water, watching the ducks play, and enjoyed the turtles playing in the water next to our site. The only problem we had were the bugs. This area of Florida has no-see-’ems which, in my opinion, are more intense than mosquitos and don’t care about your Deet. The bites last 2-3 weeks so you’ll take home the memory of them for sure. Once we learned what we need to have to prevent/get rid of those bugs, we were much happier.

Let’s talk about wi-fi. If only campgrounds were more generous with their wi-fi, we would be so much happier. This is an ongoing challenge for us because we are not willing to spend a lot of money on wi-fi at this point. We want it to work on our blog posts and to stream Netflix but we don’t “need it” so we are stuck with whatever free wi-fi a campground has to offer. Obviously, it is nice that there is any wi-fi at all but if the wi-fi is slow why even have it? We had better wi-fi in small villages throughout Spain then we do in most campgrounds and this place was no exception. Unless you are paying for wi-fi, you are not getting much.

Let’s talk about location! Don’t go to Pine Island if you want to feel like you are in a tourist area because you will be unhappy. We loved spending New Year’s Eve at Fort Myers Beach and then coming home to our quiet island. The great part is we planned a couple trips to Cape Coral (which is the closest bigger town), a day at Sanibel Island, and a day on Fort Myers Beach. We got to enjoy the tourism of these cities without the noise of them. The best kept secret is the little village you have to drive through in order to get on Pine Island, the village is called Matlacha (pronounced Matt-la-shay, not the obvious Matt-latch-a). This is a great place to spend an afternoon or all day if you want to rent kayaks.

If you want to visit Cayo Costa State Park, you need to come to Pine Island which was great because we were already there! This state park is quiet, has a beautiful sandy beach full of shells, and a great way to spend the day. We took the Tropic Star Ferry from the town of Bokeelia which is on the north end of Pine Island. You could tent camp there, but be prepared because there is nothing except a small camp store on the island.

Pine Island KOA and Pine Island itself kept us busy. We had 16 miles of biking/walking trails, a pool, a hot tub, a lake view, and each other. At the end of the day, we loved this campground and will definitely be back. If this review helped you, click the “like” button. If you have questions about the campground or the area, leave us a comment.

Our philosophy is anytime you are camping together is a good day, we are happy we had a campground to facilitate that joy. For now, it’s back to teaching until we can get back into our rig and camp again!

Recipe of the Week – Polenta Lasagna

When living a gluten-free lifestyle, whether by choice or necessity, there are many foods that you assume you may never be able to eat again. While restaurants have become more knowledgeable about gluten-free options over the last five years, it is still common to be offered a salad or a burger with no bun as the only option on a “gluten-friendly” menu. Most grocery stores have progressively stocked a variety of manufacturers but the choices are limited. You have to go to a specialty or high-end stores if you want choices.

Some foods are a real rarity in the gluten-free marketplace. Lasagne noodles are one of them. Gluten-free noodles range from “you can’t tell the difference” to “cardboard or sticks” and aside from penne, spaghetti, and elbows, there are virtually no other pasta shapes readily available so we adapt and improvise.

This polenta lasagne came out of one such improvisation. If you don’t know polenta, it is the Italian version of ground cornmeal, fancy grits, if you will. You can find it in several different spots in the store. There is often a fancy imported variety in the Italian aisle that runs about $10 a pound, but if you look in the aisle with breakfast grains like oatmeal you can find both grits and polenta for under $4 a pound. There two different types, a fine white corn or hominy meal often marketed as grits and coarser yellow corn meal which is more commonly marketed as polenta. There is a slight difference in flavor but they are basically interchangeable (as long as you’re not cooking for food snobs). When you chill cooked polenta (or grits) it turns into a solid cake-like mass that can be cut into slices and used in a variety of ways (try it on the grill with some olive oil, salt, pepper, and parmesan). We love Bob’s Red Mill brand.

For the lasagna, cook the grits at least an hour before you plan to assemble the lasagna but the night before is even better. In a saucepan, heat two and a half cups of half and half and two and a half cups of chicken broth to a simmer. Turn down the heat and add half a teaspoon of salt and slowly whisk in one and a quarter cups of polenta. The polenta is likely to lump together, so make sure that the liquid is moving when you add it and keep stirring with the whisk until it is fully incorporated. Cook on low for about fifteen minutes until the liquid is fully absorbed and the polenta is smooth and creamy. Stir frequently to keep it from sticking to the bottom and scorching. Remove from the heat, add half a cup of grated parmesan cheese, and stir well to incorporate. Let the polenta cool slightly while you prepare the pan.

Cut a piece of parchment paper about four inches longer than your 9×9 brownie pan. Fold the edges over so the paper will lay in the bottom of the pan and crease the corners to make a liner. Pour the still hot polenta into the pan and use a spatula to spread it evenly. Cover with plastic wrap pressed down onto the surface of the polenta, otherwise, it will get a rubbery skin on the top, and place in the refrigerator to cool for at least one hour, but overnight is better.

In a sauté pan, brown one pound of Italian sausage with the casings removed. While it is cooking remove the polenta from the pan. Using a long serrated knife, cut the polenta in half, making what are essentially two large lasagna noodles.

In the same pan the polenta cooled in, pour about half a cup of marinara and place one piece of polenta on top.

Add the rest of the marinara sauce to the sausage. Now layer just as you would a traditional lasagna. I don’t use a layer of ricotta because the polenta is already pretty creamy once reheated. Pour half of the meat mixture over polenta and top with a half cup of mozzarella cheese. Top with the second slice of polenta, the rest of the meat mixture and the remaining cup and a half of cheese.

Place the pan on a foil lined cookie sheet because it will bubble over, and place in a 350º oven for one hour. Cut into nine servings and serve with a healthy salad and some Chianti.

Polenta Lasagna

  • 2 1/2 cups half and half
  • 2 1/2 cups chicken broth
  • 1/2 t salt
  • 1 1/4 cup polenta
  • 1/2 c grated parmesan
  • 1 lb Italian sausage, casings removed
  • 1 jar of marinara sauce (or your favorite spaghetti sauce)
  • 2 cups shredded mozzarella cheese

Bring broth and half and half to a simmer. Add salt and whisk in polenta. Cook for 15 minutes, stirring frequently to keep from sticking or scorching. Remove from heat and stir in parmesan cheese.

Line a 9×9 pan with parchment paper and spread polenta all the way into the edges. Cover with plastic wrap and cool overnight or at least one hour in the refrigerator.

Once cooled and very firm, slice polenta into two sheets with a long serrated knife.

Remove casings from sausage and brown in a sauté pan. Pour 1/2 cup of marinara sauce into the same pan the polenta cooled in and add the remaining sauce to the sausage. In the pan, layer one slice of polenta, half the sausage mixture, and 1/2 cup of mozzarella cheese. Top with the second slice of polenta, remaining sauce, and remaining cheese.

Place the pan on a lined cookie sheet and bake at 350º for one hour. Makes 9 servings.

Our Unique Apex RV Tour – The Update!

The title of this blog has changed a few times, just like our adventures. We wrote this blog post originally after our big summer adventure and before we left for our Christmas trip. A lot has happened in that time. We came home ready to sell CC. That’s her name, Casa del Camino or CC for short. It means Roadhouse or Home of the Road and if you read any of our blogs you will see why she has been lovingly named CC.

Our Apex, Our 2nd home

Today I am updating this blog post and really changing half of its original intention. We want to give you a tour of CC and tell you that we’ve decided to keep her, unlike in the original post when we told you we were selling. We thought it was time to upgrade our 2018 Coachmen Apex 269RBKS. Apparently, a lot of RV’ers upgrade their rig after only a year and we wanted to be just like the crowd. Haha, not really but we felt like we needed more. We travel with a lot of toys – bikes, kayaks, backpacks, and all of their respective gear so we wanted to be able to carry more than we can comfortably carry currently with our Ford F150. Also, we really know our long term goal is to travel in a class A rig. But ultimately we don’t want to get into debt over any of these decisions. So, here we are, we have decided to wait. It’s a smart decision and our Apex is pretty awesome. It’s time for us to be more patient and appreciate what we have today.

With that, it’s time to give you a small tour! Our Apex well-made and we have had a blast personalizing the rig. Some of our favorite features in the Apex:

The HUGE pantry
The kitchen island
The counter space in the bathroom
The storage everywhere, inside and out
The color and style of the rig
The power jack and power awning
Our upgraded smart TV with an upgraded arm to tilt and angle
Additional stabilizer jacks we added
The numerous other upgrades we’ve done
See for yourself, the photos in the gallery below are captioned:

Now that we are keeping CC we want to improve her even more. We are having a friend make new curtains, see our Instagram page for the fabric sample. We are going to buy blackout blinds, upgrade the fans to the Fantastic Fan, add the Tire Minder Tire Pressure Monitor system, and a few more small things before we head out West in the summer of 2020. We hope to get a generator but we will have to see if that is in the budget and if we are sticking with our F150 to pull our CC. Not to worry, we will blog about our upgrades as we go.

If you want to get the “grand” tour with a video of the rig you will have to stay tuned! We plan to create a new video tour when we kick off our YouTube channel in the coming months. There is a lot going on at Cruisin’ with the Colemans and we hope you have enjoyed adventuring with us thus far. We ask that you help us grow by sharing our blog posts, Facebook, and Instagram pages.

Thank you for being a part of the journey so far! We have enjoyed bringing you along!

Until our next adventure…

Our Camino Budget

This is a controversial topic – money! Before you read any further, we ask that you are kind to us. This is our budget for our Camino – you can spend a lot less and even spend a lot more than we did! We know there are a lot of ways to plan or not to plan your Camino, this is just what we did in 2017 and what we are doing for our 2019 Camino, we hope this budget helps a few people. Let me begin by giving you a summary of our goals when planning our Caminos:

  • Flight cost – find it cheap and the least amount of connections
  • Plan a few luxuries – this so we have little things to look forward to along the way.
  • Private rooms – this is important to us so we don’t have to pack sleeping gear/sleeping clothes and towels. It saves weight and we know we will get a good night sleep.
  • Enjoy the culture – this means we plan to have evenings out to enjoy the local food and don’t eat as many pilgrim meals in the evening.
One of the many rooms along the Way

Ok, so this is another way we are different than other pilgrims. We planned out our Camino from beginning to end, meaning we planned our stops and reserved all of our rooms in advance. We knew this meant that if we were suffering from illness or injury, we would have to taxi ahead to the next town vs. walking to it. Some will not agree with this philosophy, but this was how we planned our pilgrimage. In the end, for our Camino in 2017, we taxied about 20-25 km of our entire Camino. This is a number we could live with for the peace of mind of knowing where we were sleeping every night. We have to travel on the Camino during the busiest time of the year because we are teachers, so planning the rooms in advance helped ease our minds and helped us stay on budget.

Jean-Michel with us at his Bed and Breakfast in Saint John Pied de Port, France wishing a Buen Camino!

Let’s talk about flights first, I discussed this a little bit in our blog post entitled, Our Top 10 Pieces of Essential Camino Gear if you want to read it later. We monitor flights using the apps Skyscanner and Hopper and when they tell us to buy, we do. The best thing to do is look at direct flights from one hub to another. For us, we have found inexpensive flights from Boston to Madrid. In 2017 we flew Iberia Air and our Boston to Madrid tickets were $500 total, for both of us, and then we spent another $500 total getting from Ohio to Boston. For our 2019 Camino we are flying Air Portugal from Boston to Madrid and our tickets were the same price at $500 for both. We are still monitoring flights to Boston. You have to know where you are looking to fly, monitor flights, and be willing to wait to buy the tickets.

A foot bath and massage in Pamplona, I wouldn’t even call it a luxury because my body needed this treat!

We always plan a few luxuries on our trips because it gives us things to look forward to when we are exhausted, tired, or just plain grumpy. In Pamplona, we didn’t know where it would happen but we budgeted for massages. This city comes after hiking about 3-4 days (depending on if you stop in Orrison, as we did) and your feet will be so happy that you are treating them. This cost 100 euros for us both and was so worth! We planned to have a few more massages along the way but didn’t have as many opportunities as we hoped. Our total budget for luxuries was 500 euros, we mainly spent this money on nicer restuarants and wine.

Don’t fret, we planned other luxuries, like in the places we stayed at. Our lodging budget was to average 50 euros a night for a room. Fortunately, we had plenty of rooms that only cost about 35-45 euros so we could splurge a bit in other places. For example, we read in another blog (sorry, I can’t remember the name of the blog) that Casa de Tepa in Astorga was their absolute favorite hotel on the entire Camino so we booked a room. This room came in at 82 euros, sadly prices have gone up because the website says it costs 115 euros today. We stayed in the Napoleon Room, I encourage you to go to the website and check out their videos of the different rooms. This wasn’t just called, “The Napoleon Room,” it was the actual room that Napoleon stayed in! Crazy! The best parts of this hotel were the location to the Gaudi museum and the town square, the gorgous backyard patio, the reading rooms throughout the hotel, and the cash bar on the patio. It was a fantastic find and a well-planned luxury.

Private rooms were so important to us, as it’s an important way to end a long day of walking. I am a light sleeper and I heard so many people complaining about not getting a good night’s sleep on the Camino because of the sounds and smells of others. This meant our budget was higher than it was for others in a shared room, but sometimes not too much higher. The best part was that we did not have to carry sleeping bags, pillows, towels, or even sleeping clothes. We didn’t always have a private bathroom, that was something we were willing to give up in order to stay on budget.

Luxuries came in many forms from private rooms, to air-conditioned rooms, to massages, to couple fancy restaurants (the one featured below is not considered a fancy place – lol).

We found “Mexican” cuisine in Leon, Spain

Finally, we had to find luxuries by exploring the local life and local food. It was important for us to experience the culture, not just the pilgrimage. Sometimes that meant finding out what food tasted like in a Spanish-Mexican restaurant. The takeaway was that we full-filled the urge we had for tacos but don’t get a margarita (you’ll thank me for that advice, I promise)! Other times our goal was to truly experience the local food. For example, when in Galicia you must try pulpo (octopus)! I am not a fan of octopus here in the States, but I am not going to lie, I loved pulpo. As far as our food budget goes, we planned to spend 50 euros a day for both of us in 2017 but we were closer to averaging 60 euros a day. What can I say, we do love our food…and wine!

Pulpo in Galicia

In summary, the 2019 Coleman budget for the two of us combined breaks down like this:

  • Flights: 1000 dollars
  • Private Rooms: 50 euros a night
  • Food: 60 euros a day
  • Other transportation: 300 euros
  • Luxuries: 500 euros total

We hope this helps you in your Camino planning because if you are still reading this blog post, we will assume you are a planner. Click the like button to show us some Camino love. We would appreciate hearing from you – in the comments please tell us about your Camino, what you are looking forward to on the Camino, or what you are nervous about.

Buen Camino! Brian and Michelle

Recipe of the Week – Cruiser’s Platter (Gluten-Free Fried Fish and Shrimp)

One of our goals in the coming year as we travel is to find local specialties and convert them into both gluten-free and when possible, healthier meals. While on the Gulf Coast over Christmas, we got to eat quite a bit of seafood and it was delicious. Almost every restaurant we went to offered a sailor’s platter, captain’s platter, or even an admiral’s platter. The more expensive the restaurant, the higher the rank of the platter!

Unfortunately, finding gluten-free fried fish was not possible in the Fort Myer’s area. If you know of someplace, comment below because we’re going back next year and want to check it out.

After our last fishing misadventure, we decided to try again. Michelle’s requirement was that we spent some of our time fishing and some of our time searching for dolphin and manatee. Captain John at Conway Charters did not disappoint. After meeting him at a local marina, he took us out on his boat to search the canals and creeks for some manatee. With his knowledge, it didn’t take to long and our first goal was checked off with this 6-8 foot long male manatee.

Next goal our list: catch some fish. We didn’t have much luck on this day – the fish just weren’t biting. We did manage to bring in two sheepsheads, and as they say, any day on the water is a good day. We did complete our third goal also, seeing some dolphin on our return to the marina, but enough about that, let’s cook up some fish!

Luckily for me, Captain John filleted the fish we caught. If you’re not lucky enough to have fresh fish, look for a firm fish that has thicker fillets at the store. Cod works well, as would catfish. You will need about a quarter pound per person and about the same amount of peeled, deveined shrimp. You could also look for clams, scallops, or any other seafood that looks good at the store.

Begin by preparing you breading station. In a bowl, combine about one cup of half and half with two teaspoons apple cider vinegar and stir well. The vinegar will curdle the milk and create buttermilk after sitting for about ten minutes. In another bowl, you will need about two cups of cornbread mix such as Krusteaz Honey Cornbread. In the final bowl, combine 1 cup of gluten-free flour blend with 2 teaspoons of Tony Chachere’s Creole Seasoning. If you don’t like things too spicy you could use Old Bay instead. If you want some extra kick, add a little hot sauce to the buttermilk. Make sure that the seafood is mostly dry. I put it in the fridge uncovered for about thirty minutes while I was getting everything else ready to go.

Left to right: Cornmeal mix, buttermilk, seasoned flour, seafood

Pour about 3-4 inches of canola or peanut oil into a deep pot and heat over high heat until the oil reaches 265º. You want to keep the oil between 265º-300º while you are cooking. If the oil is too cool the breading will soak up too much oil and get soggy; too hot and things will burn before they cook through. Continuously monitor the oil temperature and adjust the heat accordingly.

Toss several pieces of fish into the flour mixture to coat and set on the edges of the bowl with your right hand (this is your “dry hand” and should only go into the two flour bowls). Using your left hand (the “wet hand” that should only go into the buttermilk bowl), drag the fish one piece at a time through the buttermilk and set them into the cornmeal bowl. Using your right hand, bury the pieces of fish under the cornmeal.

I know, I’m using the wrong hand in the buttermilk in the photo above. Trust me, you will make less of a mess if you keep one hand dry and the other wet, but it can be difficult in the heat of the moment! Carefully place pieces of fish into the hot oil by holding them just into the oil and releasing so that you don’t splash oil. The oil should bubble but not pot. If at any point the oil is smoking, it is too hot. If you get a lot of popping, the fish is too wet.

Once you have about 5-6 pieces of fish in the pot, begin the process again with the next batch. The fish should cook 5-6 minutes until it reaches your desired color. Remove the fish from the oil and place onto a cooling rack placed over a cookie sheet so the excess oil can drain off. Check your oil temperature and continue until you run out of seafood.

BONUS: take the remain cornmeal mixture and add the remaining milk to it along with 1/4 cup of finely diced onion. Stir together and add more half and half until you get a thick spoonable batter. Drop teaspoons of batter into the oil to make hushpuppies!

Once all of the seafood is cooked prepared, make your dipping sauces. For tartar sauce, combine 1 cup of mayo with 2 tablespoons of pickle relish and a 1/2 teaspoon of lemon juice. For the shrimp, I like a sweet chili sauce using 1/2 cup of sweet and sour sauce combined with a tablespoon of hot chili paste (from the Thai aisle at the store). For traditional cocktail sauce, use 1/2 cup of chili sauce (usually near the seafood) combined with 1-2 teaspoons of ground horseradish from the condiment aisle. Be careful with store bought cocktail sauces, some have soy sauce added and are not gluten-free!

We almost never eat fried food, but it is a nice treat from time to time and I was surprised at how little oil was actually absorbed into the food. I used a whole bottle of oil to cook and when I was done and poured the cooled oil back into the bottle to throw away (never reuse oil that you’ve cooked fish in) there was only about an inch missing from the bottle, and part of that was on the bottom of the cookie sheet that I had used as a drip pan.

We served our Cruiser’s Platter with coleslaw and a glass of Pine Island Breeze. What’s your favorite seafood treat or side dish? Leave us a comment below and let us know!

Cruiser’s Platter (Gluten-free Fried Shrimp and Fish) with Hushpuppies and dipping suaces

For the seafood:

  • 1/4 pound per person of assorted seafood such as cod, peeled shrimp, scallops, etc.
  • 1 c half and half
  • 2 t apple cider vinegar
  • 1 box of Krusteaz Gluten-free Honey Cornbread mix
  • 1 c Gluten-free Flour blend
  • 2 t Tony Chachere’s Creole seasoning (or similar)
  • canola or peanut oil
  • 1/4 c finely diced onion

For the dipping sauces

  • 1/2 c mayo
  • 2 T sweet pickle relish
  • 1/2 t lemon juice
  • 1/2 c sweet and sour sauce
  • 1 T hot chili paste
  • 1/2 c chili sauce
  • 1-2 t ground horseradish

Lay out the seafood on plates and refrigerate without covering so that it dries out a bit.

Begin by combining half and half with vinegar to let it curdle. Prepare the remaining breading stations by pouring cornmeal mix in one bowl and combining flour and seasoning in another. Meanwhile heat oil to 365º.

Dip pieces of seafood into flour, shake off, drag through buttermilk, and cover with cornmeal. Carefully lower each piece into the oil without splashing. Cook 5-6 pieces at a time for about 5 minutes or until the desired color has been reached.

Combine remaining cornmeal mix with onion and remaining buttermilk. Add more half and half if needed to create a spoonable batter. Drop by the teaspoonful into the oil to make hushpuppies.

For tartar sauce, combine 1 cup of mayo with 2 tablespoons of pickle relish and a 1/2 teaspoon of lemon juice. For the sweet chili sauce, combine sweet and sour sauce with hot chili paste. For traditional cocktail sauce, add ground horseradish to the chili sauce.

Where We Have Traveled

Click here to open an interactive map of our travels

It was 2008 when we took our first big vacation. The plan was to be gone for almost a month. It was an overwhelming thought because we had no clue what we were doing, we were traveling with one of our two kids, staying in hotels, and a month is a long time to be gone. Questions filled our heads – Could we stay on budget? Could we be gone that long? Is there is really that much to see? I laugh now because we have learned that we never stay on budget, but we know how to do it much better, and there is too much to see and never enough time.

We have put all of the places we have traveled on one big map by clicking on the image above. We have visited 44 of the lower 48 states in the United States and 6 countries. We also have individual maps of all of our trips and a map of the national parks we have visited. To see them click here.

It’s interesting when you put your travels on “paper” so to speak. We experienced many emotions when developing this map. I was reminded of all of the repeat trips because of family obligations. Seriously, I love Michigan but I don’t need to travel there again anytime soon. Hahaha

This was 2018, many of our travels have included Michigan because of family obligations

I was reminded we are the type of people who love to revisit places we have been because we know there is always more to see at one destination. For example, you can’t see all Yosemite National Park or New York City have to offer in one trip! We also know we are more confident the second time around. We are more willing to take risks, dig deeper, and see more when we go somewhere the second time. When you plan all-new destinations in a trip it can be overwhelming. But if you plan to re-visit a few of your past favorites then you have something special to look forward to seeing again.

Finally, I was reminded of how big this world is and how little we have actually seen so far. Even the United States, we have visited all but 4 states in the lower 48 and we still need to get to Alaska and Hawaii, yet I feel like there is so much more to see in this country. The little villages, bigger cities, and a lot of national parks still to see. My inner conflict reminds me the world is huge and we have many countries we still want to see. Will we have time to see it all? I don’t know because tomorrow is not promised but we are sure going to try.

Why didn’t we start blogging a long time ago? Good question. Maybe confidence, maybe it felt like work, maybe it wasn’t time yet. We traveled together for 10 years before we started this blog so we have a lot to write about going forward. In that same sentiment, going forward, we are thrilled to bring you along.

Enjoy looking through the maps we have created, we will continue to develop them and continue adding new destinations. We know it will inspire you to travel. If you like what you see, click the like button below. If you have a question about any of our travels, leave a comment. If you are looking for a travel planner, drop us an email at info@cruisinwiththecolemans.com.

Happy travels!

Recipe of the Week – Grilled Sausages with Potatoes, Shallot, and Spinach

Sometimes after a big day out exploring we just don’t feel like spending a lot of time cooking. That was the case after our day exploring Cape Coral. After visiting the fantastic Cape Coral Farmer’s Market, we did an eight-mile walk around town and found a great little Italian place for lunch that served gluten-free pizza. A visit to Wicked Dolphin Distillery and pool time back at the campground with some newly invented cocktails finished up our day.

By the time we got back to CC we were exhausted and starving. Here’s a quick dinner that you can throw together in no time at all with things that you might even have on hand.

Start out with a variety of potatoes: red, russet, and Yukon gold are my favorites. Dice them up into bite-sized pieces along with a couple of shallots and put into a microwave safe bowl.

Add about a tablespoon of olive oil and a good sprinkle of salt, garlic powder, and pepper. Cook in the microwave for five minutes or so until the potatoes are mostly cooked but still firm.

While the potatoes are cooking, get the grill heated up and add Italian sausages.

When the sausages almost done, add the potatoes and shallot mixture to the grill. BE CAREFUL to not pour the collected oil and water in the bottom of the bowl onto the grill or you will have some major flareup!

Cook the potatoes and sausage until they are nicely charred. Once they’re done, add a few handfuls of spinach and allow it to wilt for a second before removing everything from the grill and dividing between plates. Sprinkle with a little parmesan cheese.

I would highly recommend making sure that you have plenty light on the grill. We had to keep the lights off because of the no-see-ums and I might have burned things a bit! Also, you might notice that I didn’t use spinach… we couldn’t find any at the farmers market that morning so we just went without.

Grilled Sausages with Potatoes, Shallot, and Spinach

  • 1-2 Italian sausages per person
  • 1 lb of assorted potatoes, such as russet, red, and Yukon gold\
  • 2 shallots
  • 1 T olive oil
  • 1/2 t each salt, garlic powder, and pepper
  • 1 cup spinach leaves
  • 1-2 T parmesan cheese

Cut potatoes and shallots into bite-sized pieces and place into a microwave safe bowl. Top with oil and seasonings and stir to mix. Cook for 4-5 minutes in microwave until almost cooked.

Heat grill and add sausages. Cook for 6-8 minutes and turn. Add the potato-shallot mixture and continue to cook until charred to your liking, another 5-10 minutes, making sure that the sausages are cooked through. Add spinach on top and let wilt then remove to plates.

Sprinkle with parmesan cheese and enjoy!

No blog today… but we have cocktails!​

We have been so busy exploring Pine Island, Cape Coral, and Fort Meyers that there is no blog post for this week. but we have been working hard to find the best cocktail with a view! We’ve tried Rum Rummers, Goombay Smashes, Hurricanes, Mojitos, and more, but don’t worry, we’re always safe and never drive if we’ve had too many.

After extensive research, we decided to go straight to the source and visit the Wicked Dolphin Distillery in Cape Coral. Wicked Dolphin is the first distillery in Florida since Prohibition and they make rum in small batches from local ingredients. If you are in the Fort Myers area, you should definitely go check them out. The tours are free, as are the tastings. We picked up two bottles (but wanted more) and have created a couple of cocktails that we thought that you, our dear readers, might enjoy (we certainly have)! In all of the recipes below, we are using Wicked Dolphin Rum, but you could use your favorite as a substitute. We bought everything we used and they didn’t give us anything for free… but hey Wicked Dolphin, give us a call and we’ll pick up anything you’re willing to donate for the mention!


If you are not familiar with cocktail mixing, you should know that a jigger is the standard measure. The hourglass-shaped bar mixing tool holds 1 1/2 ounces on the large side, which is a shot; and 3/4 of an ounce on the small side, which is half a shot. There are variations and not all jiggers are created equal so you should do a “reality check” with your jigger to know its volume. Most home bartenders are not too worried about it and when making our drinks, I rarely measure, which can be dangerous!

Our first creation we decided to call the Pine Island KOA Breeze. In a pint glass, combine 1-1/2 ounces of coconut rum, 3 ounces of orange juice, and ice. Shake to combine and top with Cranberry Sprite (you could also use 3/4 ounce of cranberry juice and top off with Sprite). Garnish with orange slices and a sugared cranberry if you have them (we didn’t).

Next up is the Pine Island Storm. We made this one out of necessity since we ran out of Cranberry Sprite (it’s only available during the holidays). Begin by chopping up a fresh pineapple and covering it with coconut rum and let it marinate in the fridge for at least 24 hours. In a shaker, combine 1-1/2 ounces each of the pineapple infused coconut rum and black rum with ice and 3 ounces of orange juice. Shake until frothy. Pour over ice and top with Sprite and pieces of the drunken pineapple (and some maraschino cherries, if you have them). Give the glass a float of more dark rum to make it happy! The picture below is actually a double because we were doing laundry and were not very close to the RV.

The last cocktail we created we called the RumSlide. Combine equal parts black rum and Bailey’s Irish Cream with ice. Shake until frothy and pour over ice. If you want to take it to the next level, swirl some chocolate syrup into the glass first!

We hope you enjoy the fruits of our labors here on Pine Island and if you have other favorite rum cocktails, let us know in the comments. You don’;t have to be on the beach to enjoy a few moments of island life!

★ 25 years guiding ★ 48 U.S. states ★ 10 countries ★ 3,000+ Camino miles