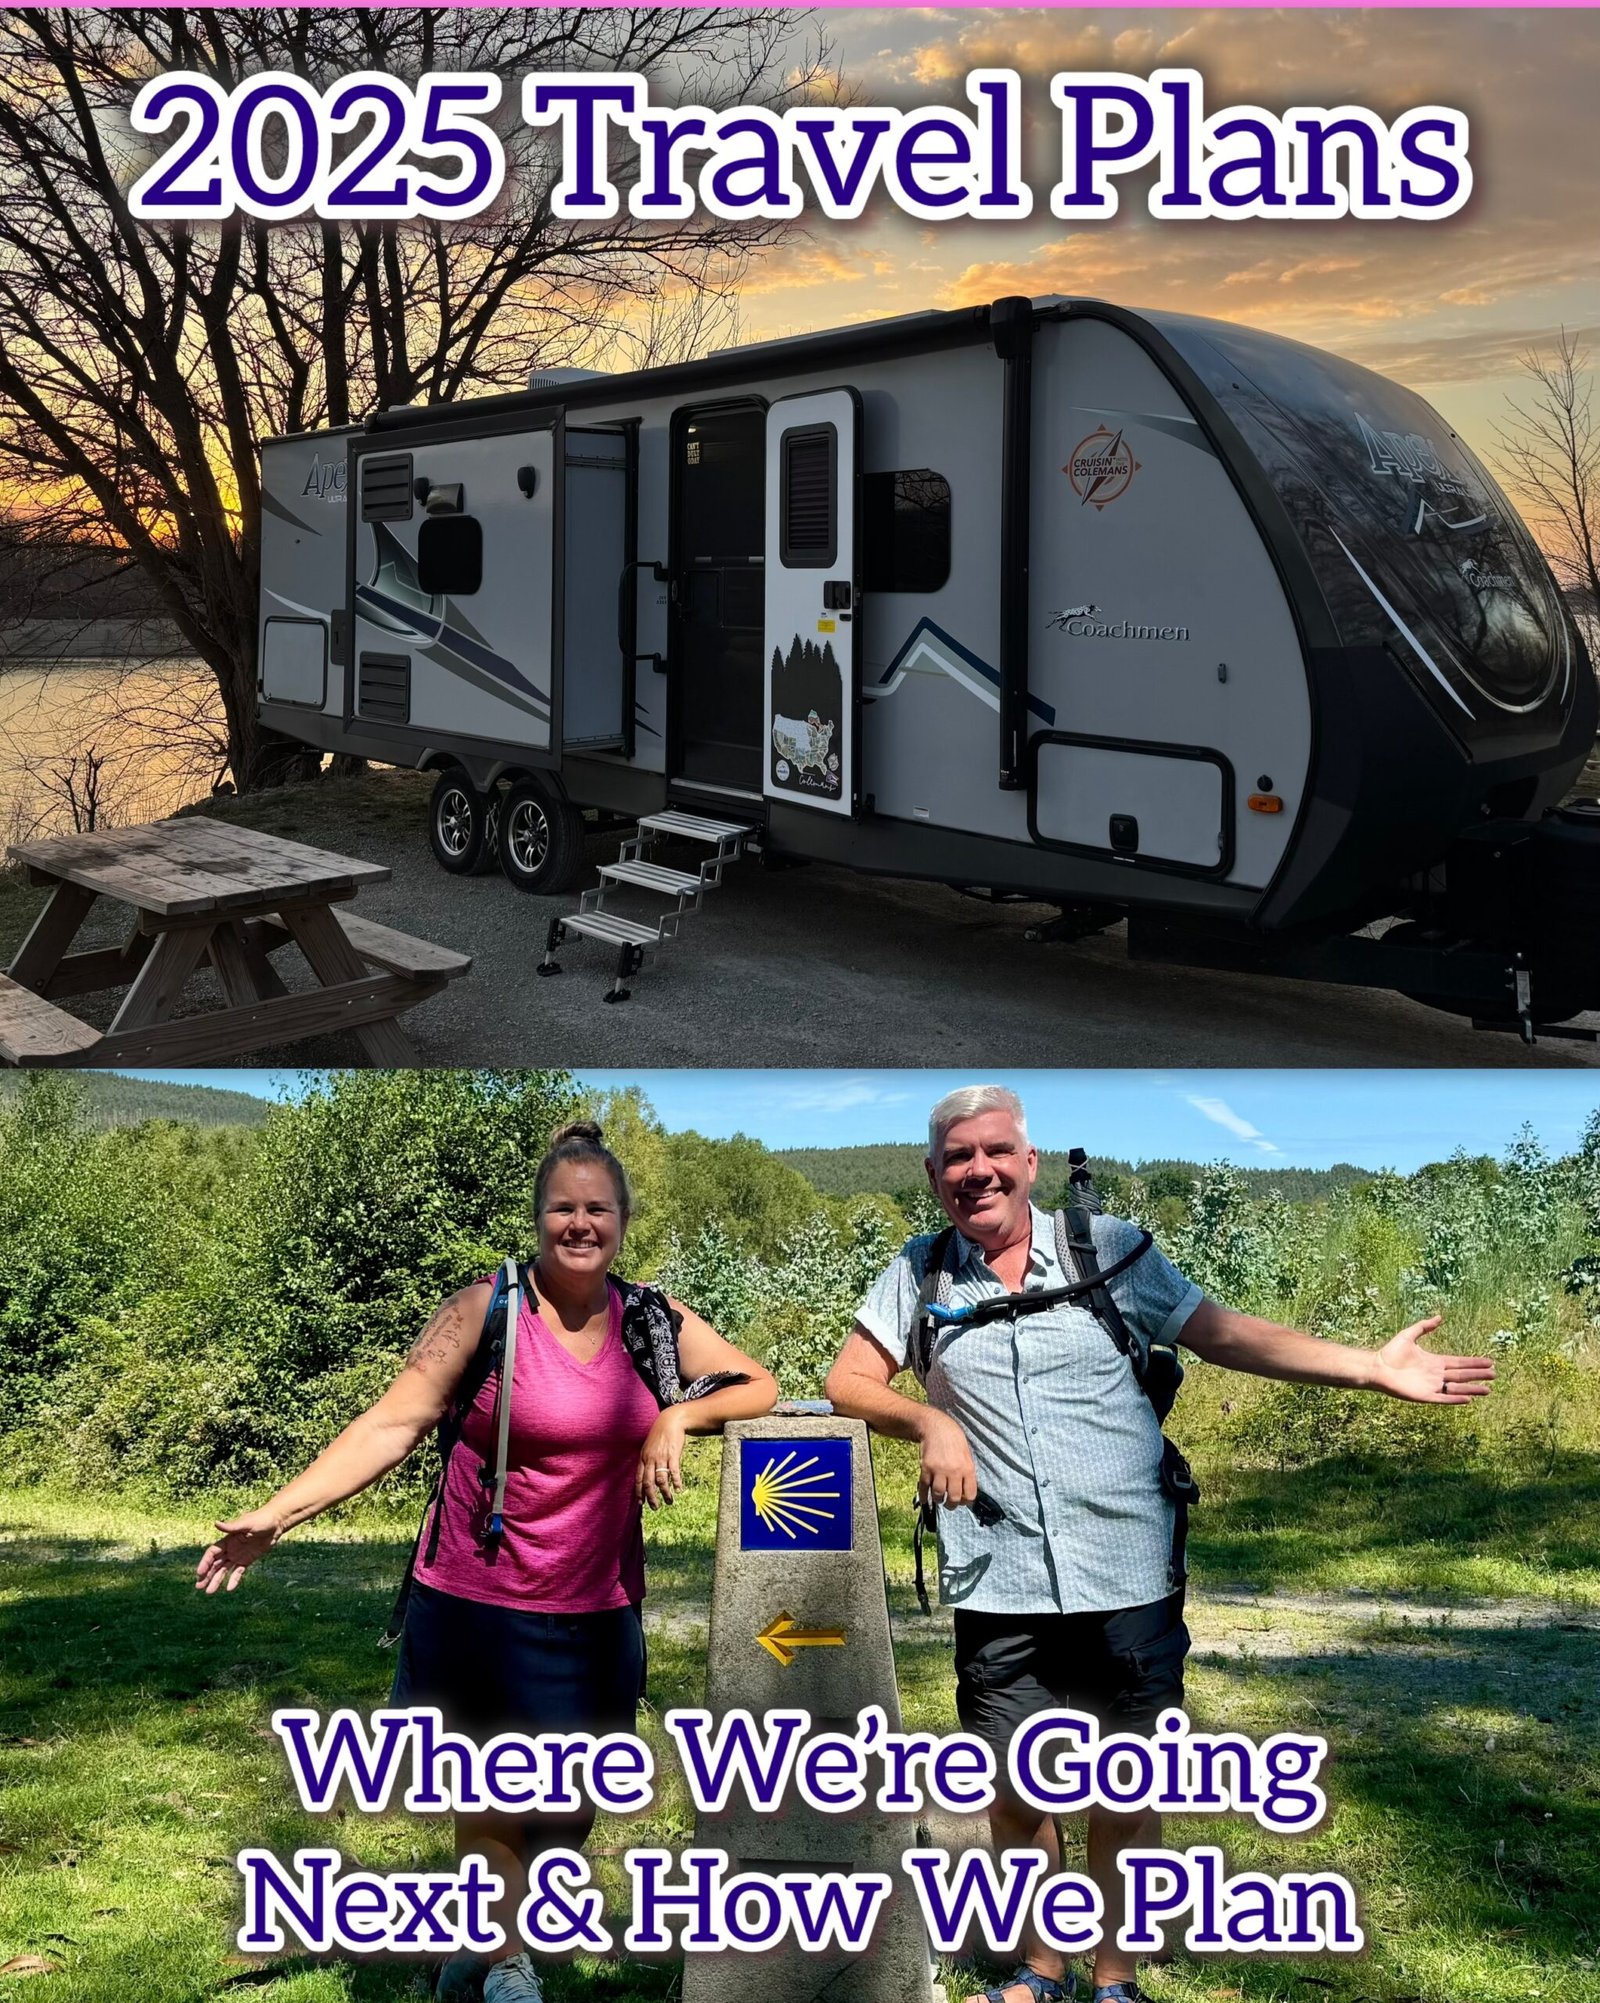
By this time of year (end of March), we usually have our travel plans finalized. We love to plan early because it helps us secure the campsites we want and assists with our budget planning. Most importantly, we enjoy planning throughout the school year. The school year is almost over, so it’s uncomfortable not to have our plans in place.
We didn’t know what we wanted to do or where to go; who knew there was a reason! But our travel plans are nearly finalized now! We have planned several RV trips in the Midwest, including one along the Bourbon Trail through Kentucky.
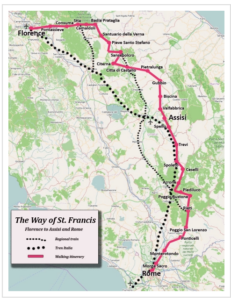
In June, we will walk the Way of St. Francis (La Via di Francesco) from Florence to Assisi. The trail continues to Rome; we are confident we will eventually complete it, just not this year. It will be a challenging walk with significant elevation gain, but we have hiked through Italy before, and the views are breathtaking!
Here’s a quick overview of how we start planning our trips.
What Can We Do As we are both over 50, one of the biggest factors in deciding what to do and where to go is asking ourselves, “What can we do before our bodies will no longer allow us?” We are acutely aware that we are not getting any younger. I hope we have plenty of years ahead, but you never know where life will take you. We want to keep doing hard things, like hiking through Tuscany or climbing Machu Picchu, before it’s something we can’t do.
Early Planning Stages With plans in mind, the real fun begins: we love coming up with what we want to see and do. We start by watching YouTube videos, as it’s enjoyable to observe what others consider important about the area we plan to visit. These videos present genuine experiences, often unrefined, offering a true account of the experience.
Time to Budget Regardless of where we want to travel, our budget constraints largely determine the destinations we choose. I wish we could live budget-free lives, but that will never happen during our travels. Haha! We begin by considering what we want to spend and then move on to what we need. We include lodging, food, airfare, excursions, potential side trips we may wish to add, and souvenirs.
Dates and Routes We look at the calendar and make sure we are making the smartest plans for the time we have to travel. It doesn’t make sense to travel all the way to Europe and spend the most amount of time. We always try to go over there for at least a month. There is so much to do and see in Europe, and your biggest expense is getting there.
Then, we consider which RV routes are sensible. If we have the time, we make plenty of stops along the way, meaning the actual destination isn’t very far. For instance, we don’t have much time for a long trip in June, so planning a Bourbon Trail trip through Kentucky is perfect for us. The destination is only a few hours away, and we’ll be staying at Harvest Hosts, so the stays will be free. If you are an RVer and not a member of Harvest Hosts, sign up here.
Creating a Spreadsheet
We love to create good spreadsheets. We have them for walking Caminos and RV trips with lots of stops. The spreadsheet includes where we are going, the miles/km to get there, what we want to do when we are there, our budget, etc. We are happy to share spreadsheets with you. Just drop us a message.
Trip planning doesn’t have to be a daunting task; in fact, it should be quite fun. It’s like a pre-vacation where your imagination can take you anywhere for free. If you need help, we LOVE to help people plan trips, drop us an email at cruisinwiththecolemans@gmail.com.
If you have any travel questions, send them our way! We love to help others. Who knows, you may inspire our next blog post. We hope you will follow our travels this year. We will highlight them on Facebook, Instagram, and YouTube, making reels and posting photos in real time as we travel.
Until next time – we hope your travels are fulfilling!
[et_pb_section admin_label=”section”]
[et_pb_row admin_label=”row”]
[et_pb_column type=”4_4″][et_pb_text admin_label=”Text”]Want to connect with us and hear about our adventures? Here is where you will find us this Spring 2025:
February 15, 2025, at the Dayton RV Show located at the Dayton Convention Center in Dayton, Ohio. At 9 a.m., we will talk about “From Florida to Maine: The Blunders and Beaches along a 2,000-mile RV Roadtrip.” At 1 p.m., we will talk about “Part-Time, Full-Time, Anytime RVers: Tips for Planning your Next Adventure!”
February 27, 2025, at 6:30 p.m. at Base Camp Outdoors Co., to talk about “Hidden Gems Around Dayton, Ohio,” where we will discuss Dayton as the Gem City because there are so many treasures to explore! The Colemans have been exploring and hiking Dayton’s trails for over 10 years. Join us to learn about their favorite trails and biggest surprises, and maybe you will discover a new hidden gem to check out.
March 20, 2025, at 6:30 p.m. at Base Camp Outdoors Co., to talk about “Navigating Dayton’s Five Rivers MetroParks Hiking Trails,” where we will discuss how, like most people, we walked our neighborhood to lose weight and be more active. When we got bored of their neighborhood, we bravely ventured to our local MetroParks. With no experience in trail navigation and zero hiking gear, we started hiking short trails in jeans and sneakers. The Colemans have hiked every mile of the MetroParks trail system multiple times. This Hiking 101 seminar will encourage you to hit the trail with what you have and begin your adventure. Further, we will give you a few gear tips to level up your hiking game.
Mark April 17th and May 15th on your calendar; we will be back at Base Camp Outdoors Co. with more topics!
If you have questions, email us at cruisinwiththecolemans@gmail.com
Of course, always follow our socials!
Happy adventuring!
Michelle[/et_pb_text][/et_pb_column]
[/et_pb_row]
[/et_pb_section]
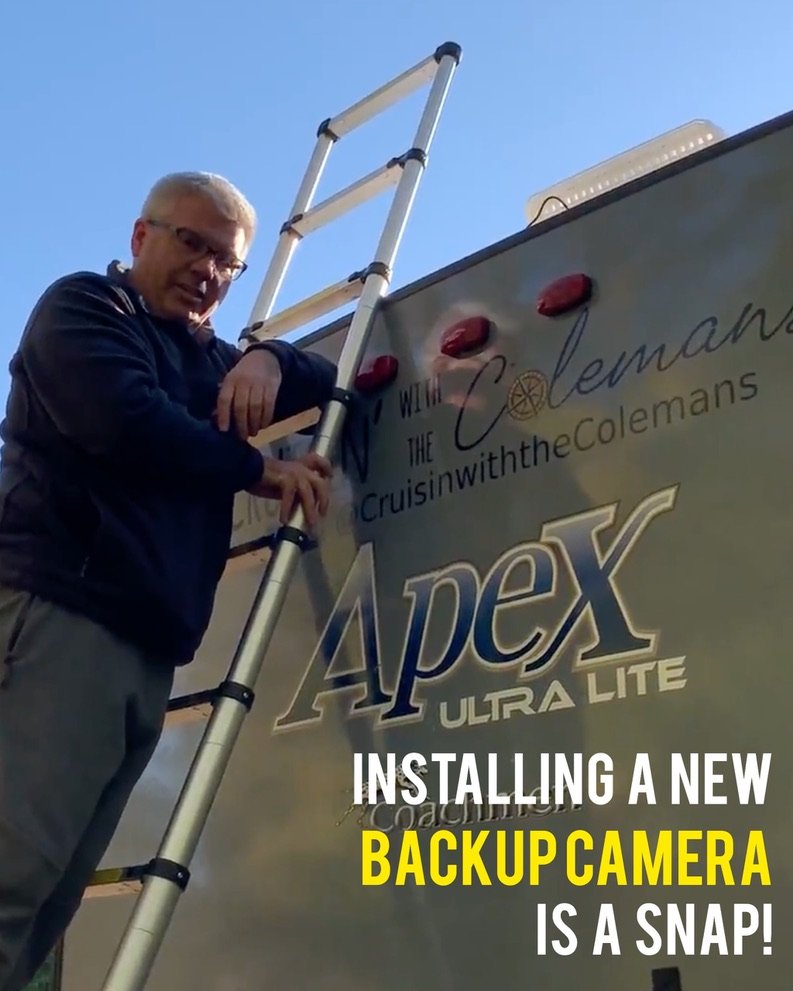
This means fewer “discussions” when backing up the RV, right? Oh, how I hope so! The camera has been used several times already and I can affirmatively say, “YES!” we are having few “discussions” (aka – arguments) over backing up the rig and that means this camera is priceless!
We found the camera on Amazon because of 3 reasons. (1) It had several good reviews, (2) it was wireless, (3) the wireless reception worked up to 60 feet which works for the length of our rig and truck, and (4) it didn’t break the bank at only $140. Here is the camera we landed on:
Watch the video if you are ready to install a camera on your rig or if you just wanted to be entertained! Haha, Brian had a lot of fun with sound effects in this video. This installation project took us less than an hour. It didn’t take long because the camera fit perfectly in our middle brake light.
In order to install this camera all you need is wire cutters, a screwdriver, and wire nuts. Before you start, make sure you turned off power to your rig and know what color your wires are so you don’t get them mixed up. For us, the white is the neutral (ground), the green is the 12V and the blue is the 110V. Finally, make sure you buy a backup camera that will work with the length of your rig and tow vehicle. The first time we bought a camera we didn’t buy one that had a long enough range. Our rig is almost 30′ so this camera is perfect with a 60′ range. Make sure you are taking a measurement that includes the length of your tow vehicle, not just the rig.
The camera has made a big difference already. We are both more confident on the road because we can see what’s around us and backing up is much easier. We are thrilled with the camera both during the day and at night.
If you are inspired to install a camera, we want to hear from you! Leave a comment below. If you have questions, please ask away. I don’t know if we will have the answer, but we will sure try.
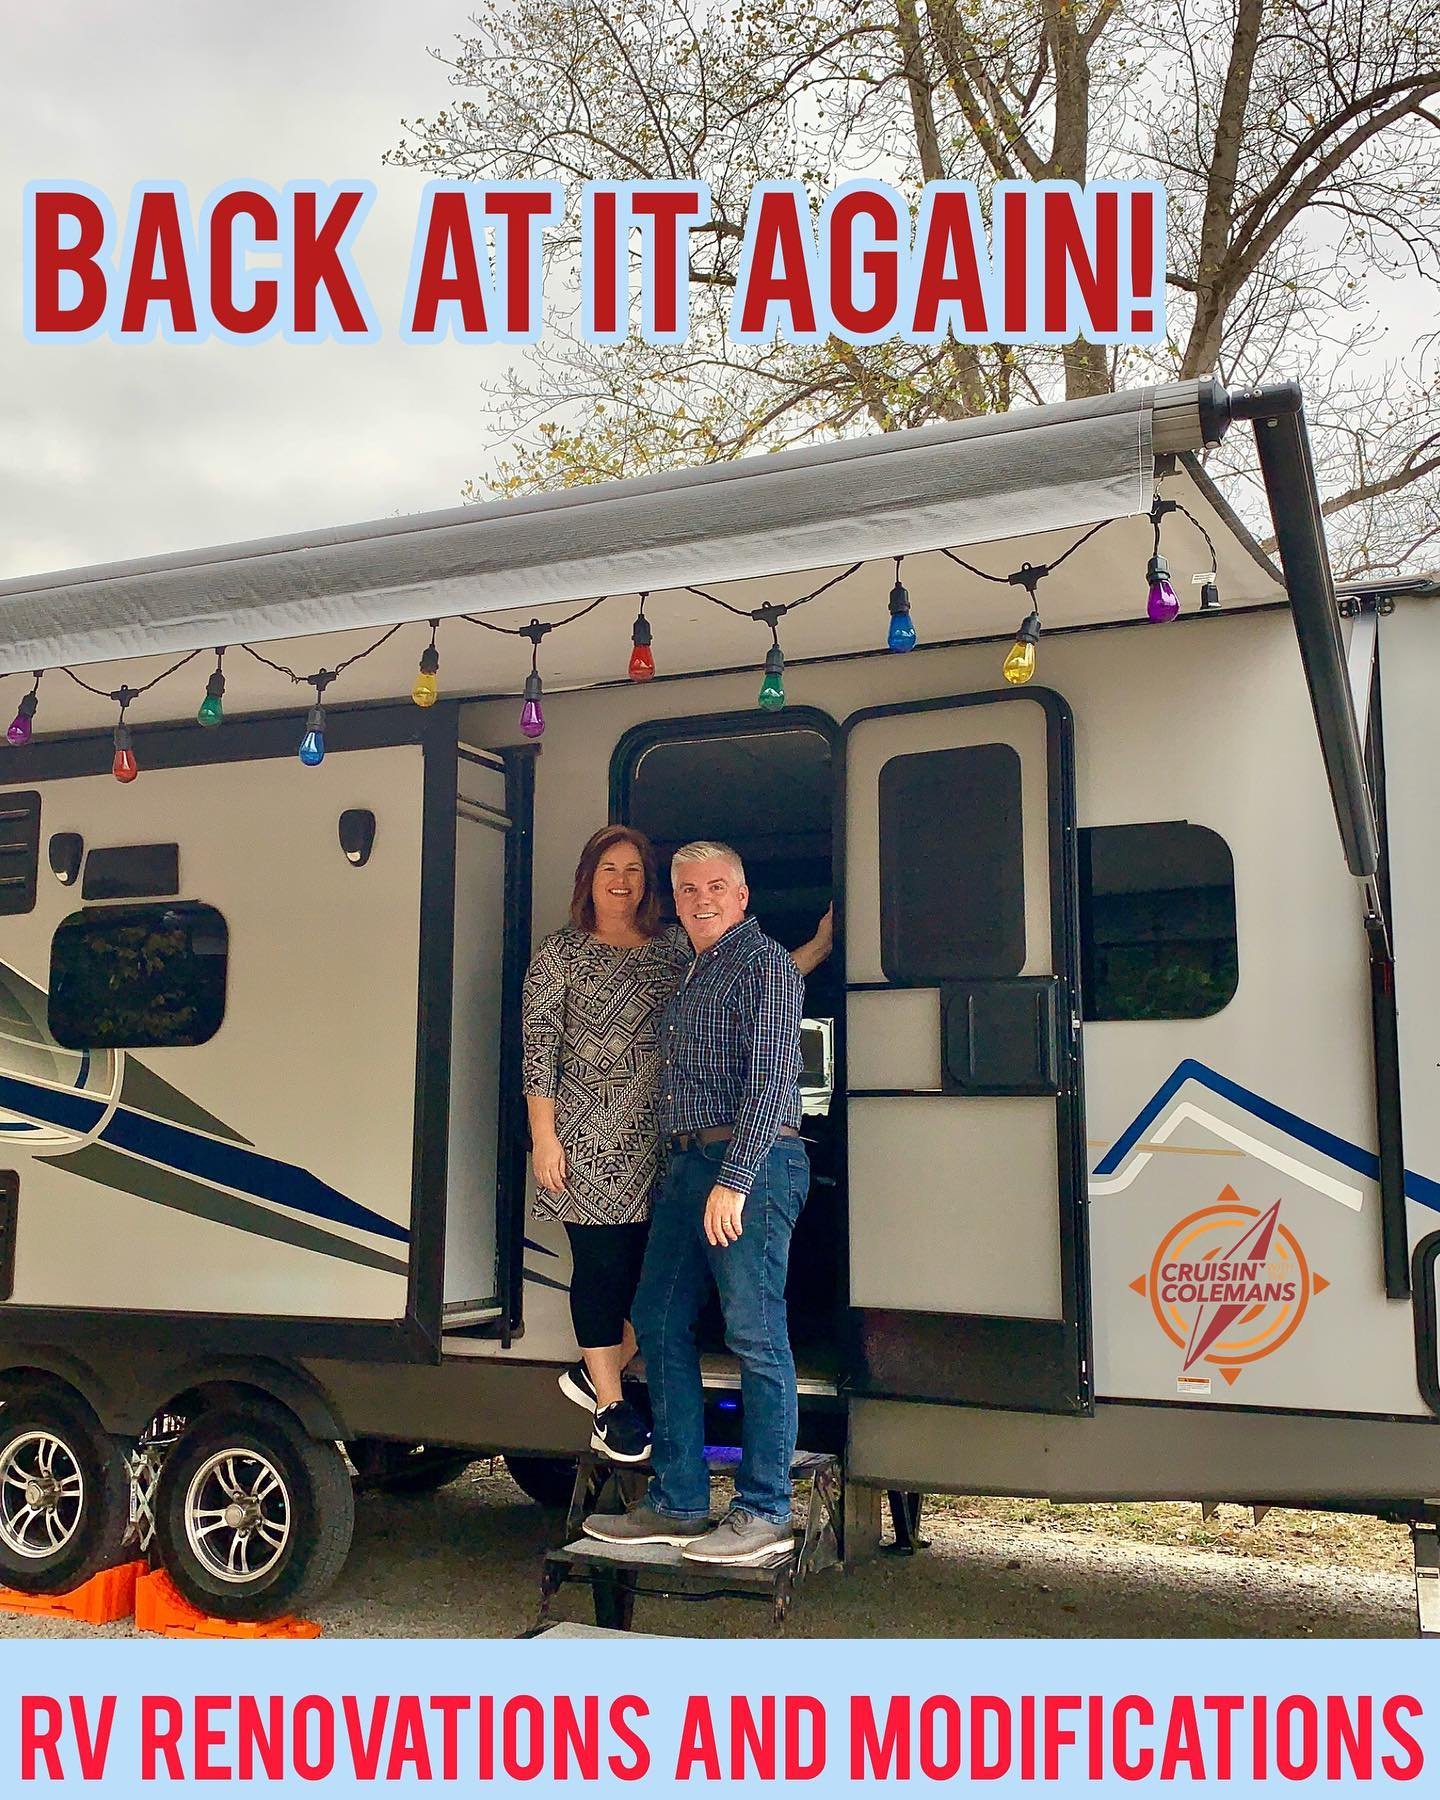
Today we begin talking about the modifications we have working on this fall <insert happy dance>! Besides adventuring outside, working on the rig is so much fun! I think it’s all about watching our ideas come together and creating a space that just makes us smile every time we open the door.
This video is an overview of what is coming up in the series of RV renovations and modifications. I will link all of those topics as the videos come out. But for now, here is what modification we made and included in this video. Here is what we have been working on:
Installing a backup camera
Finding a better use for those countertop covers
Removing our u-shaped dinette and putting in a free-standing table
Wallpapering the slide out
Installing Fantastic Fans
Upgrading our stabilization
Installing a USB Port
I should be clear, there was a port already in there but it didn’t work. When we first bought the rig it worked intermittently, we checked the wires and tried to tighten things up, but it stopped working altogether. We originally bought a standard USB charger from Lowe’s but we learned we needed a 12-volt charging station vs. a standard residential port. The other big lesson here was RV wiring colors. I don’t know about you but we don’t have the standard red and black wires. We have white (ground), blue (12 volts), and green (shore power). You will see us talk more about wire colors when we install the Fan-tastic Fan <insert face palm>. It all turned out fine in the end but we learned a lot about video recording, wires, and just because one fan goes in easy doesn’t mean the other one will too.
This is the USB port charging station we purchased. It works great. The only challenge we have is that it’s not the same size so we need to wood putty the old holes and color match the paneling so it doesn’t show. That is easier said than done.
If you have any comments or suggestions, please leave them below. We don’t claim to be experts but we are certainly always willing to give something a try. Maybe it’s the teachers in us or we don’t have the time to wait a month for an RV shop to finally have the time to help us out.
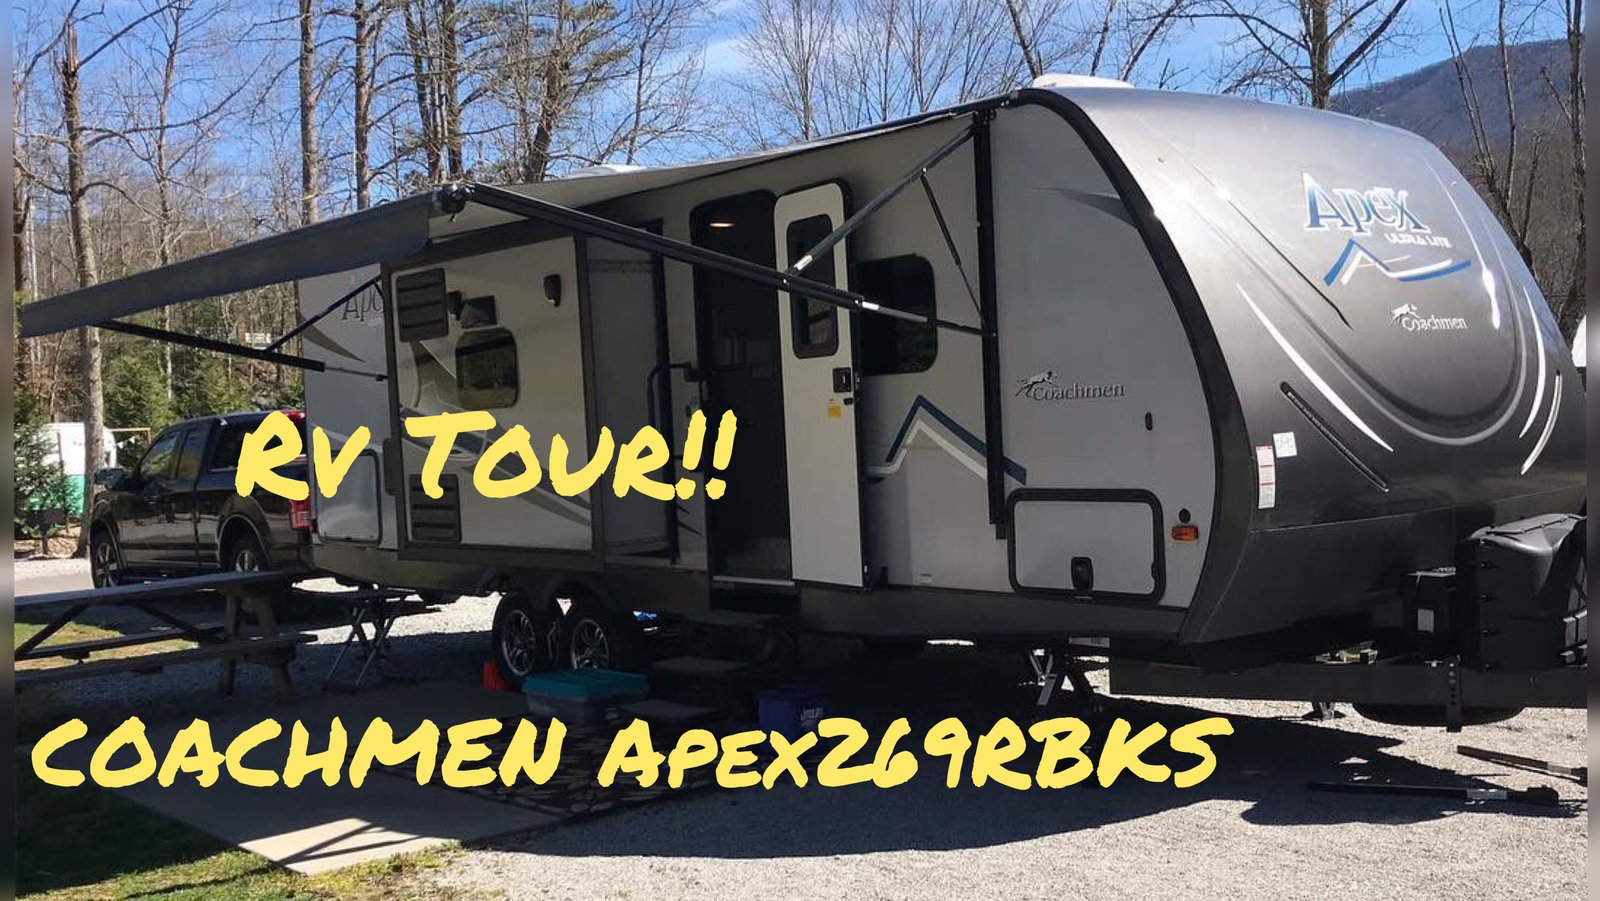
You know when you are excited about something and you feel like you have to tell everyone because they need to know too? This is how I feel about our Apex and all of the things we have done to personalize it, upgrade it, and just make the best possible use of our small space. I love seeing what other people have done to their RV because it inspires us. That’s the goal of this blog post, to inspire you and give you ideas to personalize your rig.
We purchased almost everything I am referencing in this post on Amazon. We love using Amazon because it can be shipped anywhere, and with Amazon Prime, it can usually be delivered in just a day or two. You may or may not know, but Cruisin’ with the Colemans is a new venture for us (we started in June 2018), and we are hoping that travel blogging will become our full-time gig in the future. Therefore, we are starting to figure out how to make money and one way we can do that is Amazon Affiliate links. This means if you buy any of the products we suggest then we get a small percentage of your purchase when you use our link. There is no extra cost to you. We can make two promises when we share products with you – (1) We will never share products that we haven’t used. (2) We won’t share products if we don’t think they are amazing!
On the outside of the rig, we haven’t done too much. Brian told you about what we have done to add stability to our rig, which included using x-chocks and added 2 additional stabilizer jacks. He also gave you his favorite outdoor hack and upgrade. Lightweight rigs are great because they don’t use as much fuel and you can tow it with a smaller truck. We tow our rig with a Ford F-150. Our F150 has a 12,000 towing capacity. One of the drawbacks can be stability inside of the rig when you have a lot of people walking/jumping around.
Necessary: X-Chocks
If you have duel axel tires, you will like the x-chocks. They keep your rig from moving. Bonus: It’s harder to steal your rig with x-chocks between your tires!
Upgrade: Stabilizer Jacks
These are so much better than what came with the rig! I can’t wait until we upgrade all of our stabilizer jacks.
Brian’s Favorite Hack: Command Cord Bundlers
As you saw in the video, these are great for storing items on the sides of the walls in your pass-through.
Upgrade: Bumper Bike Rack
We weren’t sure about adding this weight to the back bumper, we have heard that you shouldn’t put anything on the back bumper. However, this bike rack is very lightweight, coming in at only 21 pounds. We carry 2 bikes on the rack and have not any problems.
Upgrade: Slim Shade RV Window
If you have not heard about the slim shade, you are missing out. We heard about it in our Apex Facebook group and it took less than an hour to install. It makes your RV window a useable window while providing shade at night.
Hack: Cat Doors
Brian showed you how we converted the outdoor kitchen into the cat litter box space and storage area. This the cat door we used. I am sure an outdoor kitchen is great for many people, but this was the best decision we could have made to ensure cat litter isn’t all over the inside of our rig.
Inside the Rig
Time to move inside the rig! There are so many things we have done, I am sure something will be missed in this blog post. No fears though – just leave a comment and we’ll help find whatever we leave out. I listed my favorite hack as the IKEA baskets; however, it is so hard to pick just one favorite. Everything we have done, inside and outside, has made both our lives easier, made time in the rig more enjoyable, and has creates less clutter overall because everything has its place. Let’s start with comfort!
Upgrade: Dorel Living Slim Recliners
The couch that came with our rig was so uncomfortable! If you are active, like we are, you need a comfortable chair to come back to and put your feet up. Yes, we lost a hide-a-bed; however, we still have the dining table that can convert to a bed and we have no plans of having that many people sleeping in our rig. Haha These recliners are so comfortable, they come broken down so they are easy to get in the rig, and they fully recline.
Hack: Collapsible Drink Holders
My dad is a truck driver and I remember these cup holders from when I was little riding with him in his semi. Putting together the right keywords to find them on Amazon was the hardest part. This is something so small, yet so helpful when you need a place to put your drink while you relax in your recliner.
Hack: Acu-rite Weather Station
A hack? An upgrade? A necessity? I don’t know what to call it but we love this weather station. We actually bought 3 different ones before we settled on this version. The first was too small, the second needed to be plugged in if it was going to work, but this one was just right. 🙂 Another reason I love Amazon, easy returns!
Necessary: Rosewill Electric Oscillating Tower Heater Fan with Thermostat/Portable Ceramic Space Heater with Remote Control
This is called a heater fan; however, in the summer it works as a cooling fan. All you need to do it set the temperature at whatever you want the rig to be set at and it will either warm up the room or blow cooling air. It helps us use less propane in the winter and keeps the air moving in the summer.
Hack: Mounted Spice Rack
As you learned in the video, I am not the cook in the family. Brian not only cooks but enjoys being creative in the kitchen. If you have tried any of his recipes from his “Recipe of the Month” blog posts, you know how good his food can be! What Brian tells me, is when you’re cooking it’s important to have a few basic things close by, like oil, salt, pepper, etc. We found this spice rack on Amazon and then Brian cut a piece of pipe insulation which just sits behind the spices to keep them from moving when we’re going down the road. Brillant, I tell you!
Hack: Flexible Cutting Board for Freezer
This wasn’t our idea at all, we saw this idea in other RV Tour videos and it works great to collect the build-up of ice in your freezer. We bought this flexible cutting board and then cut it down to fit our freezer. I mentioned in the video that we hadn’t determined if it worked yet and I am happy to report that it works beautifully! No more puddles of water or scraping the back of the freezer! All we do is pull out the cutting board, shake it off outside or in the sink, and put it back. Voila!
Michelle’s Favorite Hack: IKEA Rimforsa Baskets
Installing the boards on the wall and then hanging these baskets was so brilliant. We tried using command hooks and hanging baskets with them but it was pulling off the wallpaper. This hack works perfectly and now we can store fresh fruit and veggies, bread, and stuff that you would have in your “junk” drawer. One thing I mentioned in the video was that I store the baskets on the dining table bench while we drive but I didn’t mention that I put non-adhesive gripping shelf liner on the bench first and then set the baskets down and they don’t go anywhere. I use that liner on all of my shelves. It works great!
Oooohhhh my pantry! Didn’t you love it? It’s big and there is plenty of room for everything I need to store. We have the laundry basket, various cleaning rags, kitchen towels, and of course food and snacks. It was tough to find a door organizer that was narrow enough for our RV pantry door but Amazon came through again! Brian drilled this into the top and the bottom of the door where it’s not hollow and so far, so good! As you saw in the video, I use this organizer for all of my cleaners, cans, and just odd shaped stuff. I am not sure if I will always organize it this way, but it works for now.
Necessary: Bissell Bolt 2-n-1 Lightweight Vacuum
This is an absolute necessity in my mind. It weighs only 5 pounds and has a removable handheld vacuum. It works great on the carpet and laminate flooring. It works on a rechargable battery and the charge lasts a long time. I have one in the RV and in my home.
Upgrade: Homlody High Pressure Shower Head
I feel like we have tried every showerhead out there! Haha It took a while for us to agree on the perfect showerhead but I am happy to report this is the one! We know that a lot of people rave about the Oxygenics showerhead. Brian liked it but I hated it. To me, the Oxygenics felt like a clogged hose. The showerhead pictured below has great pressure, turns off with ease, and doesn’t use a ton of water. Now we don’t boondock so I can’t attest to how it works when boondocking but we do camp with electric and a full tank of fresh water. We can easily go 3-4 days with just electric.
Hack: Shower Light, Motion Sensor, Waterproof
Who would have guessed that it would be dark in the shower at night with a skylight in the shower? I would assume we aren’t the only ones who shower at night when we smell like a campfire. But I need light in my shower at night! This light is perfect because it’s a motion sensor and only goes off when we open the shower door. It runs on batteries and it’s waterproof because it’s an indoor/outdoor light. How did we hang it up? Command strips of course!
Hack: Shower Foot Rest
Ladies, can I have your attention for a minute? We all know that men design showers because they don’t think about us and our need to lift a leg while we shave. Haha This footrest is one of five that I tried out, again thank you Amazon. Brian hung it up with the sticky pads and silicone caulk that it came with and thankfully it won’t be coming down!
Necessary: Adhesive Towel Bars
This is a simple but necessary hack. We have command hooks for extra stuff to dry but we like towels laying flat to dry as they dry faster. They are up with adhesive and we got the same style for our toilet paper holder.
Hack: Folding Bathroom RV Door
As we said in the video, we needed to remove the door that came with the bathroom because of the cat tower. The tower and the door were just too much in the same space. The only downside to this door is that your opening is just a bit narrower; however, we haven’t found it to be a problem.
Hack: Stick On LED Lights with Magnetic Backing
These are in our closets in the bedroom and in the passthrough. They provide plenty of light in those small spaces. They have magnets that hold the light to the base and then we have the base held with command strips. The idea is the you can leave the base up when you take it off to change the batteries. They only downside is that they are battery suckers, but we are in/out of our closets a lot.
Hack: Shoe Holder Storage Cart
Ok, did this one make you get excited? I love this hack! My only question to Coachmen is why the heck is there this dead space between the bed and the center console? Well, now I am glad there is this space! It took quite a bit of searching to find the right size. We tried using shoe boxes but the stacking and re-stacking of boxes irritated me and Brian’s giant shoes didn’t fit, haha. This is perfect, the wheels make it easy to slide in/out and it fits plenty of shoes.
Not Mentioned in the Video...
There were a few things I meant to talk about in the video but I forgot. So here are just a few more ideas to inspire your creativity as you personalize your rig.
Vinyl Lettering Over the Bed
This is a small touch that makes a big statement and adds a pop of color over our bed. Unfortunately the vinyl lettering that we used throughout the rest of the video is no longer available, I am sorry. If it becomes available again, I will update this blog post.
Outdoor Rug
Everyone needs a good outdoor rug that easily rinses off and adds a bit of personality to your home of the road.
Caravan Sports Zero Gravity Chairs with Cup Holders
Zero gravity chairs are all the rage and we love ours – especially the price coming in at only $40! That’s why I had to share the link with you. We bought one for our daughter-in-law, fell in love with it, and then bought some for ourselves. Below the link to the chairs is the cup holder. Be warned, there are several sizes, this is the biggest one. The last link is the bags we bought for our chairs. The chairs fit perfectly in them and we store the chairs in the back of the truck.
Our tour comes to end. Did you play the drinking game every time I said command hooks and tension bars? Haha! Command hooks are your best friend in an RV. If you enjoyed the video, please help us build our future by subscribing to our website and our YouTube channel. Then give them both a thumbs up. This helps to ensure more people see our content.
Do you have questions? Need to know more? Leave a comment below. We love hearing from you!!
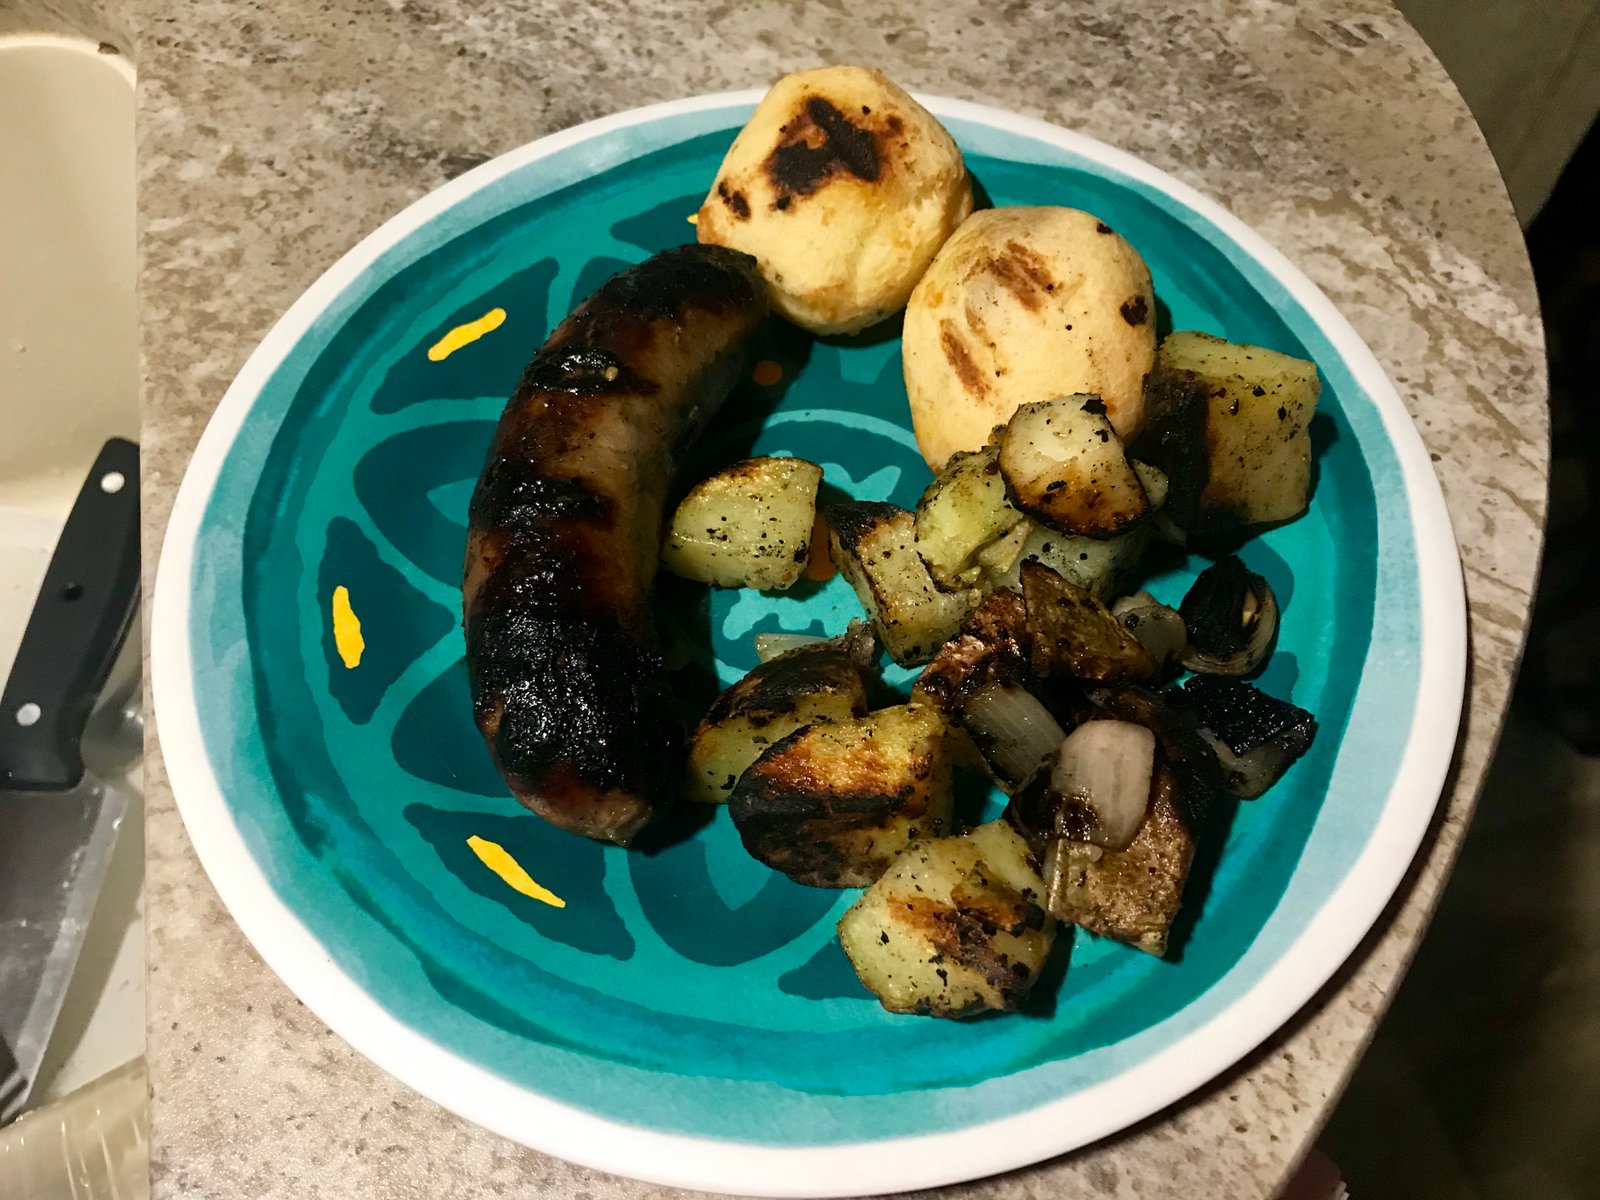
Sometimes after a big day out exploring we just don’t feel like spending a lot of time cooking. That was the case after our day exploring Cape Coral. After visiting the fantastic Cape Coral Farmer’s Market, we did an eight-mile walk around town and found a great little Italian place for lunch that served gluten-free pizza. A visit to Wicked Dolphin Distillery and pool time back at the campground with some newly invented cocktails finished up our day.
By the time we got back to CC we were exhausted and starving. Here’s a quick dinner that you can throw together in no time at all with things that you might even have on hand.
Start out with a variety of potatoes: red, russet, and Yukon gold are my favorites. Dice them up into bite-sized pieces along with a couple of shallots and put into a microwave safe bowl.
Add about a tablespoon of olive oil and a good sprinkle of salt, garlic powder, and pepper. Cook in the microwave for five minutes or so until the potatoes are mostly cooked but still firm.
While the potatoes are cooking, get the grill heated up and add Italian sausages.
When the sausages almost done, add the potatoes and shallot mixture to the grill. BE CAREFUL to not pour the collected oil and water in the bottom of the bowl onto the grill or you will have some major flareup!
Cook the potatoes and sausage until they are nicely charred. Once they’re done, add a few handfuls of spinach and allow it to wilt for a second before removing everything from the grill and dividing between plates. Sprinkle with a little parmesan cheese.
I would highly recommend making sure that you have plenty light on the grill. We had to keep the lights off because of the no-see-ums and I might have burned things a bit! Also, you might notice that I didn’t use spinach… we couldn’t find any at the farmers market that morning so we just went without.
Grilled Sausages with Potatoes, Shallot, and Spinach
1-2 Italian sausages per person
1 lb of assorted potatoes, such as russet, red, and Yukon gold\
2 shallots
1 T olive oil
1/2 t each salt, garlic powder, and pepper
1 cup spinach leaves
1-2 T parmesan cheese
Cut potatoes and shallots into bite-sized pieces and place into a microwave safe bowl. Top with oil and seasonings and stir to mix. Cook for 4-5 minutes in microwave until almost cooked.
Heat grill and add sausages. Cook for 6-8 minutes and turn. Add the potato-shallot mixture and continue to cook until charred to your liking, another 5-10 minutes, making sure that the sausages are cooked through. Add spinach on top and let wilt then remove to plates.
Sprinkle with parmesan cheese and enjoy!
★ 25 years guiding★ 48 U.S. states★ 10 countries★ 3,000+ Camino miles
RV tips, travel inspiration, and updates on the trips we're planning — delivered to your inbox each month.
Questions about this trip?
Send us an inquiry.
Tell us what you'd like to know about this trip and we'll get right back to you.
Know before you go
Activity Level.
Every Cruisin' with the Colemans trip comes with an activity level so you know, before you lace up, roughly how hard the walking will be. Think of it as the overall rhythm of the trip — a few days might push a little past it and a few will feel gentler, but it's an honest read on what your legs are signing up for.
Nobody knows your body better than you do. We're all for a good challenge, but pick a level that matches your current fitness and trail experience and the whole walk gets more fun. Not sure where you land? Reach out — we've walked every one of these ourselves and we're always happy to talk it through.
Grades
EasyEasy0–8 km (0–5 miles)
Gentle, mostly flat days on well-kept, easy-to-follow paths. Ideal if you're new to multi-day walking or simply want a relaxed pace with plenty of time to soak it all in.
Easy – ModerateEasy–Moderate8–16 km (5–10 miles)
A little more distance over mixed ground — mostly maintained trails, quiet lanes, and the occasional gentle climb. A good fit if you're reasonably active and ready for a few longer stretches.
ModerateModerate16–20 km (10–12 miles)
Fuller days on varied, sometimes rugged terrain with regular ups and downs. Great for steady hikers in good shape, or determined first-timers chasing a real sense of accomplishment.
Moderate – StrenuousModerate–Strenuous20–24 km (12–15 miles)
Long days with sustained, often steep climbs and descents on rough trail. You'll want solid fitness; a few exposed spots call for a head for heights, and navigation can get trickier when the weather turns.
StrenuousStrenuous24–28 km (15–17 miles)
Big days on demanding, often remote mountain terrain — serious distance and elevation for experienced, fit hikers. Expect rough footing, the odd exposed or aided section, and higher altitude on some routes.
ExtremeExtreme+28 km (+17 miles)
Our toughest walking, built for very fit, very experienced hikers. Rugged, sometimes remote mountain terrain with scrambling, exposure, and aided sections — plus altitude, weather, and navigation that all add to the challenge.
Where you rest
Accommodations Levels.
Where you sleep is part of the story, so we hand-pick locally run places that welcome you like an old friend. The level shifts a little from trip to trip depending on the route, but the goal never does: a clean, comfortable, genuinely local stay at the end of every walking day.
Most nights you'll land in friendly, independent or family-run hotels, guest houses, and B&Bs chosen for their charm and the little touches that feel like home. Some trips lean a touch more luxurious; others, especially in the remote stretches, mean simpler refuges or huts. Either way, we've picked each one to help you rest up and wake ready for the trail.
Basic – A Place to Rest Your HeadBasic
Mountain huts, refuges, and simple B&Bs. Ensuite rooms aren't a given, and you may share a dorm with fellow walkers — but what you trade in polish you more than gain back in camaraderie and a big, rustic welcome.
Classic – Charming Without the FrillsClassic
Locally owned B&Bs, guest houses, and small inns that feel like a home away from home — usually family-run, cozy or freshly kept, and well placed for the next day's walk. A warm welcome comes as standard.
Comfort – A Little More...ComfortableComfort
Characterful, locally owned hotels and B&Bs with the little extras that make a stay feel special — décor rooted in the region, the occasional spot to unwind, and sometimes a kitchen worth lingering over.
In Style – For Those who Want to Treat ThemselvesIn Style
First-class stays in boutique hotels, vineyards, and country manors — often in the best seats in the house, from hilltop towns to the water's edge, with standout service and, now and then, a truly memorable table.
Mixed – Boutique Hotels to Mountain Huts, all in One TripMixed
One trip, a bit of everything. You might bed down in Classic or Comfort rooms through the towns and villages, then a refuge or other Basic spot up in the mountains where that's all there is — an honest, memorable mix that matches the journey.