Camino del Norte | Güemes to Comillas | Days 10-13

I wanted to write a blog but decided to take a nap. Seriously, I can’t seem to get enough sleep lately. My body is trying to adjust but this Camino is tough on all my parts.

Albergue el Convento

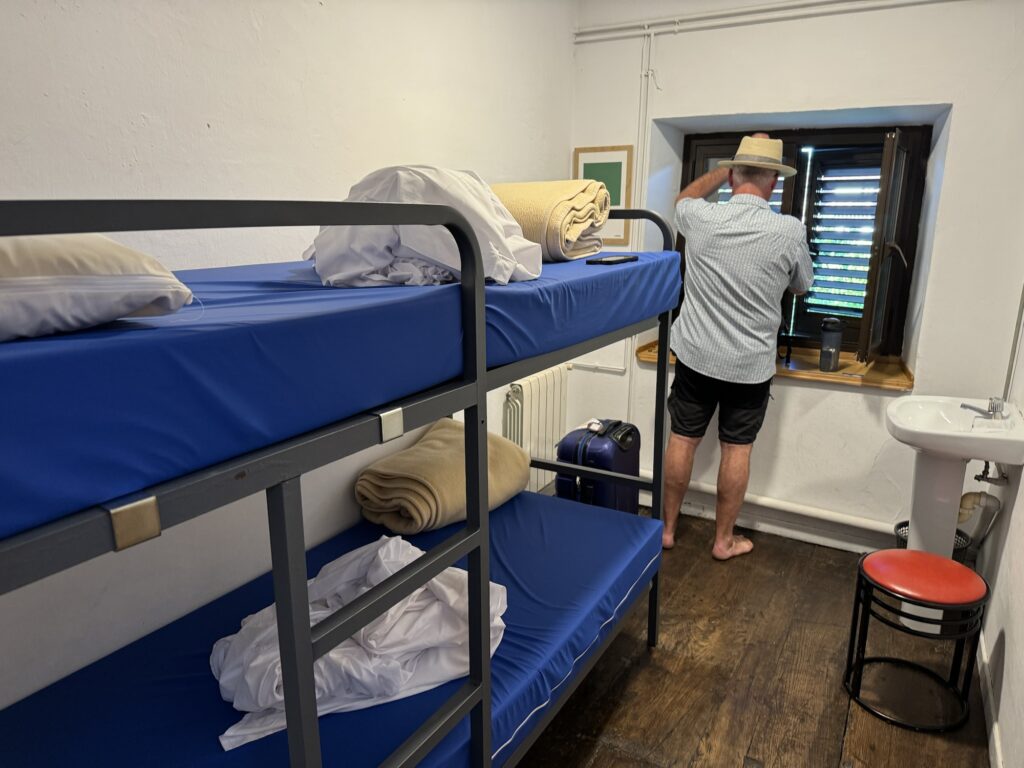
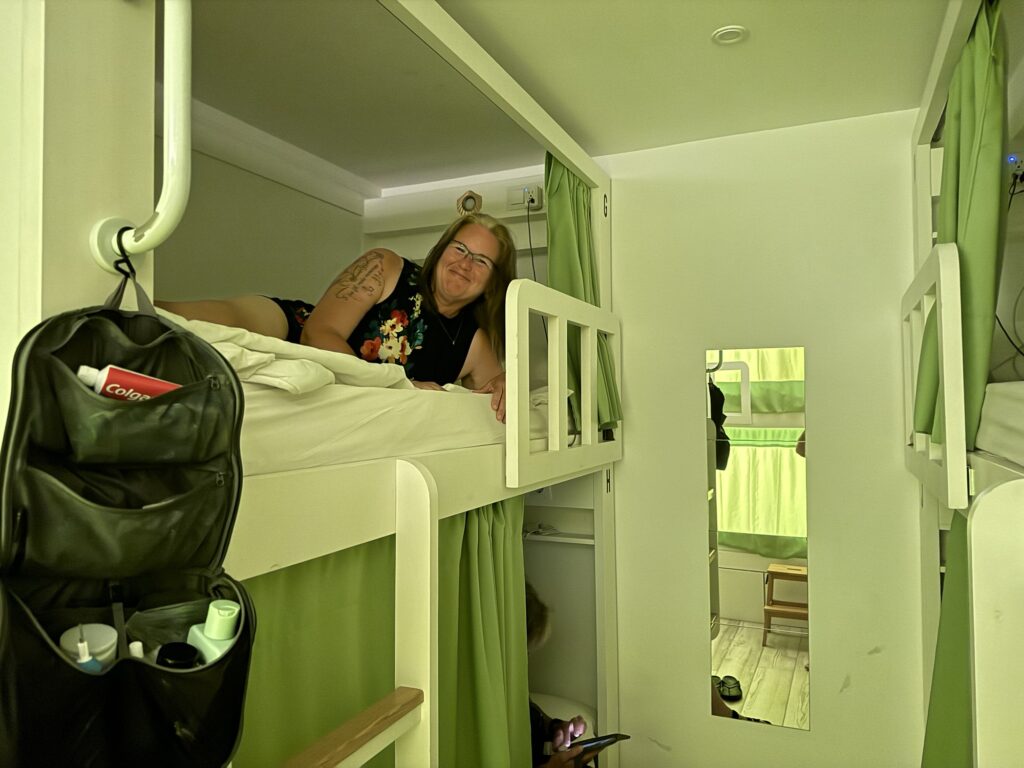
Today was lucky day 13 on the Camino and it’s my first day in awhile without a nap. However, it could be because of the circumstances. We’ve been quite spoiled on this Camino. Heck, I’ve been spoiled on all Camino’s thus far because I’ve never slept on a top bunk. Six Camino’s and no top bunks. I hate top bunks. I despise them. They require upper body strength I don’t have anymore. Let’s be serious, I probably never had it. And in the middle of the night I pray I don’t have to use the bathroom.

My first top bunk, hopefully my last

Let me back up a bit. I know we haven’t had a “true” Camino experience thus far because we’ve been in private rooms the entire time with only two communal meals. We’ve enjoyed many private rooms over our many Camino’s. I have no shame in that because as a couple I quite enjoy sleeping next to my husband. Yep, I said it. Even when we’re laying near each other in our separate twin beds, which is typical. I enjoy the little bedtime conversations we have before we drift off. I enjoy our luggage spread out all over the room. I don’t care who knows it, I love sleeping with my husband. 😆❤️ I know his habits and have learned to tolerate them. But this guy in the lower bunk across from me is super annoying right now.

Communal dinner at Albergue El Convento

I long for communal dinners. I love conversations over a meal with other pilgrims. I don’t need to share a room with them. At this very moment as I lay on my top bunk, I’m listening to several people rustle in their beds, a few still coming in and out of the bathroom, one person stinks of cigarettes, another person just stinks, the person below me has her light on, and another person is touching every loud piece of equipment they brought with them. I’ve usually napped by now and am asleep for the night by 10 p.m. Currently, it’s 11:05 p.m. and several people still have their lights on. I am, by the way, laying in bed in the dark with only the light of my phone to write this blog. I miss discussing this chaos with my hubby.

It’s honestly hurt our Camino to not have communal dinners because we haven’t bonded with anyone until last night. But, in our defense, there have been so many tourist cities it’s been super easy to just stay in a private room. Also, I look for communal dinners and the opportunities have been limited.

Having fun with our new Aussie friends at the Gaudi Castle in Comillas

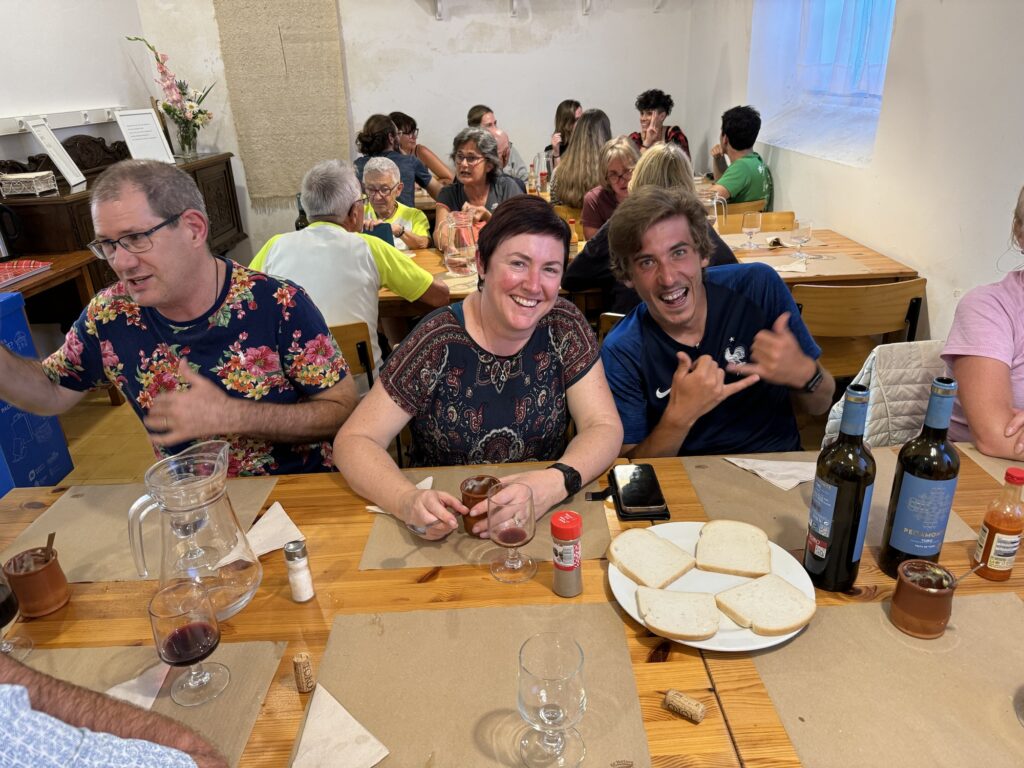
But, alas, our pilgrim family is beginning to form. We have a pilgrim daughter from Alaska, Sophia. Brian taught her to thread her blisters tonight. She is so happy with how her feet feel! We have friends from the Netherlands, Australia, Italy, and France.

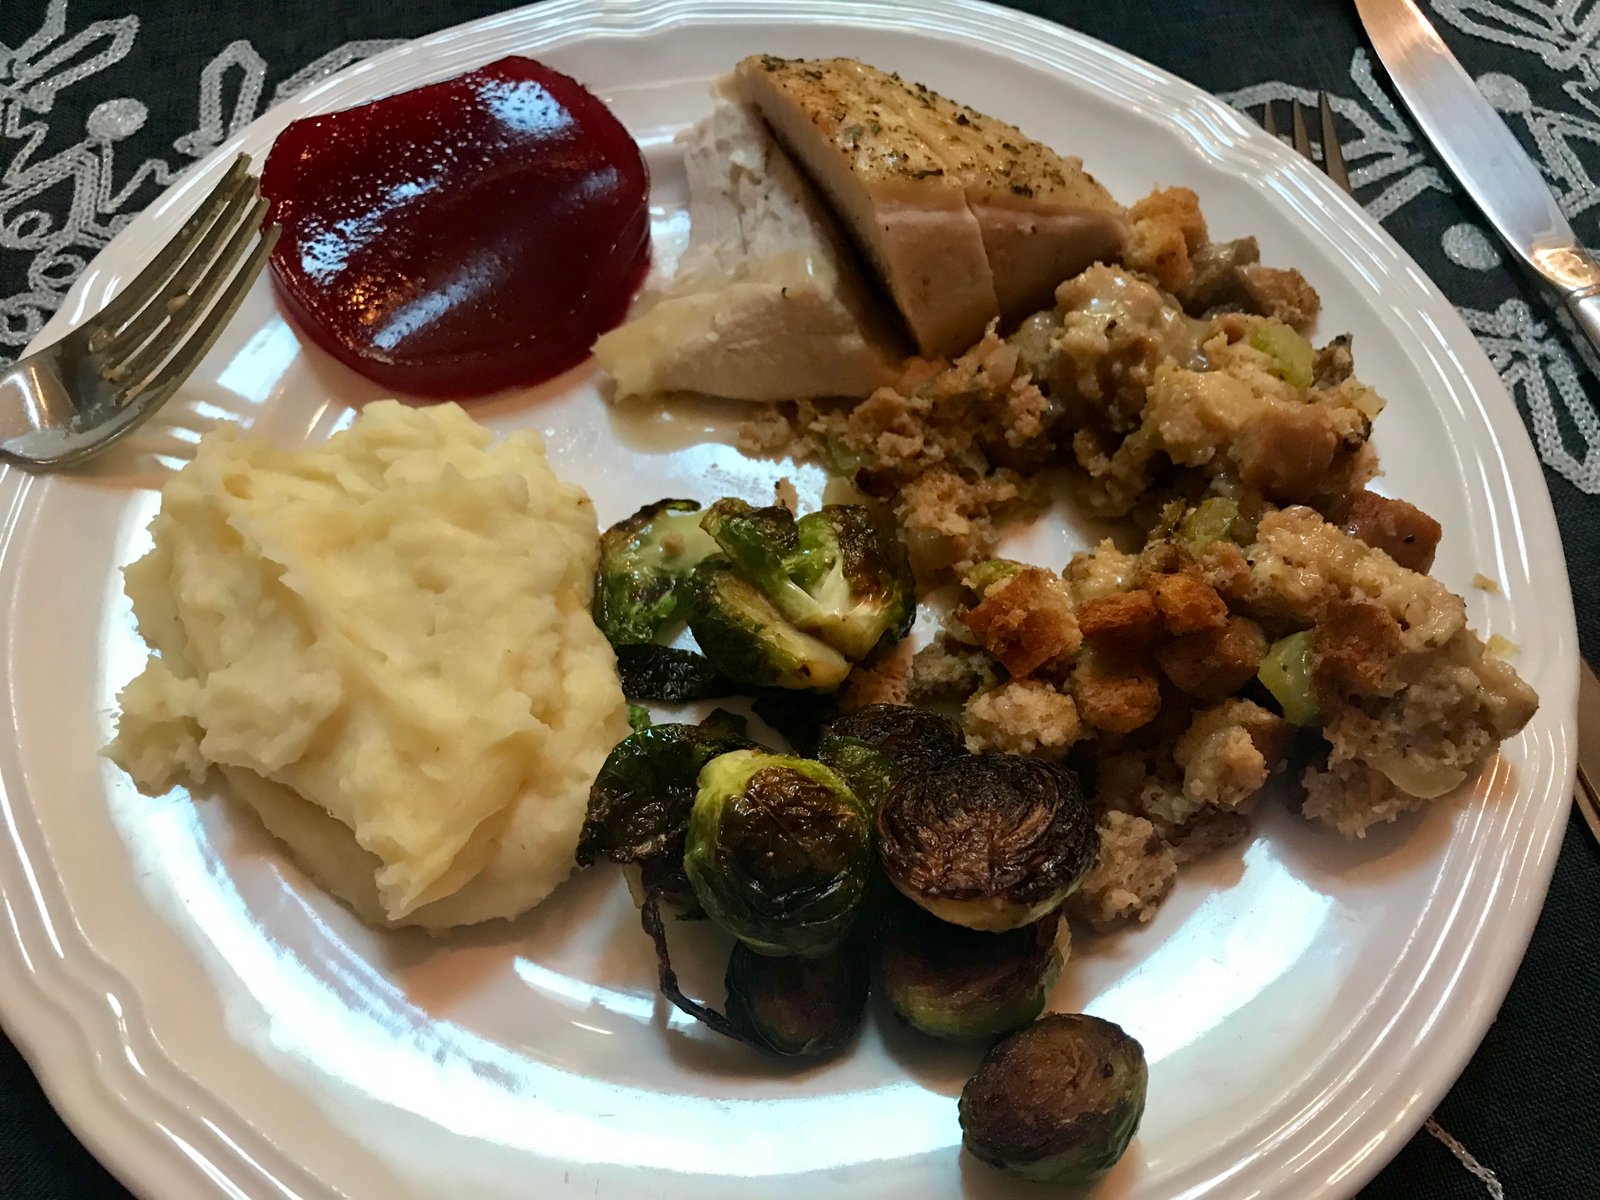
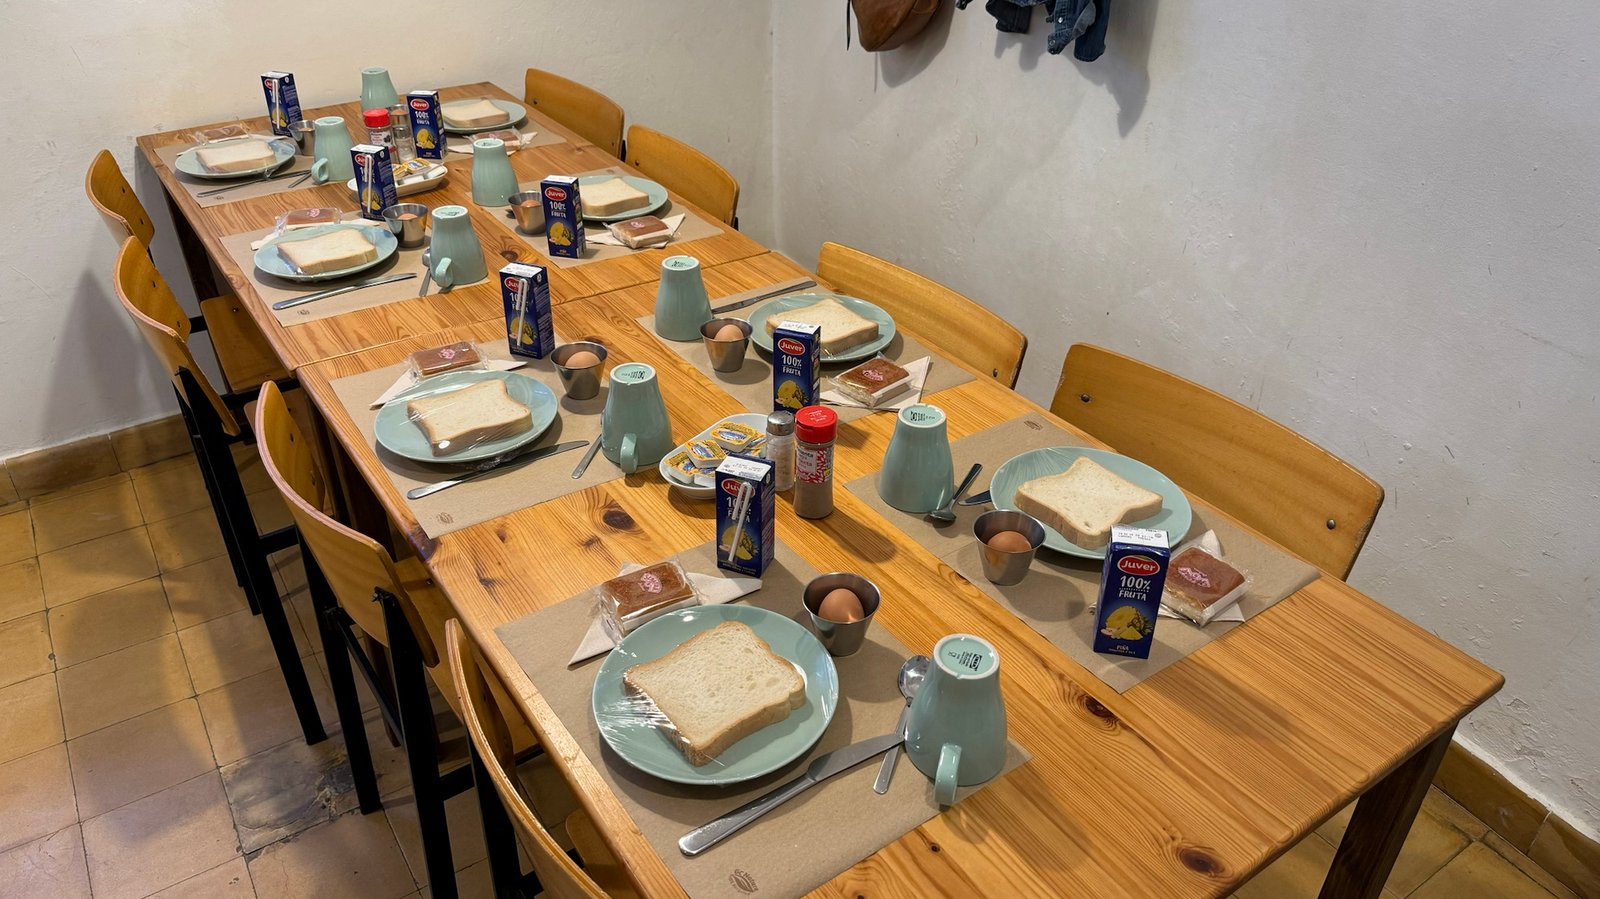
Last night we had an outstanding communal dinner at Albergue El Convento in Santillana Del Mar. We enjoyed wine in their gardens, a sharing time with other pilgrims, and a communal dinner. The rooms were 2 beds each so Brian and I had a private room. Fortunately Brian took the top bunk. He loves me. We had an outstanding communal breakfast. I slept like a baby. I don’t care about shared bathrooms. I just hate sharing a room and despise top bunks, if that’s not clear yet.

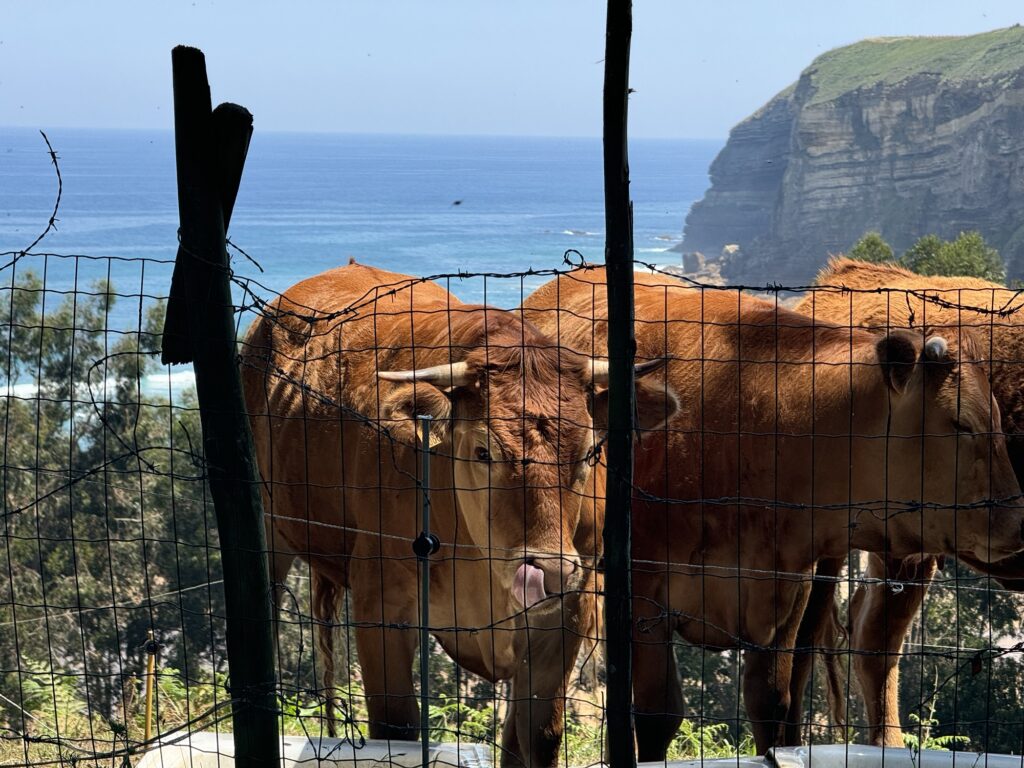
Tonight’s albergue is this shared room, photo above. It’s stuffy in here because the doors are closed, the fan is off, the A/C isn’t running, and there’s no air flow in the room. The curtains are nice but they don’t help the air flow.

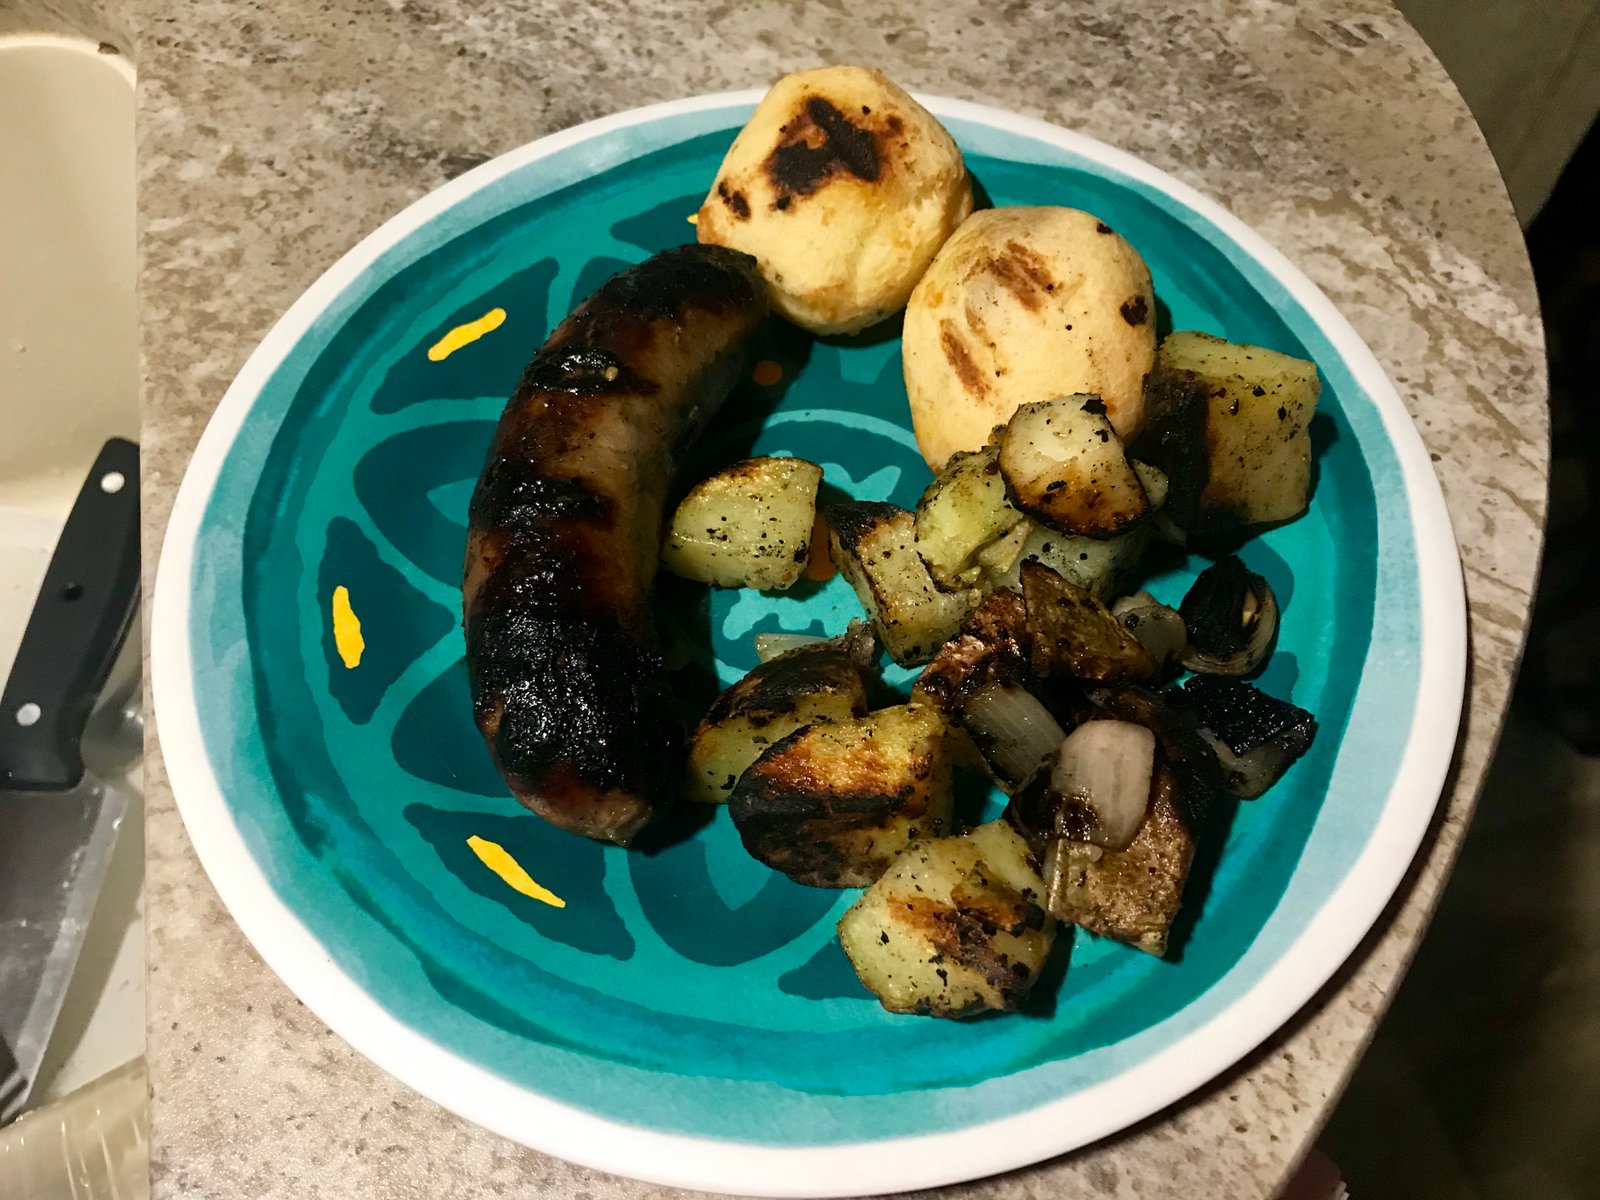
The plus side for tonight has nothing to do with the lodging but rather the company. Because we enjoyed a communal dinner last night, we made friends with another couple and we went to dinner with them. It just takes one good communal dinner to make relationships. Besides growing closer together as a couple, we walk Camino’s for the relationships.

The views are out of this world

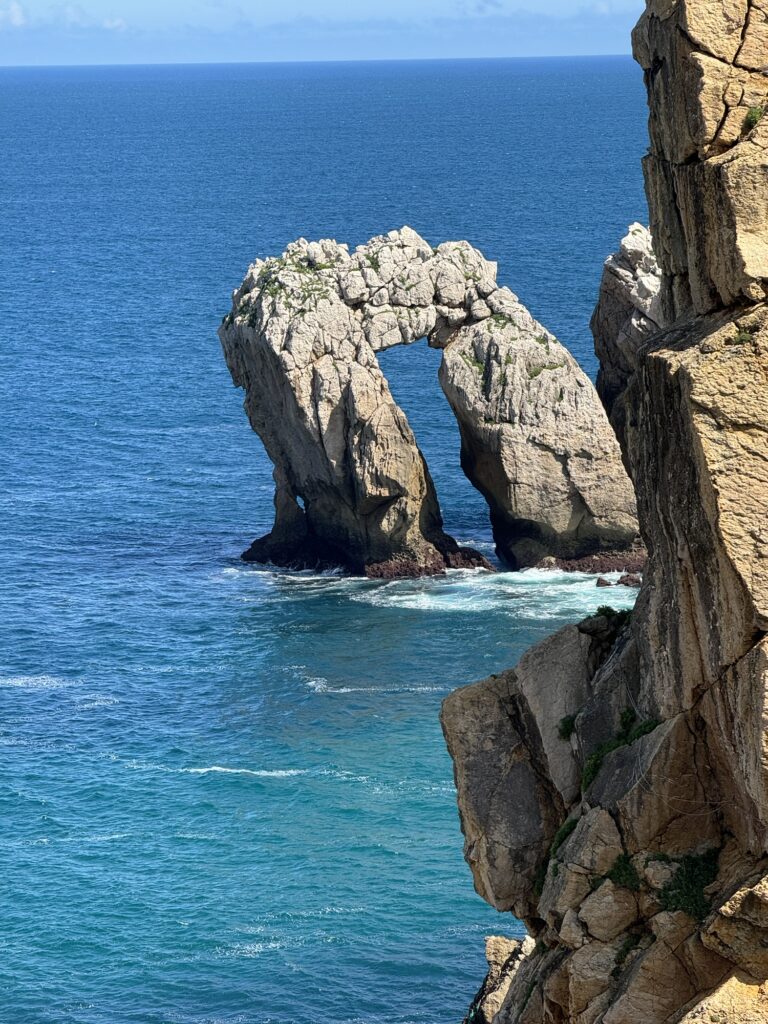
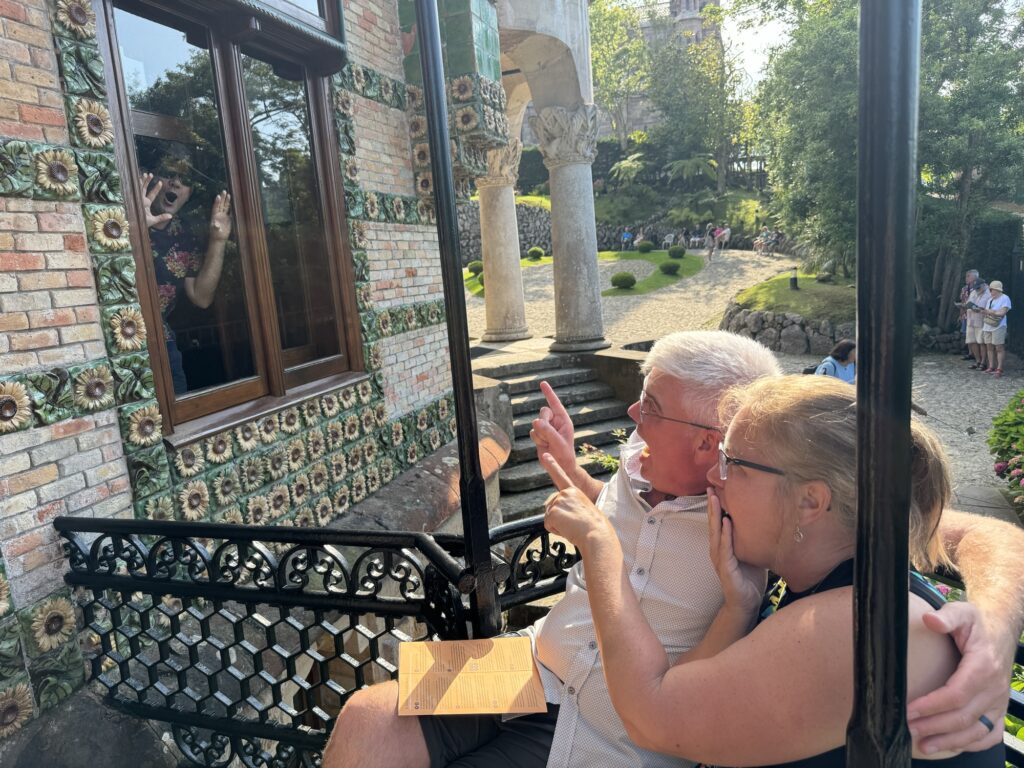
I want to tell you about the epic scenery we’ve been experiencing for the last few days but I’ve been talking long enough. Please follow our YouTube channel for breathtaking footage of our walk. Words and photos don’t do it justice but we try. This route is simply stunning.

Cows and the ocean. It doesn’t get much better

I have to get some sleep now. There’s already one terrible snorer and it’s not Brian. If I was alone in a room with Brian I would just call his name and tell him to roll over. It would work and I would get some sleep. But this guy is a stranger so I don’t think it’s a good move to smack him.

This is my last top bunk for any Camino. I can guarantee that for sure. Sorry, but in the future I’m going to do my best to quietly sleep next to my husband. ❤️ Thanks for reading today’s rant. It helped to vent.

Update: I didn’t sleep well and I am looking forward to today’s nap.

Recipe of the Month – Basque Chicken with Roasted Potatoes

Today we are sleeping in as we prepare to begin walking our Camino, leaving from Leon, Spain, tomorrow morning. I don’t know what we will find to eat today in Leon, but if we can’t find anything inspiring we know of a fine little Mexican restaurant called King Kong near the Cathedral.

On our 2017 Camino, the first real meal that we ate on the Way was a Pilgrim’s dinner in a small restaurant in Saint-Jean-Pied-de-Port the night before we started walking. We didn’t know it at the time, but the meal was the classic Poulet a la Basque or Basque Chicken. It was so tender, piquant, salty, and oh-so-good that I had to figure out the recipe. On my birthday later that year, Michelle bought me Yosmar Martinez’s Tastes of the Camino Cookbook. The first recipe is for Basque Chicken. Her recipe is not exactly like the one we had in SJPdP, but it gave me a jumping off point. So with Yosmar’s forgiveness for “borrowing” parts of her recipe, here is my version of Basque chicken. This version will serve 2-3 people.

Begin by seasoning one and a half pounds of boneless skinless chicken thighs with salt and pepper and browning it in a pan with olive oil. It does not need to be cooked through. Set the chicken aside.

Add sliced onion, red and yellow pepper, four cloves of minced garlic, and a cup of petite diced tomatoes to the pan and cook until everything is softened, about ten minutes.

Add half a cup of dry white wine and cover to simmer on low for thirty minutes. Taste the sauce and season with additional salt and pepper if needed but be careful to not make the dish salty due to the garnish later. Also, a small amount of sugar may be added if the tomatoes are particularly acidic. Add the chicken back in and continue to simmer on low for an additional 20 minutes or until the chicken is cooked through and slightly falling apart.

During the simmer, prepare the potatoes. Preheat the oven to 400º and cut fingerling potatoes in halves or quarters depending on size. Toss them in some olive oil and salt and place them in a roasting pan or cookie sheet. Roast for fifteen minutes, tossing several times to make sure they get browned evenly.

Meanwhile, for the garnish, cut four ounces of Serrano ham (I used Prosciutto) into thin strips and cook over medium-high heat in a skillet. There is no need to add oil as the ham will render some fat quickly. Cook until the strips begin to brown and get crispy. Roughly chop some flat leaf parsley for additional garnish. Don’t skip this, the green brightens the final dish and lightens the flavor too.

Spoon the sauce into a large serving bowl and place the chicken on top. Garnish with the ham strips and parsley. Serve the potatoes on the side. Don’t forget the white wine!

Basque Chicken with Roasted Potatoes

  • 1-1/2 pounds of boneless skinless chicken thighs
  • 4 T olive oil, divided
  • 1 large onion sliced
  • 4 cloves of minced garlic
  • 1 red and 1 yellow bell pepper, sliced
  • 1 c petite diced tomatoes
  • 1/2 c dry white wine
  • 4 oz Serrano ham
  • 2 sprigs flat leaf parsley
  • 1 pound of fingerling potatoes
  • optional sugar
  • salt and pepper to taste

Begin by seasoning the chicken thighs with salt and pepper and browning it in a pan with half of the olive oil. It does not need to be cooked through. Set the chicken aside.

Add onion, red and yellow pepper, minced garlic, and diced tomatoes to the pan and cook until everything is softened, about ten minutes.

Add wine and cover to simmer on low for thirty minutes. Taste the sauce and season with additional salt and pepper if needed but be careful to not make the dish salty due to the garnish later. Also, a small amount of sugar may be added if the tomatoes are particularly acidic. Add the chicken back in and continue to simmer on low for an additional 20 minutes or until the chicken is cooked through and slightly falling apart.

During the simmer, prepare the potatoes. Preheat the oven to 400º and cut potatoes in halves or quarters depending on size. Toss them in the remaining olive oil and salt and place them in a roasting pan or cookie sheet. Roast for 15 minutes, tossing several times to make sure they get browned evenly.

Meanwhile, for the garnish, cut the ham (I used Prosciutto) into thin strips and cook over medium-high heat in a skillet. There is no need to add oil as the ham will render some fat quickly. Cook until the strips begin to brown and get crispy. Roughly chop some flat leaf parsley for additional garnish.

Spoon the sauce into a large serving bowl and place the chicken on top. Garnish with the ham strips and parsley. Serve the potatoes on the side.

On a side note…

We hope you enjoy following us along our journey across Spain and Portugal in the coming weeks. Hit subscribe for up to date blog posts, and make sure that you check out our Instagram feed for real-time, up to the minute posts along the Way. Our goal is to post on Instagram daily, and YouTube and blog at least once a week. Thanks for coming on this adventure with us! Our July recipe will be for Tarta de Santiago, an almond cake that is popular across Spain but especially in Galicia. Buen Camino!

Recipe of the Month – Taco Pizza (with gluten-free option)

We love pizza! I will put almost anything on a pizza: BBQ chicken, ham and pineapple, caramelized apples and oatmeal, or seafood. But one of our favorite pizza toppings is taco and if you’ve never had a taco pizza you are missing out. Other than the crust, there is nothing in this recipe that would include gluten, but always check your store-bought seasonings and sauces to be sure, some may have gluten hidden in the ingredient list.

Start with the pizza crust. If you don’t have gluten issues, use your favorite store bought crust or make your own. After lots of research, for the best gluten-free pizza crust, we have discovered two options. We love the Bob’s Red Mill pizza crust mix that you can buy here but if you want a real treat, try this recipe from MeaningfulEats.com. It is quick and easy to make and works well with any gluten-free flour blend. Do what you need to get your crust ready and start to brown a pound of ground beef in a skillet.

Drain the hamburger and add a packet of taco seasoning (warning: some brands do contain wheat as a thickener) and a quarter cup of water. Mix let most of the water evaporate out. Set aside to cool.

Pre-bake the crust to get it mostly done. Raise the oven temperature to 480º. In a bowl, combine a can of refried beans, a half a can of crushed tomatoes, and one cup of taco sauce. Add one teaspoon each of garlic powder, oregano, and marjoram. If the sauce seems to think to spread, add a little more tomato or taco sauce.

Spread the bean mixture on the pre-baked crust. Any sauce that is left over (you should have about a cup) makes a great dip for tortilla chips!

Top the sauce with one cup of shredded mozzarella cheese, the taco meat, and another cup of cheddar or Mexican blend cheese.

Bake in the oven for 10 to 15 minutes until the cheese is melted and bubbly (mine got a little overdone, oops).

Top with shredded lettuce, diced tomatoes, and any other taco toppings that you enjoy. The most important topping is crushed taco Doritos. Slice and enjoy

Taco Pizza

  • Pizza dough (gluten free mix, your favorite recipe, or store bought)
  • 1 pound ground beef
  • 1 packet of taco seasoning
  • 1 can of refried beans
  • 1 cup of crushed tomatoes or tomato sauce
  • 1 cup of taco sauce
  • 1 tsp each garlic powder, oregano, and marjoram
  • 1 cup of shredded mozzarella cheese
  • 1 cup of shredded cheddar or Mexican blend cheese
  • shredded lettuce
  • diced tomatoes
  • sour cream
  • Taco Doritos
  • Other taco toppings that you enjoy

Prepare the pizza crust as needed and prebake it according to directions. It should be almost done.

Brown the ground beef in a skillet. Add the taco seasoning and about 1/2 cup of water. Cook until thickened. Set aside to cool.

Mix the beans, tomato sauce, and taco sauce together in a bowl. Add the seasonings and combine.

Spread the sauce on the crust. Top with mozzarella cheese, taco meat, and finish with the cheddar cheese.

Bake at 480º for about 10 to 12 minutes or until the cheese is bubbly or the desired amount of brown. Top with lettuce, tomatoes, and crushed Doritos.

Does it pizza? What would like to see on a pizza as an unusual topping? Maybe we’ll create a special pizza just for you! Leave a comment below to let us know. Also, make sure you subscribe for email notifications each time we post a new blog. If you want to follow our upcoming Camino, check out Cruisin with the Colemans on Instagram and YouTube!

Recipe of the Month – Cajun Chicken Pie

We’ve been seeing a lot about Mardi Gras in the last week and it really gave me a taste for some New Orleans inspired food. We were already planning to make a chicken pot pie this week, so I figured that with a few tweaks it could really warm up the cold weather we’ve been having and take us back to the Big Easy.

Start by heating one tablespoon of butter and one tablespoon of olive oil in a large skillet. Place about a pound of boneless skinless chicken thighs in the pan and sprinkle with salt and half a teaspoon of poultry seasoning. Cook until browned on both sides and there is no pink. Set aside on a plate.

Meanwhile, chop a large onion, red pepper, two stalks of celery, and half a pound of mushrooms. Someone else in the house finished off the celery, so none for us this time around in the pot pie!

Put the vegetables in the pan and cook until they are softened and reduced in volume. Allow all of the liquids to cook off and scrape up any browned bits.

Dice the chicken into small bite sized pieces and add it to the veggies.

Add three tablespoons of flour (or two tablespoons of gluten-free flour blend) and one and a half teaspoons of Tony Chachere’s Creole Seasoning. Stir in and allow the flour to cook for a minute.

Add one cup each of chicken broth and half and half. Bring to a boil and allow the gravy to thicken. Taste and adjust seasonings if needed. Be careful about adding more Tony’s, it has a lot of salt and it’s easy to overdo it. If you want more spice, add some hot sauce or cayenne pepper.

Pour the whole mixture into a two quart casserole dish. Before you scroll any further, I must say… don’t judge.

Top the filling with a pie crust. There are several options here. I usually make a fresh crust and my favorite recipe is in this post for Praline Pumpkin Pie. Tonight I was trying to get things done a little quicker and used a premade crust. You can use a rollout refrigerator crust but I’ve never found a gluten-free one. Wholly Wholesome makes a really good crust that you can find in the freezer section. Pop the shell out of the pie pan and place it on top of the filling. I dropped ours and it shattered. In that case, piece it back together on top of the filling (I told you already, no judgment)! Once the crust thaws, roll the edges down and crimp them

If you’re eating it now, bake in a 400º oven for thirty minutes. You can also refrigerate it overnight to cook tomorrow. Set the pie out to return to room temperature for at least thirty minutes and bake at 350º for one hour.

We’re eating ours tonight for dinner, check out our Instagram page to see the final results around 7 PM.

Deep Dish Cajun Chicken Pie

  • 1 large onion
  • 8 oz mushrooms
  • 2 stalks celery
  • 1 red sweet pepper
  • 1 T butter
  • 1 T olive oil
  • 3 T flour (or 2 T gluten-free flour blend)
  • 1 pound boneless skinless chicken thighs
  • 1/2 t poultry seasoning
  • 1 1/2 t Tony Chachere’s Creole Seasoning
  • 1 c chicken broth
  • 1 c half and half

Heat butter and oil in a large skillet. Add the chicken and sprinkle with salt and the poultry seasoning. Cook until browned on both sides and no longer pink in the center. Place aside on a plate. While the chicken is cooking, dice the vegetables.

In the same skillet, cook the vegetables until they are soft and reduced in volume, cooking of all of the liquid. Meanwhile, dice the chicken into bite-sized pieces.

Add the chicken to the vegetables along with the Creole seasoning and flour. Mix together and cook for one more minute. Add the milk and broth and bring to a boil. Allow the mixture to thicken and adjust seasonings if necessary. Pour the filling into a 2 quart casserole dish and cover with a pie crust.

Bake at 400º for 30 minutes. The pie will hold well overnight. Let it come to room temperature and bake at 350º for one hour.

Recipe of the Month – Mexican Chicken Soup

Yep, you read that correctly, the recipe of the week is becoming the recipe of the month so that we can focus on bringing you more content in other areas, such as Camino planning and recaps of some of our best previous adventures.

With all of the cold weather we have been having lately, I’ve been making lots of soup. It not only warms the stomach but also the house! I love this recipe but it’s not ours, we have to thank Laurie (one of Michelle’s colleagues) who found the recipe on Cooks Country. On a side note and a fun fact we learned that Laurie has diligently subscribed to Cooking Light magazine since its inception 40 years ago and was one of their first subscribers! The soup has just enough kick to warm you up on multiple fronts. Of course, you could adjust the spicy heat up or down depending on your preferences.

Begin by bringing six cups of chicken broth to a simmer in a large pot and add about a pound and a half of chicken thighs to poach for 15 minutes.

In a food processor, combine half of a large onion, a can of diced tomatoes (or Ro-tel tomatoes with you like things on the spicy side), half (or more) of a seeded jalapeno pepper, four cloves of garlic, one canned chipotle chili and a tablespoon of the adobo sauce it’s packed in, and a teaspoon each of salt, pepper, and cilantro. Pulse the whole thing until it is smooth and well pureed. If I had any tortilla chips in the house this is probably as far as I would have gone because it looked and tasted like a smooth salsa at this point.

Remove the chicken from the pot and set aside to cool. Pour the broth into a container to skim the fat off the top.

In the same pot, heat a tablespoon of oil and add the “salsa” to the pot. Let it simmer for five minutes or so to cook the “green-ness” out of it and allow the flavors to combine.

Skim the fat off the broth and add it back into the pot along with two cups of frozen corn and a can of rinsed and drained tri-blend beans (or kidney, pinto, or black beans). Allow the soup to come to a boil and then reduce the heat. Simmer for 15 minutes. Meanwhile, run a knife through the chicken to cut it into bite-sized pieces. Take the pot off the heat and add the chicken and two tablespoons of lime juice. Taste and adjust seasonings if needed (I added a little more salt).

Top the soup with diced avocado, slices of fresh or crispy tortilla, or a little cojita or queso fresco. We served it with pao de queijo, which are amazing gluten-free cheese rolls.

Mexican Cheese Soup

  • 6 c chicken broth
  • 1 1/2 pounds chicken thighs
  • 1/2 of a large onion
  • 1 t each salt, pepper, and cilantro
  • 1 can of diced tomatoes (get the kind with chilis or jalapeno if you like)
  • 1/2 jalapeno pepper, seeded
  • 4 cloves garlic
  • 1 canned chipotle pepper plus 1 T adobo sauce it’s packed in
  • 1 T oil
  • 2 c frozen corn
  • 1 can beans, any variety, drained and rinsed
  • 2 T lime juice
  • assorted toppings such as diced avocado, Mexican cheese, or tortilla strips

Bring chicken broth to a boil and add chicken. Simmer for 15 minutes until the chicken is done and there is no pink remaining.

In a food processor, combine onion, spices, tomatoes, garlic, and peppers and pulse until smooth.

Remove chicken from pot and set aside to cool. Pour broth into another container to skim fat once cooled. In the same pot, heat the oil and add the tomato mixture. Simmer for 15 minutes over medium heat to combine flavors.

After skimming fat from broth, add back to the pot along with the corn and beans. Bring to a simmer and cook for 15 minutes. Shred the chicken and add to the pot at the end of cooking along with the lime juice. Adjust seasonings if needed.

Let us know if you try this recipe or any other recipe we have posted! Tag us on Facebook or Instagram with the hashtag #cruisinwiththecolemans! We’d love to hear from you!

Recipe of the Week – Polenta Lasagna

When living a gluten-free lifestyle, whether by choice or necessity, there are many foods that you assume you may never be able to eat again. While restaurants have become more knowledgeable about gluten-free options over the last five years, it is still common to be offered a salad or a burger with no bun as the only option on a “gluten-friendly” menu. Most grocery stores have progressively stocked a variety of manufacturers but the choices are limited. You have to go to a specialty or high-end stores if you want choices.

Some foods are a real rarity in the gluten-free marketplace. Lasagne noodles are one of them. Gluten-free noodles range from “you can’t tell the difference” to “cardboard or sticks” and aside from penne, spaghetti, and elbows, there are virtually no other pasta shapes readily available so we adapt and improvise.

This polenta lasagne came out of one such improvisation. If you don’t know polenta, it is the Italian version of ground cornmeal, fancy grits, if you will. You can find it in several different spots in the store. There is often a fancy imported variety in the Italian aisle that runs about $10 a pound, but if you look in the aisle with breakfast grains like oatmeal you can find both grits and polenta for under $4 a pound. There two different types, a fine white corn or hominy meal often marketed as grits and coarser yellow corn meal which is more commonly marketed as polenta. There is a slight difference in flavor but they are basically interchangeable (as long as you’re not cooking for food snobs). When you chill cooked polenta (or grits) it turns into a solid cake-like mass that can be cut into slices and used in a variety of ways (try it on the grill with some olive oil, salt, pepper, and parmesan). We love Bob’s Red Mill brand.

For the lasagna, cook the grits at least an hour before you plan to assemble the lasagna but the night before is even better. In a saucepan, heat two and a half cups of half and half and two and a half cups of chicken broth to a simmer. Turn down the heat and add half a teaspoon of salt and slowly whisk in one and a quarter cups of polenta. The polenta is likely to lump together, so make sure that the liquid is moving when you add it and keep stirring with the whisk until it is fully incorporated. Cook on low for about fifteen minutes until the liquid is fully absorbed and the polenta is smooth and creamy. Stir frequently to keep it from sticking to the bottom and scorching. Remove from the heat, add half a cup of grated parmesan cheese, and stir well to incorporate. Let the polenta cool slightly while you prepare the pan.

Cut a piece of parchment paper about four inches longer than your 9×9 brownie pan. Fold the edges over so the paper will lay in the bottom of the pan and crease the corners to make a liner. Pour the still hot polenta into the pan and use a spatula to spread it evenly. Cover with plastic wrap pressed down onto the surface of the polenta, otherwise, it will get a rubbery skin on the top, and place in the refrigerator to cool for at least one hour, but overnight is better.

In a sauté pan, brown one pound of Italian sausage with the casings removed. While it is cooking remove the polenta from the pan. Using a long serrated knife, cut the polenta in half, making what are essentially two large lasagna noodles.

In the same pan the polenta cooled in, pour about half a cup of marinara and place one piece of polenta on top.

Add the rest of the marinara sauce to the sausage. Now layer just as you would a traditional lasagna. I don’t use a layer of ricotta because the polenta is already pretty creamy once reheated. Pour half of the meat mixture over polenta and top with a half cup of mozzarella cheese. Top with the second slice of polenta, the rest of the meat mixture and the remaining cup and a half of cheese.

Place the pan on a foil lined cookie sheet because it will bubble over, and place in a 350º oven for one hour. Cut into nine servings and serve with a healthy salad and some Chianti.

Polenta Lasagna

  • 2 1/2 cups half and half
  • 2 1/2 cups chicken broth
  • 1/2 t salt
  • 1 1/4 cup polenta
  • 1/2 c grated parmesan
  • 1 lb Italian sausage, casings removed
  • 1 jar of marinara sauce (or your favorite spaghetti sauce)
  • 2 cups shredded mozzarella cheese

Bring broth and half and half to a simmer. Add salt and whisk in polenta. Cook for 15 minutes, stirring frequently to keep from sticking or scorching. Remove from heat and stir in parmesan cheese.

Line a 9×9 pan with parchment paper and spread polenta all the way into the edges. Cover with plastic wrap and cool overnight or at least one hour in the refrigerator.

Once cooled and very firm, slice polenta into two sheets with a long serrated knife.

Remove casings from sausage and brown in a sauté pan. Pour 1/2 cup of marinara sauce into the same pan the polenta cooled in and add the remaining sauce to the sausage. In the pan, layer one slice of polenta, half the sausage mixture, and 1/2 cup of mozzarella cheese. Top with the second slice of polenta, remaining sauce, and remaining cheese.

Place the pan on a lined cookie sheet and bake at 350º for one hour. Makes 9 servings.

Recipe of the Week – Cruiser’s Platter (Gluten-Free Fried Fish and Shrimp)

One of our goals in the coming year as we travel is to find local specialties and convert them into both gluten-free and when possible, healthier meals. While on the Gulf Coast over Christmas, we got to eat quite a bit of seafood and it was delicious. Almost every restaurant we went to offered a sailor’s platter, captain’s platter, or even an admiral’s platter. The more expensive the restaurant, the higher the rank of the platter!

Unfortunately, finding gluten-free fried fish was not possible in the Fort Myer’s area. If you know of someplace, comment below because we’re going back next year and want to check it out.

After our last fishing misadventure, we decided to try again. Michelle’s requirement was that we spent some of our time fishing and some of our time searching for dolphin and manatee. Captain John at Conway Charters did not disappoint. After meeting him at a local marina, he took us out on his boat to search the canals and creeks for some manatee. With his knowledge, it didn’t take to long and our first goal was checked off with this 6-8 foot long male manatee.

Next goal our list: catch some fish. We didn’t have much luck on this day – the fish just weren’t biting. We did manage to bring in two sheepsheads, and as they say, any day on the water is a good day. We did complete our third goal also, seeing some dolphin on our return to the marina, but enough about that, let’s cook up some fish!

Luckily for me, Captain John filleted the fish we caught. If you’re not lucky enough to have fresh fish, look for a firm fish that has thicker fillets at the store. Cod works well, as would catfish. You will need about a quarter pound per person and about the same amount of peeled, deveined shrimp. You could also look for clams, scallops, or any other seafood that looks good at the store.

Begin by preparing you breading station. In a bowl, combine about one cup of half and half with two teaspoons apple cider vinegar and stir well. The vinegar will curdle the milk and create buttermilk after sitting for about ten minutes. In another bowl, you will need about two cups of cornbread mix such as Krusteaz Honey Cornbread. In the final bowl, combine 1 cup of gluten-free flour blend with 2 teaspoons of Tony Chachere’s Creole Seasoning. If you don’t like things too spicy you could use Old Bay instead. If you want some extra kick, add a little hot sauce to the buttermilk. Make sure that the seafood is mostly dry. I put it in the fridge uncovered for about thirty minutes while I was getting everything else ready to go.

Left to right: Cornmeal mix, buttermilk, seasoned flour, seafood

Pour about 3-4 inches of canola or peanut oil into a deep pot and heat over high heat until the oil reaches 265º. You want to keep the oil between 265º-300º while you are cooking. If the oil is too cool the breading will soak up too much oil and get soggy; too hot and things will burn before they cook through. Continuously monitor the oil temperature and adjust the heat accordingly.

Toss several pieces of fish into the flour mixture to coat and set on the edges of the bowl with your right hand (this is your “dry hand” and should only go into the two flour bowls). Using your left hand (the “wet hand” that should only go into the buttermilk bowl), drag the fish one piece at a time through the buttermilk and set them into the cornmeal bowl. Using your right hand, bury the pieces of fish under the cornmeal.

I know, I’m using the wrong hand in the buttermilk in the photo above. Trust me, you will make less of a mess if you keep one hand dry and the other wet, but it can be difficult in the heat of the moment! Carefully place pieces of fish into the hot oil by holding them just into the oil and releasing so that you don’t splash oil. The oil should bubble but not pot. If at any point the oil is smoking, it is too hot. If you get a lot of popping, the fish is too wet.

Once you have about 5-6 pieces of fish in the pot, begin the process again with the next batch. The fish should cook 5-6 minutes until it reaches your desired color. Remove the fish from the oil and place onto a cooling rack placed over a cookie sheet so the excess oil can drain off. Check your oil temperature and continue until you run out of seafood.

BONUS: take the remain cornmeal mixture and add the remaining milk to it along with 1/4 cup of finely diced onion. Stir together and add more half and half until you get a thick spoonable batter. Drop teaspoons of batter into the oil to make hushpuppies!

Once all of the seafood is cooked prepared, make your dipping sauces. For tartar sauce, combine 1 cup of mayo with 2 tablespoons of pickle relish and a 1/2 teaspoon of lemon juice. For the shrimp, I like a sweet chili sauce using 1/2 cup of sweet and sour sauce combined with a tablespoon of hot chili paste (from the Thai aisle at the store). For traditional cocktail sauce, use 1/2 cup of chili sauce (usually near the seafood) combined with 1-2 teaspoons of ground horseradish from the condiment aisle. Be careful with store bought cocktail sauces, some have soy sauce added and are not gluten-free!

We almost never eat fried food, but it is a nice treat from time to time and I was surprised at how little oil was actually absorbed into the food. I used a whole bottle of oil to cook and when I was done and poured the cooled oil back into the bottle to throw away (never reuse oil that you’ve cooked fish in) there was only about an inch missing from the bottle, and part of that was on the bottom of the cookie sheet that I had used as a drip pan.

We served our Cruiser’s Platter with coleslaw and a glass of Pine Island Breeze. What’s your favorite seafood treat or side dish? Leave us a comment below and let us know!

Cruiser’s Platter (Gluten-free Fried Shrimp and Fish) with Hushpuppies and dipping suaces

For the seafood:

  • 1/4 pound per person of assorted seafood such as cod, peeled shrimp, scallops, etc.
  • 1 c half and half
  • 2 t apple cider vinegar
  • 1 box of Krusteaz Gluten-free Honey Cornbread mix
  • 1 c Gluten-free Flour blend
  • 2 t Tony Chachere’s Creole seasoning (or similar)
  • canola or peanut oil
  • 1/4 c finely diced onion

For the dipping sauces

  • 1/2 c mayo
  • 2 T sweet pickle relish
  • 1/2 t lemon juice
  • 1/2 c sweet and sour sauce
  • 1 T hot chili paste
  • 1/2 c chili sauce
  • 1-2 t ground horseradish

Lay out the seafood on plates and refrigerate without covering so that it dries out a bit.

Begin by combining half and half with vinegar to let it curdle. Prepare the remaining breading stations by pouring cornmeal mix in one bowl and combining flour and seasoning in another. Meanwhile heat oil to 365º.

Dip pieces of seafood into flour, shake off, drag through buttermilk, and cover with cornmeal. Carefully lower each piece into the oil without splashing. Cook 5-6 pieces at a time for about 5 minutes or until the desired color has been reached.

Combine remaining cornmeal mix with onion and remaining buttermilk. Add more half and half if needed to create a spoonable batter. Drop by the teaspoonful into the oil to make hushpuppies.

For tartar sauce, combine 1 cup of mayo with 2 tablespoons of pickle relish and a 1/2 teaspoon of lemon juice. For the sweet chili sauce, combine sweet and sour sauce with hot chili paste. For traditional cocktail sauce, add ground horseradish to the chili sauce.

Recipe of the Week – Grilled Sausages with Potatoes, Shallot, and Spinach

Sometimes after a big day out exploring we just don’t feel like spending a lot of time cooking. That was the case after our day exploring Cape Coral. After visiting the fantastic Cape Coral Farmer’s Market, we did an eight-mile walk around town and found a great little Italian place for lunch that served gluten-free pizza. A visit to Wicked Dolphin Distillery and pool time back at the campground with some newly invented cocktails finished up our day.

By the time we got back to CC we were exhausted and starving. Here’s a quick dinner that you can throw together in no time at all with things that you might even have on hand.

Start out with a variety of potatoes: red, russet, and Yukon gold are my favorites. Dice them up into bite-sized pieces along with a couple of shallots and put into a microwave safe bowl.

Add about a tablespoon of olive oil and a good sprinkle of salt, garlic powder, and pepper. Cook in the microwave for five minutes or so until the potatoes are mostly cooked but still firm.

While the potatoes are cooking, get the grill heated up and add Italian sausages.

When the sausages almost done, add the potatoes and shallot mixture to the grill. BE CAREFUL to not pour the collected oil and water in the bottom of the bowl onto the grill or you will have some major flareup!

Cook the potatoes and sausage until they are nicely charred. Once they’re done, add a few handfuls of spinach and allow it to wilt for a second before removing everything from the grill and dividing between plates. Sprinkle with a little parmesan cheese.

I would highly recommend making sure that you have plenty light on the grill. We had to keep the lights off because of the no-see-ums and I might have burned things a bit! Also, you might notice that I didn’t use spinach… we couldn’t find any at the farmers market that morning so we just went without.

Grilled Sausages with Potatoes, Shallot, and Spinach

  • 1-2 Italian sausages per person
  • 1 lb of assorted potatoes, such as russet, red, and Yukon gold\
  • 2 shallots
  • 1 T olive oil
  • 1/2 t each salt, garlic powder, and pepper
  • 1 cup spinach leaves
  • 1-2 T parmesan cheese

Cut potatoes and shallots into bite-sized pieces and place into a microwave safe bowl. Top with oil and seasonings and stir to mix. Cook for 4-5 minutes in microwave until almost cooked.

Heat grill and add sausages. Cook for 6-8 minutes and turn. Add the potato-shallot mixture and continue to cook until charred to your liking, another 5-10 minutes, making sure that the sausages are cooked through. Add spinach on top and let wilt then remove to plates.

Sprinkle with parmesan cheese and enjoy!

Recipe of the Week – Gluten-free Holiday Dressing

If you’re following us in Instagram (@cruisinwiththecolemans) you probably already know the we are in Florida right now celebrating Christmas with my parents at Lake Lochloosa. We’re thrilled to get to spend some time with them but we’re even more excited to be heading to the beach later this week.

Before we head out to do some kayaking with (hopefully) manatee and not alligators, I wanted to share one more special holiday recipe – dressing. In the Coleman house, we never stuff the turkey. It’s always roasted with plenty of butter, onion, herbs, and spices, but our dressing is served on the side where the edges can get crispy and I know there is no risk of undercooking. Anyone who is gluten free knows that you can’t run into the grocery store and buy a box of gluten-free dressing mix, so this treat has to be a little more labor intensive than usual, but it’s always made with a secret ingredient, LOVE!

Preheat the oven to 250º. Start out with fourteen slices of bread. We use Kinnikinnick gluten-free bread and for this batch we used half white and half multigrain. Stack the bread up and using a serrated bread knife, cut the pieces into quarter inch cubes and toss them into a large bowl.

Melt a stick of butter and add two teaspoons of poultry seasoning, two teaspoons of parsley, and one teaspoon of garlic powder. Pour the butter mixture over the bread and mix thoroughly to get every piece of bread covered in butter and spices.

Spread the mixture on two cookie sheets so that the bread cubes are not crowded and put them in in the oven. The next step is going to take a while, so I hope you’re not in a hurry. Bake the cubes for one hour, stirring them every 10 to 15 minutes. You want the cubes to dry out but not brown or burn. Think of how Stove-Top looks coming out of the box, and that is your goal. Depending on how fresh the bread is, it may even take an hour and a half.

By the way, at this point , these make excellent croutons for a salad!

Dice two stalks of celery, a medium onion, and two cloves of garlic.

Sauté half of a pound of celery in a skillet and add the vegetables. Cook until the celery and onions are soft.

Add the mixture to the bread cubes in a large bowl. Add two cups of chicken or turkey broth and stir until it is mostly absorbed by the bread. Taste the mixrture to adjust seasoning. Add salt is needed. Stir in two eggs and if the mixture is dry, a little more broth.

Pour the entire mixture into a greased casserole dish and bake at 350º for an hour.

Our Thanksgiving menu included Roasted Turkey, Holiday Mashed Potatoes, Brussel’s Sprouts, Dressing, and of course canned cranberry sauce. For dessert, everyone enjoyed Gluten Free Praline Pumpkin Pie.


Holiday Dressing

  • 14 slices of gluten free bread
  • 1/2 c (1 stick) melted butter
  • 2 t poultry seasing
  • 2 t dried parsley
  • 1 t garlic powder
  • 2 stalks celery
  • 1 medium onion
  • 2 cloves of garlic
  • 1/2 pound breakfast sausage
  • 2-3 cups of turkey or chicken broth
  • 2 eggs

Preheat the oven to 250º. Using a serrated knife, cut the bread into 1/4 inch cubes. Melt the butter and add the poultry seasoning, parsley, and garlic powder. Stir the seasoned butter into the bread cubes and make sure they are well coated. Spread onto 2 cookie sheets and bake for an hour, stirring every 10-15 minutes until the cubes are dry but not browned.

Dice the celery, onion and garlic. Sauté the sausage in a pan and add the vegetables. Cook until soft.

Mix the sausage mixture into the bread crumbs. Add the broth and taste to adjust seasonings. Add salt if needed. Stir in the eggs and add more broth if the mixture seems too dry. Pour into a greased casserole dish and bake at 350º for an hour.

Recipe of the Week – Potato Fennel Hash

While we were in Michigan this summer we took a fishing charter on Lake Superior and came home with a mess of fish. You’ll hear about our fishing adventure on Wednesday’s post but today you will see the fruits of our labor. We love to serve fish with Potato Fennel Hash but it actually goes well with any meat.
Fennel, also sometimes called Anise (ah-nees), is a bulb vegetable similar to celery but with a mild licorice flavor. The fronds have a stronger flavor can be dried or used fresh anywhere you would use dill. The stalks can be diced and added to salad for a spicy crunch. The bulb adds a nice flavor to potatoes and bulks the dish up with half the calories and carbs.
Begin by heating the oven to 450º. Place a heavy pan in the oven with a little oil to preheat with the oven. Trim the stalks and fronds and save for another use. Slice the bulb in half and remove the core. Slice the bulb finely to match size of the shredded potatoes. The slicing side of a box grater works well.

Slice a sweet onion into thin slices also.

Add about a pound of grated potatoes and mix all together so that they are well combined. The onions and fennel should be roughly the same texture as the potatoes. We often use bagged grated potatoes for convenience.

Heat a large skillet over medium high heat and add about one tablespoon of canola oil. Add about half of the potato mixture to the pan and sprinkle with salt and pepper. Don’t overcrowd the pan, you want the moisture to evaporate away while the potatoes get brown and crunchy.

After a couple of minutes, stir the mixture to allow the potatoes to cook evenly.

Once they are mostly cooked through, put the mixture into the pan from the oven. The hash should sizzle when it hits the pan. Place the pan back in the oven and repeat the process with the rest of the potato mixture.

Once all of the potatoes are in the oven, allow to brown and continue cooking while you prepare the meat, stirring occasionally.

I pan-fried our fish this night. It’s lake trout in a buttermilk cornmeal breading with cajun seasoning. The tartar sauce is homemade too! What do you love to serve with your fish fry? Post ideas in the comments below!

Potato Fennel Hash

  • 1 large fennel bulb, trimmed, cored, and thinly sliced
  • 1 large sweet onion, thinly sliced
  • 2 medium-sized russet potatoes, grated, with or without the peels
  • 2 1/2 T canola oil, divided
  • salt and pepper to taste

Pre-heat the oven to 450º with a heavy pan with 1/2 T oil in the oven.
Thinly slice the fennel and onion and mix with the grated potatoes. All three ingredients should be roughly the same sized shred.
Heat a heavy skillet over medium high heat. Add 1 T of oil and once hot, add half of potato mixture. Sprinkle with salt and pepper. Cook, stirring occasionally until most of the moisture has evaporated and the fennel and onion are cooked through.
Transfer the hash to the hot pan in the oven and repeat the process with the remaining potato mixture.
Allow the hash to brown in the oven, stirring occasionally, while you prepare the rest of dinner.

★ 25 years guiding ★ 48 U.S. states ★ 10 countries ★ 3,000+ Camino miles