Recipe of the Week – Gluten Free Praline Pumpkin Pie

Welcome to the new and improved Cruisin’ with the Colemans website. Here’s a huge shout out to our web designer Elizabeth Kimmel for a fantastic job! Make sure that you click around and explore everything that we have to offer and stay tuned for new features that will be coming soon, including an Etsy store selling prints of some of our favorite travel photos.

As promised before our hiatus, here is my recipe for Gluten Free Praline Pumpkin Pie! When Michelle had to go gluten-free six years ago due to a diagnosis of lifelong heath issues we were concerned many favorite special treats would have to disappear from her diet. Surely we both had to make major adjustments to our cooking, but over the years we have found and developed our own recipes to include most of our favorite menu items into a gluten-free diet. Pie crust is one of those items. I have found two different pie crusts that work well with non-wheat based flour, a pat-in-the-pan crust that involves no rolling and the one that I have here. I have used them both for sweet and savory pies with great success, but this roll out dough is my favorite because it turns out both crispy and flaky. At Thanksgiving dinner this year with some of our neighbors, the ladies asked how I got the crust so flaky and were shocked to discover it was wheat free! With more than a hundred years of pie making experience at the table, I took it as a great compliment!

Let’s start with the crust. Cut a stick of butter into eight slices and put in the freezer while you gather the rest of the ingredients. You’ll need all purpose gluten free flour (such as Pamela’s Artisan Blend), salt, white and dark brown sugar, pecans, more butter, pumpkin puree, evaporated milk, an egg, and almost every spice in your rack. Finally get a measuring cup of water and add several ice cubes.

Preheat the oven to 450º. In the bowl of a food processor (I love my Ninja) place one and a quarter cups of all purpose gluten free flour blend, a teaspoon of salt, and two tablespoons of sugar (we always use Whey Low sugar substitute) and give it a quick pulse to mix the ingredients. Add the butter directly from the freezer and pulse eight to ten more times to combine into a crumbly texture with pea-sized pieces of butter remaining.

Add four tablespoons of ice cold water to the processor and mix together. The dough should mostly clump together and but still appear dry. If the humidity is dry, you may need one to two more tablespoons of water. Be careful not to end up with a sticky mess or you will not be able to roll it out.

Pour the mixture onto a large piece of parchment paper and press together into a mound. Using as little additional flour as possible and a rolling pin, roll into a thin round circle about an inch bigger than the top of your pie pan.

Don’t worry if the edges crack like mine, you’ll be able to press them back together once you line the pan. If the dough is a little too wet, a second piece of parchment on top may be helpful. Carefully transfer the dough to a 9-inch pie pan. If things totally fall apart here, don’t panic. I’ve always found that the worse the crust looks, the easier time you will have convincing everyone that it’s totally home-made. Break off any pieces that are overhanging the edge of the pan and use them to fill in any gaps or cracks that you have. Tuck the edges down and crimp around the pan to create as decorative and edge as you wish.

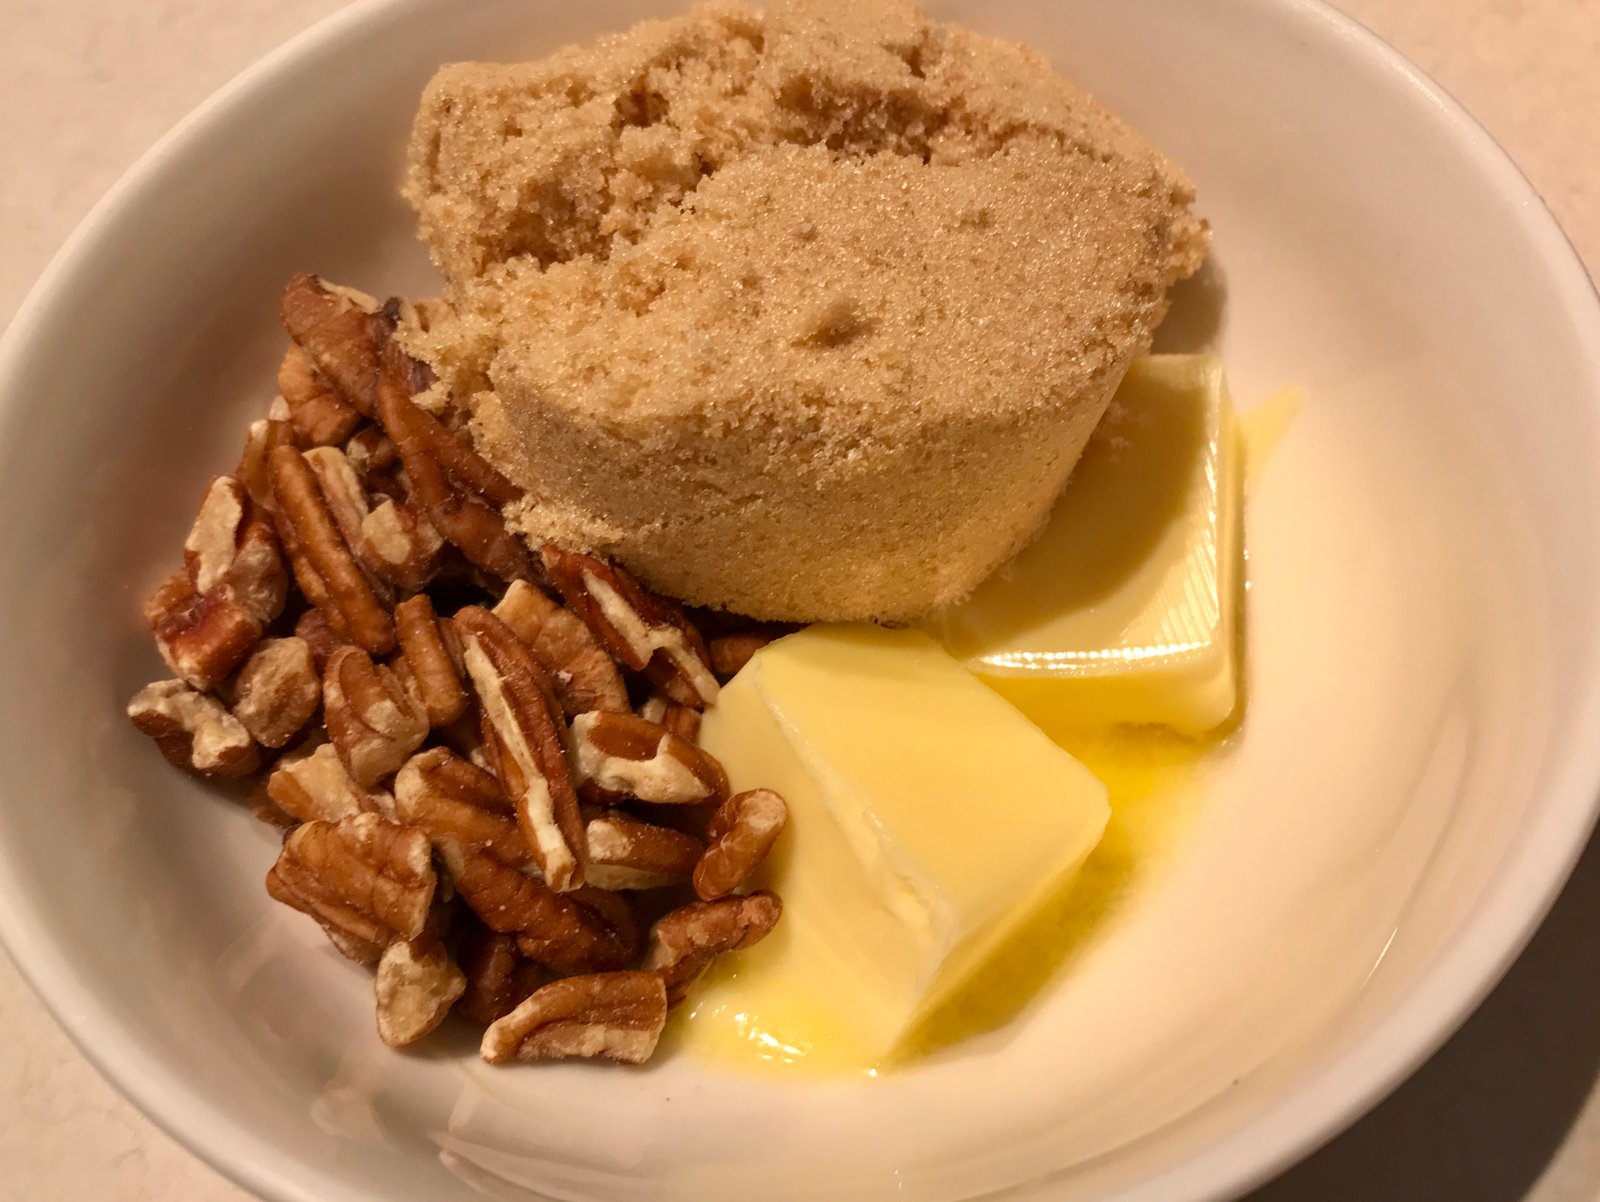
In a small bowl soften two tablespoons of butter and add a third of a cup of brown sugar (such as Whey Low Gold) and about half a cup of chopped pecan pieces.

Mix together with your fingers to create a chunky paste and crumble it into the bottom of the pie pan. Bake for ten minutes until the sugar is bubbly and the crust is set.

You do not want the crust to brown at this point. If the crust gets air bubbles, prick it with a fork. If it begins to slide down into the pan, press it back up with the back of a fork. Once the crust is prebaked, set it aside while you make the filling. Lower the oven to 400º.

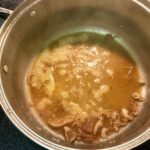
Melt one tablespoon of butter in a saute pan and add a 15-oz can of pumpkin puree. This will not only give a toasty flavor to the pie but remove excess liquid from the pumpkin. Let it cook for about ten minutes, stirring occasionally.

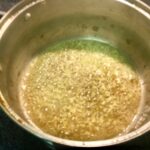
Meanwhile, in a large bowl combine a quarter cup of sugar (or Whey Low sugar substitute) a quarter cup of brown sugar (again, Whey Low Gold), two teaspoons of gluten-free all purpose flour blend, one teaspoon of cinnamon, half a teaspoon of ginger, a quarter teaspoon each of salt, nutmeg, and clove, and a dash of allspice. Mix together well to ensure that all of the spices are well combined.

Add one egg and the entire can of evaporated milk and mix thoroughly then stir in the pumpkin. The mixture will be very wet.

Unfortunately this is were things begin to fall apart for me. Because I was cooking several other items at the same time (it was Thanksgiving dinner after all, I forgot to continue taking pictures so you will just have to use your imagination!

Pour the filling into the pie crust. There may be more than you can use, if so, pour the extra into lined muffin cups. Bake the pie for one hour and check that it is set. If the crust is beginning to brown too much, cover the edges with foil to prevent burning. The pie is done when the center is set and no longer jiggles. Don’t worry if the filling cracks in places, you’re going to cover that up with whipped cream anyway, right?

By the way, the secret to the flaky crust? It’s the praline! The caramel layer in the bottom of the crust keeps the pie filling from getting the crust soggy. We hope you enjoy our favorite pumpkin pie, leave a comment below to tell us about your favorite Thankgiving dessert.


Gluten Free Praline Pumpkin Pie

For the crust

  • 1/2 cup butter (1 stick)
  • 1 1/4 cup all ourpose gluten free flour blend
  • 1 t salt
  • 2 T sugar (may omit if making a savory pie)
  • 4 T (or more) ice cold water

For the praline

  • 2 T butter, softened
  • 1/3 c brown sugar
  • 1/2 c chopped pecan pieces

For the filling

  • 1 T butter
  • 1 15-oz can pumpkin puree
  • 1/4 sugar
  • 1/4 brown sugar
  • 2 t gluten free flour blend
  • 1 t cinnamon
  • 1/2 t ginger
  • 1/4 t salt
  • 1/4 t nutmeg
  • 1/4 t clove
  • dash allspice
  • 1 egg
  • 1 12-oz can evaporated milk

Begin by cutting the butter into 1 T size pieces and and freeze while you gather the remaining ingredients. Pre-heat the oven to 450º.

Combine flour, salt, and sugar in a food processor bowl. Pulse to mix. Add butter and pulse 8-10 times until the butter is mixed but some pea sized pieces remain. Add 4 T ice cold water and pulse again until the dough begins to hold together. You may need to add additional water but be careful that it doesn’t gett too sticky.

Turn the dough out onto a large piece of parchment paper and press together into a flat disk. Useing as little extra flour as possible, roll out the dough with a rolling pin into a circle about 1 inch parger than your pie pan.

Carefully, transfer the crust to a 9-inch pie pan. Press cracks together and pinch the edges to make a decorative crust. Prick the sides of the crust with a fork to keep it from bubbling up. Put the dough in the refridgerator until you are ready to add the praline and bake.

To make the praline, soften the butter and add the brown sugar and pecans. Mix together with your fingers and crumble into the bottom of the pie crust. Bake at 450º for about 10 minutes. Do not the the sides brown and use the back of a fork to press them back up if they start to slouch. When the praline is bubbly, it’s done. Lower the oven to 400º to bake the pie.

Melt another tablespoon of butter in a sauté pan and add the pumpkin. Stir together and simmer over medium heat for 10 minutes.

In a large bowl, combine sugar, flour, and spices and mix thoroughly. Add the egg and evaporated milk and whisk until smooth. Stir in the pumpkin. The mixture will be runny. Pour into the pie crust. If there is extra, pour it into lined muffin tins. Bake the pie for approximately 1 hour until the center is set. If the crust begins to get too brown, cover the edges with foil.

Recipe of the Week – Potato Fennel Hash

While we were in Michigan this summer we took a fishing charter on Lake Superior and came home with a mess of fish. You’ll hear about our fishing adventure on Wednesday’s post but today you will see the fruits of our labor. We love to serve fish with Potato Fennel Hash but it actually goes well with any meat.
Fennel, also sometimes called Anise (ah-nees), is a bulb vegetable similar to celery but with a mild licorice flavor. The fronds have a stronger flavor can be dried or used fresh anywhere you would use dill. The stalks can be diced and added to salad for a spicy crunch. The bulb adds a nice flavor to potatoes and bulks the dish up with half the calories and carbs.
Begin by heating the oven to 450º. Place a heavy pan in the oven with a little oil to preheat with the oven. Trim the stalks and fronds and save for another use. Slice the bulb in half and remove the core. Slice the bulb finely to match size of the shredded potatoes. The slicing side of a box grater works well.

Slice a sweet onion into thin slices also.

Add about a pound of grated potatoes and mix all together so that they are well combined. The onions and fennel should be roughly the same texture as the potatoes. We often use bagged grated potatoes for convenience.

Heat a large skillet over medium high heat and add about one tablespoon of canola oil. Add about half of the potato mixture to the pan and sprinkle with salt and pepper. Don’t overcrowd the pan, you want the moisture to evaporate away while the potatoes get brown and crunchy.

After a couple of minutes, stir the mixture to allow the potatoes to cook evenly.

Once they are mostly cooked through, put the mixture into the pan from the oven. The hash should sizzle when it hits the pan. Place the pan back in the oven and repeat the process with the rest of the potato mixture.

Once all of the potatoes are in the oven, allow to brown and continue cooking while you prepare the meat, stirring occasionally.

I pan-fried our fish this night. It’s lake trout in a buttermilk cornmeal breading with cajun seasoning. The tartar sauce is homemade too! What do you love to serve with your fish fry? Post ideas in the comments below!

Potato Fennel Hash

  • 1 large fennel bulb, trimmed, cored, and thinly sliced
  • 1 large sweet onion, thinly sliced
  • 2 medium-sized russet potatoes, grated, with or without the peels
  • 2 1/2 T canola oil, divided
  • salt and pepper to taste

Pre-heat the oven to 450º with a heavy pan with 1/2 T oil in the oven.
Thinly slice the fennel and onion and mix with the grated potatoes. All three ingredients should be roughly the same sized shred.
Heat a heavy skillet over medium high heat. Add 1 T of oil and once hot, add half of potato mixture. Sprinkle with salt and pepper. Cook, stirring occasionally until most of the moisture has evaporated and the fennel and onion are cooked through.
Transfer the hash to the hot pan in the oven and repeat the process with the remaining potato mixture.
Allow the hash to brown in the oven, stirring occasionally, while you prepare the rest of dinner.

Recipe of the Week – Creamy Cheese Soup

We love soup and we also try to eat healthy meals as often as possible.  Any opportunity to lighten up a favorite meal and still feel like we’re having a “cheat” meal is appreciated. This potato soup is bulked up with some flavorful vegetables and lightened up by using mostly broth instead of cream. Use good quality cheese to get the most flavor. Mild and sharp cheddar both have roughly the same calories but because sharp has a stronger flavor, you can use less and get maximum flavor for fewer calories. The same goes for using pecorino instead of parmesan. Also, I prefer to NOT use low-fat cheese in recipes. It doesn’t melt well, and the little bit of fat that is lost in reduced fat cheeses means that the cheese has less mouth feel which not only affects the overall taste, but will make the food less satisfying. You might be more likely to eat more food, meaning more calories! That said, for all the tricks that this soup uses, everyone will love it and no one will feel like they’re missing out.
Begin by dicing four ounces of Canadian bacon and cook in a large pot with one tablespoon of oil until the meat begins to get crispy.

Meanwhile finely dice a large red onion, three pealed carrots, and 3 stalks of celery.

Add the vegetables to the pot and cook until soft and lightly browned. Add one teaspoon each of dry mustard (Colman brand, of course) and garlic powder and half a teaspoon of smoked paprika. Cook for an additional minute.
Add three cups of chicken broth, one and a half pounds of diced Yukon gold potatoes (about 3 medium-sized), half a teaspoon of salt, and Cayenne pepper to taste (maybe a 1/4 teaspoon or so). Bring to a boil, reduce heat, and simmer, covered, for about 20 minutes until the potatoes are soft.

Remove the pot from heat. Using a spoon or wooden spatula mash about half of the vegetables and potatoes against the side of the pot to smash them and thicken the soup. Stir in 1 cup of half and half, 1 cup of shredded sharp cheddar cheese, and a quarter cup of pecorino Romano cheese. Pecorino is a sheep’s milk cheese that has a sharper flavor than parmesan. Stir until well combined and the cheeses are melted. Top the soup with some diced scallion as a garnish and enjoy! If this soup sounds good, click like and we’ll post more of our favorite soup recipes and don’t forget to sign up to get email notifications of all of our new posts.

Creamy Cheese Soup

  • 1 T olive oil
  • 4 oz Canadian bacon, diced
  • 1 large red onion, diced
  • 3 carrots, peeled and diced
  • 3 stalks of celery, diced
  • 1 t dry mustard powder
  • 1 t garlic powder
  • 1/2 t smoked paprika
  • 3 c chicken broth
  • 1 1/2 lbs Yukon gold potatoes, diced
  • 1/2 t salt
  • 1/4 t Cayenne pepper, more or less to taste
  • 1 c half and half
  • 1 c shredded sharp cheddar cheese
  • 1/4 c pecorino Romano cheese
  • 1/2 c scallion, diced

Heat oil in a large soup pot and cook bacon until the edges start to get crispy. Add onion, carrot, and celery and cook until the vegetables are soft and begin to brown.
Add spices and cook 1 additional minute.
Add broth, potatoes, salt, and Cayenne to pot and bring to a boil. Reduce heat and simmer, covered, for 20 minutes or until potatoes are soft.
Remove the pot from the heat. Smash about half of the vegetables and potatoes against the side of the pot with a fork or spatula to slightly thicken the soup.  Add half and half and cheeses. Stir until combined and cheese is melted. Divide into bowls and garnish with diced scallion.

Recipe of the Week – Chicken Tamale Pie

We love flavors inspired by Mexican food and while this tamale pie is far from an authentic dish, it is quick and easy, perfect for RV cooking on a day you need to cook inside and don’t mind firing up the oven.
Start by preparing the cornbread base: mix half of a gluten-free cornbread mix with half a cup of frozen or canned corn (drained), half a cup of Greek yogurt, and on egg.  The mixture will be dry and sticky. If it is too dry, add a little milk or half and half. Spread the mixture into a baking pan. Place into a 400º oven and bake for 15 minutes. It will not be golden and crispy and it should be set in the center, but not “done.”

While the cornbread mixture is in the oven, prepare the topping. On the stove top, sauté one large diced onion in olive oil until tender then add 2 cloves of minced garlic for another minute. Add one tablespoon (about half a packet) of taco seasoning, two cups of diced cooked chicken, and about half a cup of enchilada sauce. The chicken can be poached, grilled leftover from a previous meal, or a rotisserie chicken that has been shredded. It doesn’t even have to be chicken. We grilled pork chops the night before and made a couple of extras for this meal.

Take the cornbread out of the oven and poke holes in it with the handle of a wooden spoon. Pour about half a cup of enchilada sauce over the mixture, allowing the sauce to fill in the holes.

Top with the chicken mixture.

Cover the whole thing with a layer of shredded cheddar or Mexi-blend. If yours is as full as mine, place it on a cookie sheet or you will end up with a huge mess (I may speak from experience here)!

Bake for another twenty minutes, until bubbly and the cheese has toasted. Bubbly and toasted are two of my favorite cooking techniques!

Serve with guacamole, green salad, or eat it all by itself. Stay tuned in future weeks for more traditional recipes turned into casseroles for a quick and easy weeknight dinner. Leave a comment below with your favorite dinner casserole recipe, maybe we will feature it as one of our recipes of the week.

Chicken Tamale Pie

  • 1/2 package of gluten-free corn bread mix (we like Krusteaz brand)
  • 1/2 c plain Greek yogurt (sub sour cream if you prefer)
  • 1/2 corn kernels (frozen or drained canned)
  • 1 egg
  • 1 T olive oil
  • 1 large onion, diced
  • 2 cloves garlic, minced
  • 1 T taco seasoning (about 1/2 a packet)
  • 2 c diced chicken or pork, already cooked
  • 1 c enchilada sauce, divided (I buy the small-sized can and use the whole thing)
  • 1 cup of shredded cheddar cheese (or Mexi-cheese, or pepper jack, or whatever you have on hand)

Preheat the oven to 400º. Prepare the base by mixing cornbread mix, yogurt, corn, and egg in a bowl. The mixture will be dry but if it doesn’t come together, add a little milk or half and half. Spread the mixture into a 9×9 pan and bake for 15 minutes while you prepare the topping.
In a large skillet, heat oil and sauté the onion for about 5 minutes, until tender. Add garlic and cook one more minute. Add taco seasoning, 1/2 c sauce, and chicken. Cook until heated through.
Remove the cornbread from the oven. It will not be done but should be mostly set in the center. Poke holes throughout with the handle of a wooden spoon and top with the remaining enchilada sauce. Top with the chicken mixture and finally, the cheese.
Bake for another 20 minutes until bubbly and the cheese has melted and toasted.

Recipe of the Week – Chili

I love Halloween! From decorating the house to creating and building costumes it is one of my favorite times of year. Thankfully, Michelle tolerates my compulsion and plays along most of the time. One of our annual traditions is the first pot of chili of the season is always made on the night of trick-or-treat. My recipe for chili has evolved over the years and I’m always making little changes from time to time to adjust the flavor.  Here is the current version. Oh, and this year we dressed as Winifred and Billy from Hocus Pocus. Michelle will have more on that later.

Start by cooking a couple of slices of chopped up bacon in a large pan. Add a large diced onion and cook until the onions are soft.

Add a pound of ground beef and two cloves of minced garlic. Continue cooking until the hamburger is browned.

Meanwhile, in a crock pot pour a can of crushed tomatoes, diced tomatoes, beans (I used tri-blend this time, but usually I use pinto), and a bottle of beer. Did you know that the FDA considers Corona to be gluten-free? It’s an ongoing debate that you can read a little more about here. If you’re feeding a bigger crowd, add a second can of beans.

Also add three tablespoons of chili powder, one tablespoon of Worcestershire sauce, and a half teaspoon each of cumin and garlic powder. A note about chili powder. There are about a million varieties of chili powder out there and they range from sweet and mild to hot and spicy. Even two bottles of the same brand my vary in their heat level so always error on the side of caution if you are cooking for someone who is sensitive to spicy foods. You can always add more chili powder later in the cooking process. Notice that no salt has been added to the recipe yet for the same reason. This is definitely one trick you don’t want to spring on anyone who tastes your chili!

Add the cooked ground beef mixture to the crock-pot and stir. Cook on low for 3-4 hours, or longer if you don’t need to eat so soon.

Taste the chili and adjust seasonings if needed. Add salt, chili powder, cayenne pepper, or even a little sugar if you need to tone down the acid of the tomatoes or the spiciness down a bit.
We love to add a little Greek yogurt and cheddar cheese and serve this with Krusteaz Gluten Free Honey Corn Bread and leftover trick-or-treat candy.

Trick-or-Treat Chili

  • 2 slices of bacon
  • 1 large onion, diced
  • 1 lb lean ground beef
  • 2 cloves garlic, minced
  • 1 can diced tomatoes, with juice
  • 1 can crushed tomatoes
  • 1 or 2 cans pinto beans, undrained
  • 1 12 oz bottle of beer (gluten-free if necessary)
  • 2-3 T chili powder
  • 1 T Worcestershire sauce
  • 1/2 t cumin
  • 1/2 t garlic powder
  • salt, sugar, as needed

Chop the bacon and fry in a large pan. Add onion and cook until softened. Add ground beef and garlic and cook until browned.
Meanwhile, in a lined crock pot, combine remaining ingredients and stir. Pour the ground beef mixture on top, being careful not to melt the liner with the hot ingredients.
Cook on low for several hours to allow flavors to combine. When it’s time to serve, taste the chili. Add salt if needed. This is also the time to add more chili powder or Cayenne pepper if you want extra heat. I often add a teaspoon of sugar at this time to cut the acidity of the tomatoes.
Serve with Greek yogurt, sour cream, or cheddar cheese.
Do you have interesting additions to your chili? The bacon and Worcestershire sauce are my newest additions. The bacon adds a little saltiness and well, it’s bacon. The Worcestershire sauce gives the chili a little more depth. Leave a comment below to tell us what unusual ingredients you add to your favorite chili recipe.

Recipe of the Week – Pumpkin Pie Pancakes with Sweet & Salty Pecans

The weather has changed, the leaves are turning colors, and the smell of fireplaces fill the air! Time for pumpkin spice anything and breakfast for dinner!! I did a search online for Pumpkin Pancakes and Once Upon A Chef delivered with a recipe that looked promising.  Using Chef Jenn Segal’s recipe as a jumping off point and my favorite pumpkin pie recipe for inspiration, here’s what we came up with for dinner the other night.
Start by preheating the oven to 350º and mix a half cup of Whey Low Gold brown sugar substitute with half a teaspoon of salt, one teaspoon of cinnamon, and half a teaspoon of cayenne pepper (*full disclosure, I only use a heavy dash of cayenne because Michelle does not like a lot of spice), with about a tablespoon of water. Stir in two cups of pecan halves.

Spread the coated pecans onto a cookie sheet covered with parchment paper (NOT wax paper) and pop in the oven for about 15 minutes.

For the pancakes, in a large bowl, combine a half cup of canned pumpkin with three tablespoons of melted butter, and two eggs.  Whisk until well mixed.

Add the following spices (yes, all of them!): one and a half teaspoons cinnamon, one teaspoon each of ginger and allspice, half a teaspoon each of nutmeg,  clove, and salt. Yes, this seems like a lot of spice but it is an amazing combinations of flavors that you will not regret!

Mix together with one and a half cups of Pamela’s Gluten Free All Purpose Flour Artisan Blend, two teaspoons of baking powder, a quarter teaspoon of baking soda, one and a half cups of half and half, two eggs, and three tablespoons of REAL maple syrup (yes, you could use one of those brands that are on the shelf next to the pancake mixes but you are making breakfast for dinner, splurge). The mixture will seem like a thick cake batter.

It’s probably about time to check on the pecans. These are a little over cooked. Take them out of the oven and let them cool on a cooling rack.  If the nuts are sticky, the are not done, put them back in.

Make the pancakes in a hot skillet. For some reason, I did not take any pictures during this step. I pour about a quarter cup of batter for each pancake and use a spatula to flatten the batter out so they are not too thick. Flip once you see some bubbles form on top. As each batch of pancakes is done, place them on the cookie sheet from the pecans and pop them in the oven (which is now turned off) to stay warm.

Break apart the pecans and store the extras in an airtight contain once completely cool.  Top the pancakes with pecans and serve with sausage or bacon. We also made mimosas because, well, why not?

What is your favorite breakfast for dinner side? We love maple sausage but tell us yours in the comments!

Sweet and Salty Pecans

  • 1/2 C Whey Low Gold Brown Sugar Substitute (or regular brown sugar)
  • 1/2 t salt
  • 1 t cinnamon
  • 1/2 t cayenne pepper (or less depending on your heat tolerance)
  • 1 T water (or more if needed)
  • 2 C pecans halves

Preheat oven to 350º.
Combine all ingredients except pecans in a medium bowl. The mixture should be thickish. Add the pecans and stir until well coated.
Pour the pecan mixture onto a parchment lined baking sheet. Make sure that the nuts are spread in a single layer and bake for about 15 minutes.
Remove the nuts from the oven to check. If the nuts are sticky, bake a little longer. They should look a little crusty on top and caramelized on the bottom. Slide the parchment onto a cooling rack to let the nuts cool.
Break apart the nuts and keep extras in an airtight container, if you can resist eating them all!

Pumpkin Pie Pancakes

  • 1/2 C canned pumpkin
  • 3 T butter, melted
  • 2 eggs
  • 1 1/2 t cinnamon
  • 1 t ginger
  • 1 t allspice
  • 1/2 t nutmeg
  • 1/2 t clove
  • 1/2 t salt
  • 1 1/2 c half and half
  • 3 T real maple syrup
  • 1 1/2 c gluten-free flour blend (such as Pamela’s Artisan Blend)
  • 2 t baking powder
  • 1/2 t baking soda

In a bowl, mix together pumpkin, butter, eggs, all of the spices, and salt. Whisk until well combined. Add the milk and syrup and combine.
Add flour and other dry ingredients and mix well.
In a hot skillet, add a little cooking spray if needed, and use 1/4 c of batter for each pancake. Cook until bubbles form on the top and flip. The pancakes will rise quite a bit and be very fluffy. Keep in a warm oven until all of the pancakes are ready to serve.
Top pancakes with butter, pecans, maple syrup, and serve with your favorite breakfast sides.
 

Recipe of the Week – Creamy Chicken Soup

As the weather cools, we love to start making heartier meals and one of my favorite things to cook are creamy, thick soups. Krissy at SelfProclainedFoodie.com has created a wonderful rich and creamy soup with lots of flavor and wonderful texture. I’ve made a few adjustments to her recipe as I’ve given it here, but you can compare her original recipe here.
Begin by heating one tablespoon of olive oil in a large pot over med high heat. Add one pound of chicken thighs, making sure that the pot is not too crowded. The chicken will stick to the bottom of the pan, it will release on its own as the chicken cooks. Turn the chicken after about seven to nine minutes. Continue to cook until the chicken is done. Remove it to a bowl to cool.


Deglaze the pan with a half cup of dry white wine or dry sherry. A note on cooking with wine or sherry: never cook with wine that you wouldn’t drink. Most “cooking” wines have lots of added sugar and salt. If the wine tastes bad by itself, it will taste bad in a recipe. I never use expensive wine for cooking, but a $10-20 bottle that tastes good will add depth and complexity to any recipe that you add it to. Adding wine to the pan at this time will allow you to scrape up the bits of stuck chicken and browned bits that are full of flavor. Remove the bits and remaining liquid to the same bowl as the chicken.

While the chicken is cooking, dice one large onion, four stalks of celery, and two large carrots. Add two tablespoons of butter to the pot and once melted, add the diced veggies, called a mirepoix, to the pan and lower the heat to medium. If the butter starts to brown, the heat is too high. The liquid released from the veggies should help keep things from burning. Let the vegetables cook until soft and lightly browned. Remove the veggies to another bowl.

Add three more tablespoons of butter to the pot along with three or four cloves of minced garlic. Cook until fragrant and bubbly. Add six tablespoons of gluten-free flour blend and stir well. Cook the roux over medium heat until lightly browned, about five minutes, stirring constantly. Roux can be tricky, once the color starts to change, it can burn very quickly. If the roux gets too dark, or if you see black flecks, toss it out and start over because it will make the entire soup tasted scorched and bitter.

Add two cups of half and half and whisk until the soup thickens. Add four cups of chicken broth along with all of the accumulated juice and wine from the bowl of chicken. Add the cooked vegetables and use an immersion blender to partially puree the mixture. I like some larger chunks left behind.

Dice up the chicken, add it to the pot, and season to taste with salt and pepper.

We love to serve the soup with Pao de Queijo, a Brazilian cheese bread that is naturally gluten-free and a glass of the wine that was used to deglaze. If you try the soup, let us know in the comments what you serve on the side.

Creamy Chicken Soup (based on the recipe from Self Proclaimed Foodie)

  • 1 lb boneless, skinless chicken thighs
  • 1 T olive oil
  • 1/2 c dry white or dry sherry
  • 5 T butter, divided
  • 1 large onion, diced
  • 4 stalks of celery, diced
  • 2 large carrots, peeled and diced
  • 3-4 cloves of garlic, minced
  • 6 T gluten-free flour blend
  • 2 c half and half
  • 4 c chicken broth
  • salt and pepper, to taste

In a heavy pot, heat olive oil over medium high heat and cook chicken thighs until browned, about 7-9 minutes on each side. The chicken will stick and then release from the pan when ready to be turned. Transfer the chicken to a bowl.
Deglaze the pot by adding wine and scrapping the browned bits from the bottom of the pot. Add bits and remaining liquid to the chicken bowl.
Add 2 T butter and lower heat a little. Add all vegetables except garlic to the pot and cook, stirring occasionally, until vegetables are soft and slightly browned, about 10 minutes. Remove to another bowl.
Melt remaining 3 T of butter and add garlic. Cook until fragrant, 2-3 minutes and add flour. Stirring constantly, cook flour until a rich light brown color. Be careful not to burn or scorch the roux. If it begins to burn, toss it out and start this step over after cleaning the pot.
Add half and half to the roux and whisk until thickened. Whisk in the chicken broth and accumulated juices and wine from the bowl of chicken.
Add the cooked vegetables to the pot and use an immersion blender to slightly puree the mixture. Leave chucks to your liking or puree completely smooth.
Dice the chicken and add to the pot. Taste the soup and adjust the seasonings to your liking with salt and pepper. Makes 5-6 servings.

A Fishing Charter, a Rescue “at Sea,” and the Most Expensive Fish Tacos Ever

For those who like to skip to the last page of a book to find out how everything ends, we’re fine, the boat is fine, the rescue at sea was not us. More on that later.

We are always looking for new adventures and to experience things that are not only unique to the areas that we are visiting, but out of the box and our own comfort zone. While in Michigan this summer, I knew that we would be able to get amazing fresh fish from Lake Superior and during menu planning one week I convinced Michelle that we should buy some and plan on fish tacos. Then we discovered that we couldn’t find a fresh fish market within a reasonable drive. A few nights later, probably after a bottle of wine, I say “would you ever consider doing a fishing charter?” The next thing I know, we have computers open and are researching options in the area around the Keweenaw peninsula. Captain Brian at Sand Point Charters tells us that we will definitely be coming home with some lake trout and probably even some salmon but he has one question. Do we want the bigger or smaller boat? What’s the difference Michelle asks. The big boat has a toilet. One credit card deposit later and we are on our way to a big boat and the most expensive fish tacos that I have ever eaten!


The Fishin’ Mission is a comfortable 30′ yacht with plenty of room, lots of gear, and of course, a head (that’s boat talk for toilet).

Captain Brian Helminen piloted us out onto the water and told us about his background and family (he and his wife have raised 15 children!). After boating through Lac La Belle and out onto Lake Superior, he begins the arduous task of teaching us both about Great Lakes fishing. Now don’t get me wrong, we have both been fishing before, but it’s been a while, and never with this much gear. We learned about dipsy divers, lure, setting depth, and many other things that have since left my memory.

By the time we have six lines out, I notice that one is moving. It was on Michelle’s side, so time for her to get to work! 

After some initial squeamishness, Michelle does pose for the official first fish picture. It was a small lake trout, barely big enough to keep, but we did just in case it was the only thing we caught. Eventually, we threw this one back in favor of the larger ones we had pulled in.

Fishing was going quite well. Every time we got a line out, after a few minutes something got a hit. On the radio, Captain Brian hears an SOS call from a sailboat that had run into some rocks a few miles away. He notifies the Coast Guard that we are in the area but he is concerned that we would not have enough fuel to get to the distressed boat, perform a rescue, and get back to our dock. They put him on standby in case we are needed to help out.

Over the next hour and a half or so, we brought in seven more fish including this one, our largest lake trout. We also got two Koho salmon.

Everything was going well and we decide that we were only going to keep salmon from this point forward. Captain Brian has been monitoring the situation with the Mother Superior, the stranded boat. Turns out that there are no other boats in the area and the Coast Guard has decided to not send out a rescue boat (I didn’t know that was an option).

Captain Brian explains that it is the responsibility of any boat to help out another boat in distress. He has recalculated our fuel and we should have no problem reaching the boat, pulling her free, and making it back. We are underway, with about 15 minutes to get to the other boat. Along the, Captain Brian needs to get ropes ready to pull the sailboat off the rocks. He looks Michelle in the eyes and says “You are the Captain now!”

We get to Manitou Island and find the Mother Superior. The captain did not know that there were rocks under the surface that were not on the charts and his rutter snagged on them. There was no damage but his engines could not help them break free.

Once we get close enough, I am supposed to throw this rope to the other boat so that it can be tied off and we will pull them free. ME, throw the rope, on a bobbing boat!

Yes, please replay that, because that throw was that good! Once they were freed, it was time to head back to get our fish cleaned and packed up. But first, the captain wanted to show us a couple of tourist attractions since we were on a section of the Lake that we had not planned to visit. Manitou Island is known for this quartz vein that runs down the cliff face and into the water. It is a local favorite swimming hole (we opted out, the water temp was in the 50’s).

We also went past Gull Rock with its 1967 lighthouse. The small building is actually an outhouse with a flush toilet. Built above the rocks, each time a wave crashes in, the toilet is automatically cleaned. The island was recently acquired by a preservation society who hopes to restore it.

As we returned to Lac La Belle, Captain Brian gave us a little history of the area. There were copper mines along the lake but to get the ore out to Lake Superior, a channel was dredged out in the 1860s. That is the channel we rode through in the time-lapse below. It was a beautiful ride as the sun began to set and my mind drifted to fish tacos.

Once back at the lake house, our haul was laid out to be cleaned. Thankfully Captain Brian took care of that too!

After an hour drive back to the campground, it was late and we were hungry. Dinner became cheese and crackers while I cooked a little fish. A tablespoon of butter and some garlic powder in a frying pan and add scraps of salmon and trout cheeks fresh out of Lake Superior.

We did get fish tacos the next night and they were delicious! Maybe I’ll post that recipe sometime.

Have you ever had a misadventure on a boat or an excursion that didn’t go as planned? Tell us about it in the comments below.

Recipe of the Week – Sautéed Chicken with Garlicky Pasta

We love to entertain guests but there are only so may opportunities during the weekend with our busy schedules. That leaves weeknight entertaining, but who has time for a fancy dinner after work? Sautéed Chicken with Garlicky Pasta comes together quickly and is perfect for a “Sunday dinner” any night of the week. Serve with a green salad and invite some company for dinner on a weeknight!
Start by heating some olive oil in a saucepan over medium high heat. Season four chicken cutlets with salt and pepper and cook for about 5 minutes per side.

While the chicken is cooking slice half of a red onion, a small package of baby bella or white mushrooms, four cloves of garlic and about one tablespoon of fresh thyme. Take two or three tomatoes and core then slice them thinly. Dispose of the seeds and juice that result.

Remove the chicken and keep it warm (I usually put it on a plate and stick it in the microwave to get it out-of-the-way). Add a little more olive oil to the pan if necessary. Toss in the mushrooms and onion and saute until soft. Meanwhile start a pot of water to boil for the pasta. Cook two ounces of spaghetti per person according to package directions.

Add garlic, thyme, and tomatoes and cook until tomatoes are heated through.

Pour two cups of chicken broth into the pan and scrape up any browned bits (this is called deglazing). Make a slurry by mixing one tablespoon of gluten-free flour with two tablespoons of water and add to the pan along with one teaspoon of Dijon mustard. Add the chicken and any juices on the plate back into pan and allow the sauce to thicken. Taste and adjust the seasoning if needed.

Portion out the spaghetti on plates and top with sauce and chicken. If you really want to get fancy, sprinkle some chopped parsley on top or a little parmesan cheese.

Sauteéd Chicken with Garlicky Pasta

  • 1 T olive oil, plus a little more
  • 4 chicken cutlets
  • 1/2 pound white or baby bella mushrooms, sliced
  • 1 small red onion, sliced
  • 2-3 tomatoes, cored and sliced
  • 4 cloves of garlic, minced
  • 1 T fresh thyme, chopped
  • 8 oz gluten-free spaghetti
  • 2 C chicken broth
  • 1 T gluten-free flour blend
  • 1 t Dijon mustard
  • 1/4 c fresh parsley, chopped (optional)
  • 4 T parmesan cheese (optional)

Season chicken with salt and pepper. Heat oil in a saucepan over medium high heat and saute chicken about 5 minutes on each side. Place chicken aside and keep warm.
Cook pasta according to package directions.
Add a little additional oil to pan and saute mushrooms and onion until soft. Add garlic, thyme, and tomatoes and heat through.
Deglaze the pan with chicken broth and add a slurry of flour mixed with 2 T of water. Stir in Dijon and allow sauce to thicken. Taste sauce and adjust seasonings if needed.
Top with parsley and parmesan, if desired.

Recipe of the Week – Strawberry Pretzel Salad

Summer picnics and winter carry-ins are some of my favorite events because I get to try a variety of interesting dishes and a smorgasbord of flavors and cuisines. A few weeks ago our condo association had its annual end of the summer picnic, and boy can these people cook… pasta salads, cookie bars, cakes, deviled eggs, and three different kinds of slaw. I had to get two plates just to try a taste of everything!
Michelle found this recipe in an old Methodist church cookbook used to make it with her grandma for special occasions or just a random visit home. It always pleases a crowd. There is nothing groundbreaking here, but this version is a little different from most like it with the addition of the crushed pineapple and juice. I’ve lightened it up a little bit with some adjustments to quantities and ingredients, and of course, our version is gluten-free.

Screen Shot 2018-09-24 at 10.04.53 PM.png
May Burch at First United Methodist Church, Sterling, IL

Preheat the oven to 350º and crush a bag of Snyder’s pretzel sticks in a food processor. You will probably need to do it in several small batches. These are our favorite GF pretzel because they have a great flavor and crunch. Melt 2 sticks of butter and pour over the pretzels in a 9×13 baking pan. Stir together until everything is coated and all of the butter is absorbed. Place into the oven for about 10 minutes. Remove from the oven and place directly in the freezer for a few minutes to cool it off.

While the pretzels are baking, cream together an 8 oz package of 1/3 fat Philadelphia Cream Cheese (also called Neufchatel Cheese) and 1 cup of Whey Low Type D Sugar Replacement (you could use regular sugar) until smooth and creamy. Fold in an entire regular size tub of Cool Whip Sugar Free being careful not to over work the air out.

Spoon the mixture over the pretzels and spread into an even layer. If the pretzels are still hot, they will melt the Cool Whip mixture.  Make sure to seal all of the edges of the pan so that the jello layer doesn’t soak through and make the pretzels soggy.

Drain a 14 ounce can of crushed pineapple and reserve 1 cup of liquid. Sprinkle the pineapple over the pan as evenly as you can.

Cut a large package of strawberries into 1/4 inch slices and arrange on top. I like to make it look pretty, but you could just dice them up and throw them on if you’re in a hurry. If strawberries are not in season, you could thaw a package of frozen ones, but rather than layer them like this, chop them and add directly to the jello in the next step along with the pineapple and juice. Place the pan in the fridge while you make the jello.

In 1 cup of boiling water, dissolve a large package of sugar-free strawberry Jello. Add the 1 cup of reserved pineapple juice and cool in the fridge for about 10 minutes to thicken slightly. Pour over the top, getting jello into all of the nooks and crannies. Let the whole thing chill until solid, about an hour and a half, before serving.

I’m not really sure if this is a salad or a dessert, but at either end of the buffet table it will be good and you probably won’t have any leftovers. Speaking of, this does not hold very well overnight. I would really encourage you to make it the day you plan to serve it. The total prep time including the time for the jello to set up is about 2 – 2 1/2 hours and you really can’t rush jello.
What’s your favorite Jello salad recipe? Share a link in the comments.

Strawberry Pretzel Salad

  • 1 bag of gluten-free pretzel sticks
  • 2 sticks (1 cup) of unsalted butter, melted
  • 8 oz 1/3 fat Neufchatel cream cheese
  • 1 cup Whey Low Sugar (or regular)
  • 1 regular tub of Sugar Free Cool Whip, thawed
  • 1 cup crushed pineapple
  • 20 oz package of fresh strawberries, cut into 1/4 inch slices
  • 1 cup boiling water
  • 1 cup pineapple juice (reserved from the crushed pineapple)
  • 6 oz box of Sugar Free Strawberry Jello (that’s the big box)

Preheat the oven to 350º.
Crush the pretzels in a food processor and mix in a 9×13 pan with melted butter. Bake for 10 minutes. Cool in the freezer.
Cream the cream cheese and sugar with a mixer until smooth. Fold in the Cool Whip and spread over the pretzel crust. Make sure to seal all of the edges so the jello can’t leak through later.
Top the cream cheese layer with the pineapple and then arrange the strawberries on top.
In boiling water, dissolve the jello and mix in the juice. Chill slightly, but do not over thicken. Pour over the strawberry layer and chill in the refrigerator until set completely, 1 to 1 1/2 hours.

★ 25 years guiding ★ 48 U.S. states ★ 10 countries ★ 3,000+ Camino miles